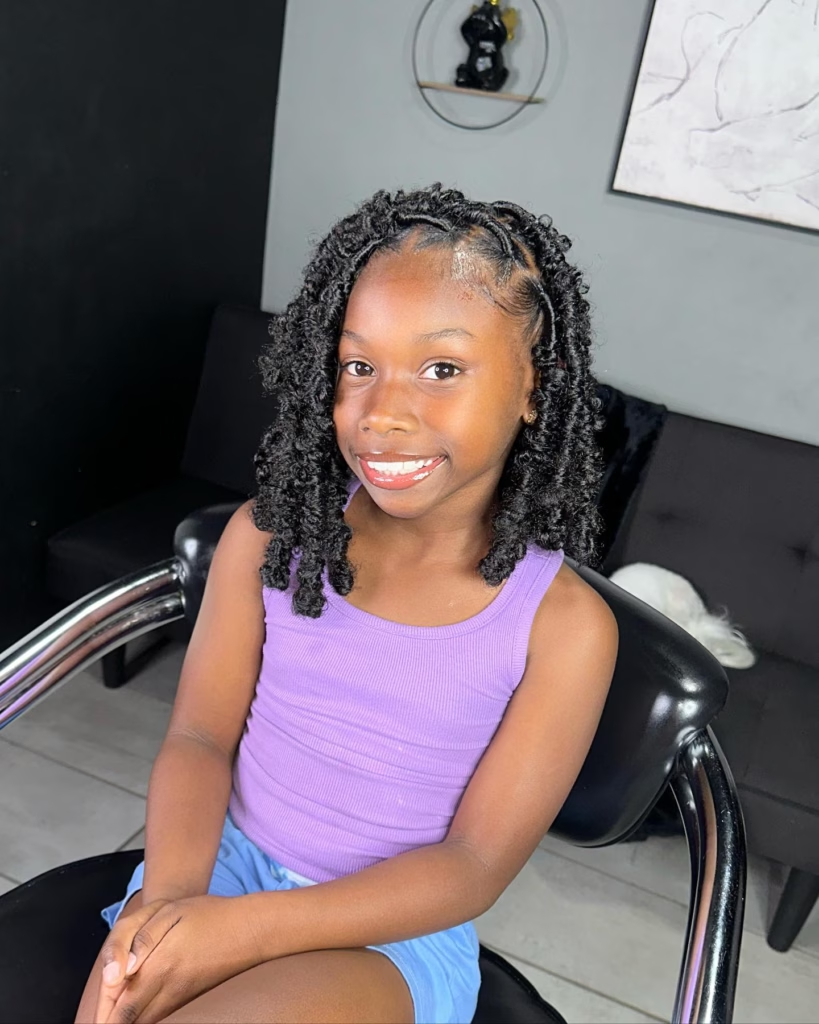
Starting locs on your child is one of the most loving hair decisions you can make. It is also one of the most misunderstood ones.
You have probably spent weeks searching. You found TikTok tutorials, read blog posts that contradicted each other, and still cannot answer three basic questions. Is my child old enough? Which method is safest? And what does maintenance actually look like once we start?
Most content out there is written for adults. The rest is too surface-level to be genuinely useful.
This guide answers all three questions. You will learn how to know if your child is ready, which starting method fits their hair and personality, how to do the installation correctly, and what to do every week after that.
You will also learn what to avoid so you do not accidentally cause real scalp damage.

Source @iamthedime_
Here is why getting this right matters. Traction alopecia, which is hair loss caused by too much tension on the scalp, affects one in three children of African descent who wear tight hairstyles for long periods, according to Tymeless Hair and Wigs.
That number is not meant to scare you. It is meant to make sure you go into this with real information.
Children as young as 3 have successfully started locs. Patience and the right approach make it manageable. This guide gives you both.
Is Your Child Ready for Locs? Answer These 3 Questions First


Before you pick a method, there is one question that matters more than anything else: Is your child actually ready?
Most parents focus on age. Age matters, but it is not the only thing. A 5-year-old who can sit still for 90 minutes may be far more ready than an 8-year-old who cannot. Temperament is just as important as the number of candles on the birthday cake.
Here are the three questions to answer before you book anything.
Question 1: Can your child sit still long enough?
A basic loc installation on a child takes anywhere from 2 to 5 hours depending on hair density and the method chosen. Some methods can be split into two sessions. But your child still needs to handle significant chair time. If your child cannot sit through a 30-minute cartoon without bouncing off the walls, plan for shorter sessions and more breaks. Do not force a 2-year-old through a 4-hour install.
Source @iamthedime_
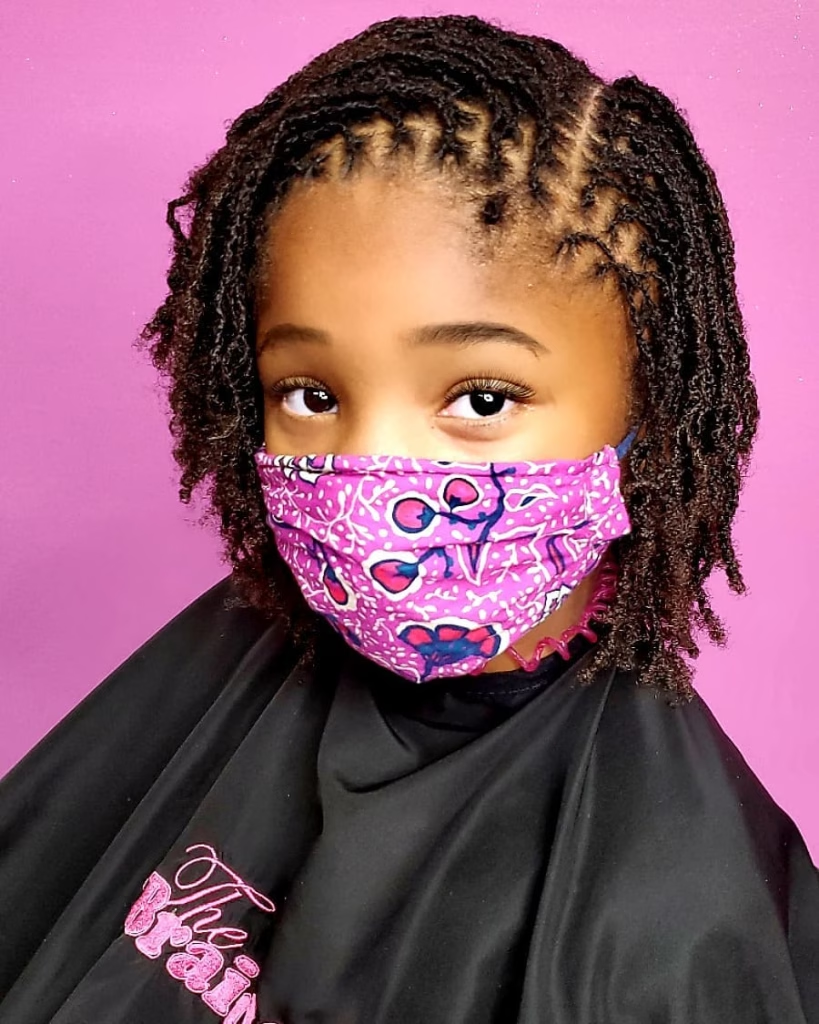
Question 2: Does your child actually want locs?
This one matters more than parents often admit. According to Dr Locs, if your child is already expressing preferences about their hair, whether they prefer braids, twists, or locs, that is your clearest signal that they are ready for the conversation. Ask them directly. Give them a real choice.
A child who is forced into locs they did not want will resist every maintenance session. And removing locs, if they change their mind later, often means cutting the hair off. That is a big consequence for a decision they never made.
Question 3: Are you financially ready for the commitment?
Source @sweetcreativestyles
Starting locs is not a one-time cost. Professional installations for kids range from $80 to $200. Monthly retwists run $50 to $120 on average. That is a real ongoing expense, and it does not go away once the locs are in.
Paula Barker of Silkie Locks Hair Design is direct about this: do not start locs on your child to get out of styling their hair, or to save money on appointments. If you are not prepared to maintain locs consistently, wait until you are. Neglected locs on a child’s head create more problems than they solve.
Hair length matters too. Most locticians recommend at least 2 to 3 inches of hair as a starting point. Below that, sections are too short to form and hold during the locking process.
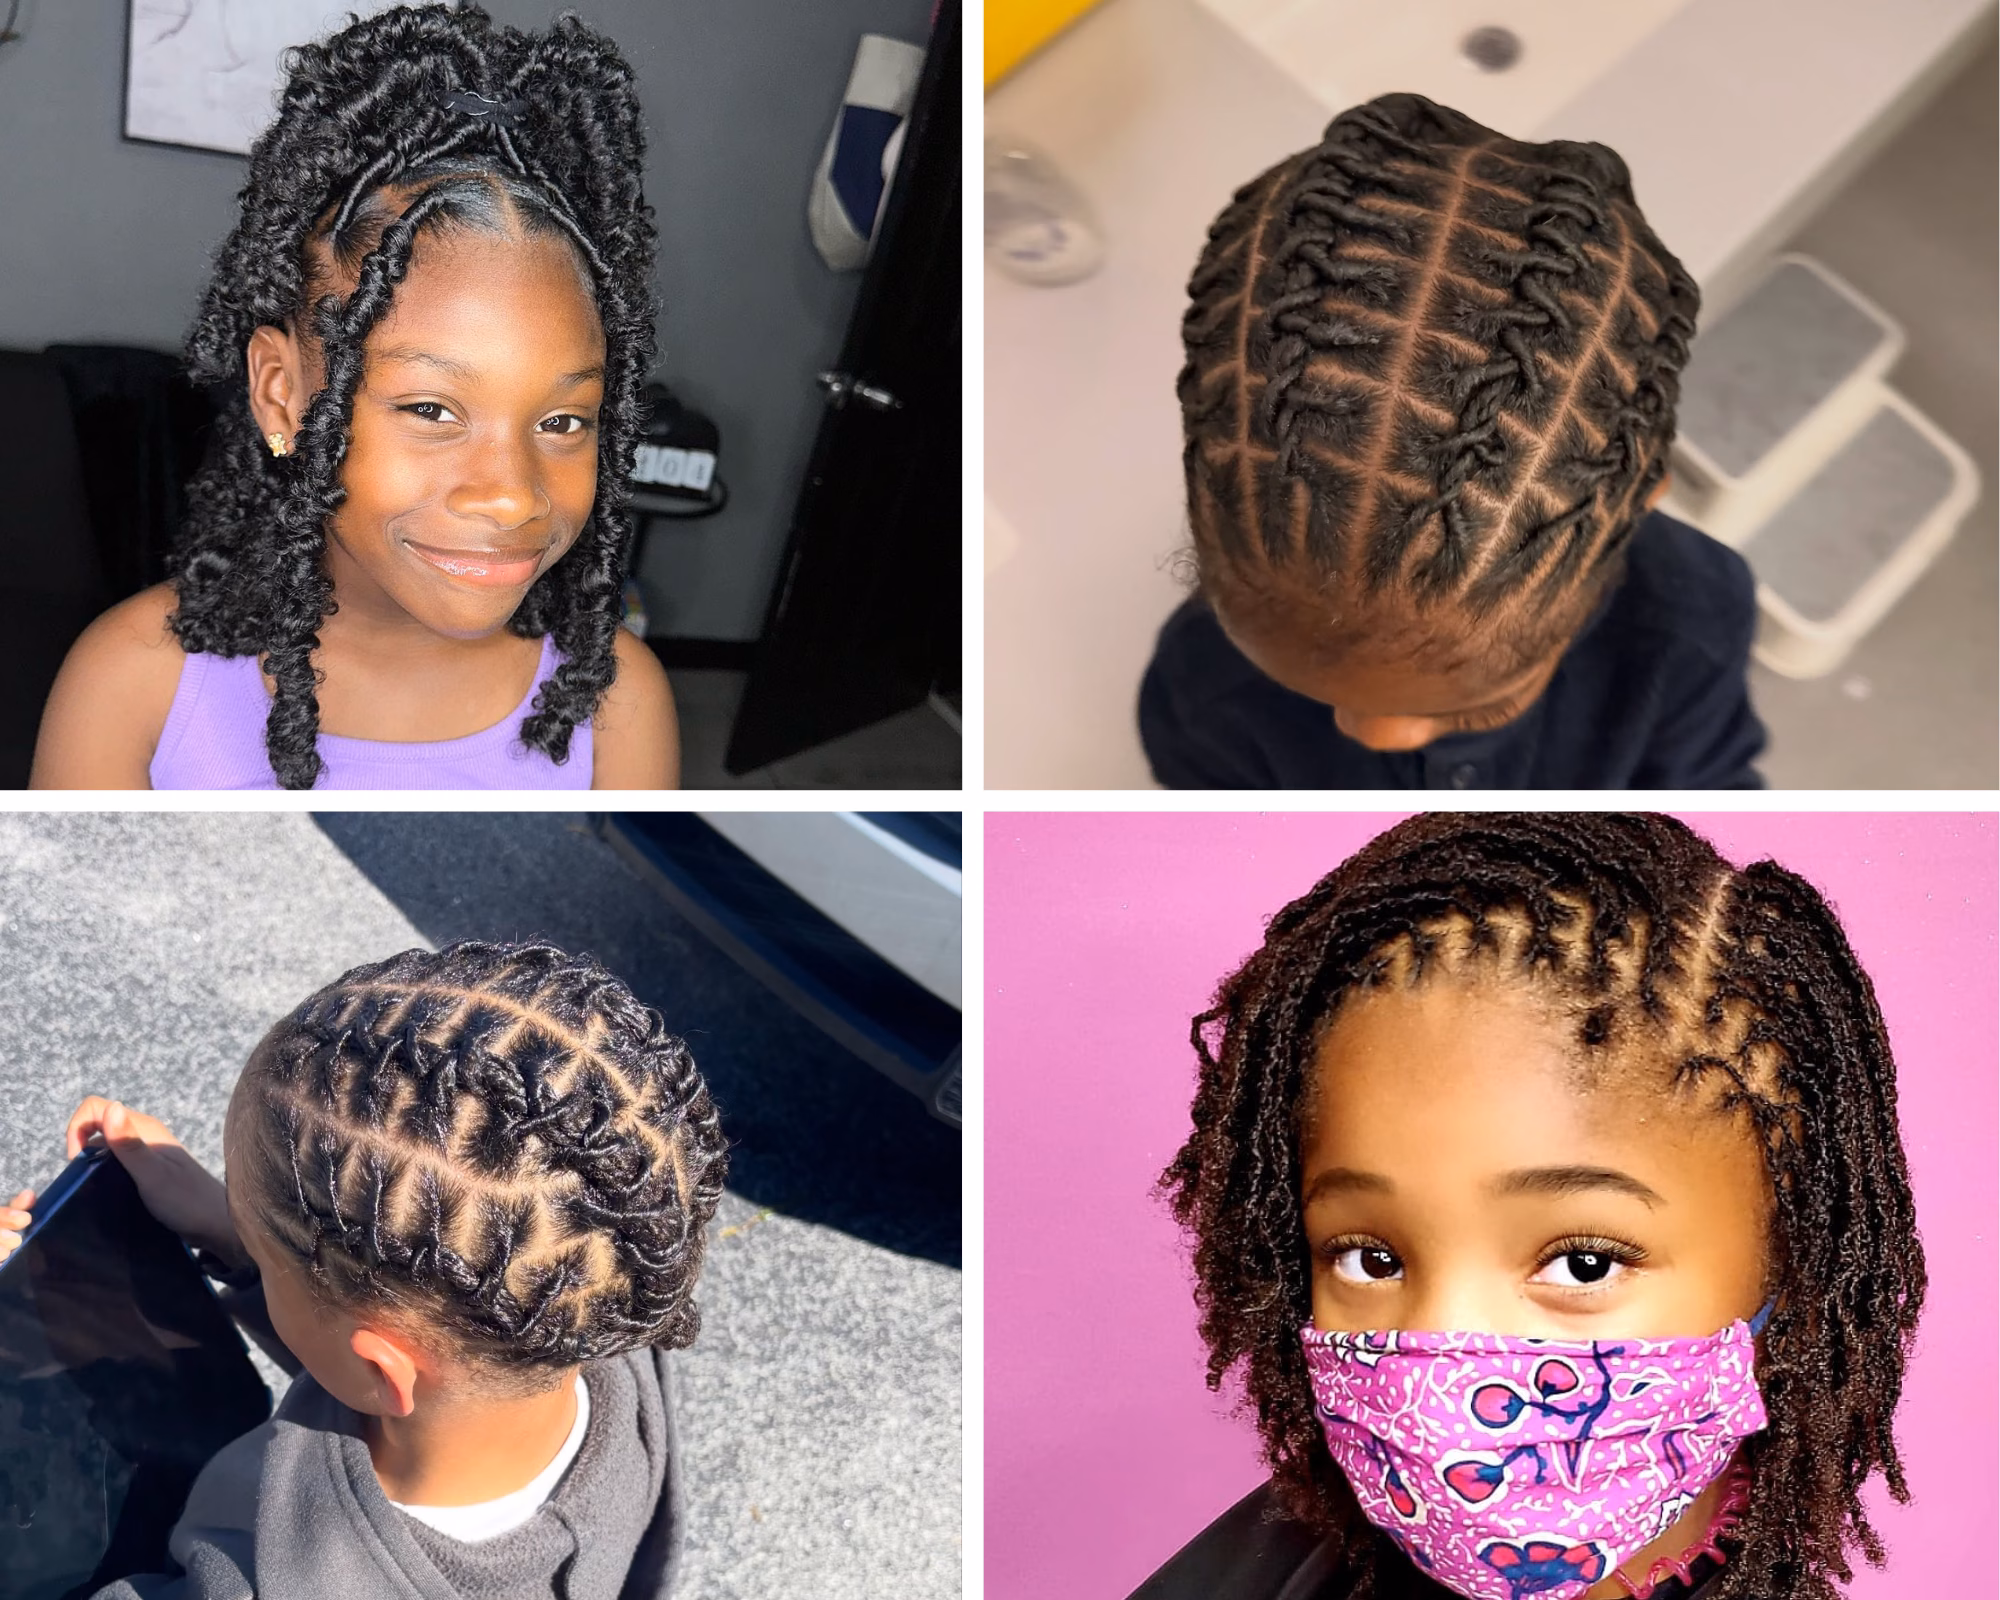
The 4 Best Methods for Starting Locs on Kids

Source @voltairechina_
Not every loc method works the same on a child’s hair. The right choice depends on your child’s curl pattern, how active they are, and how much patience they have during the install.
Here are the four methods that work best for kids, organized from the most beginner-friendly to the most technical.
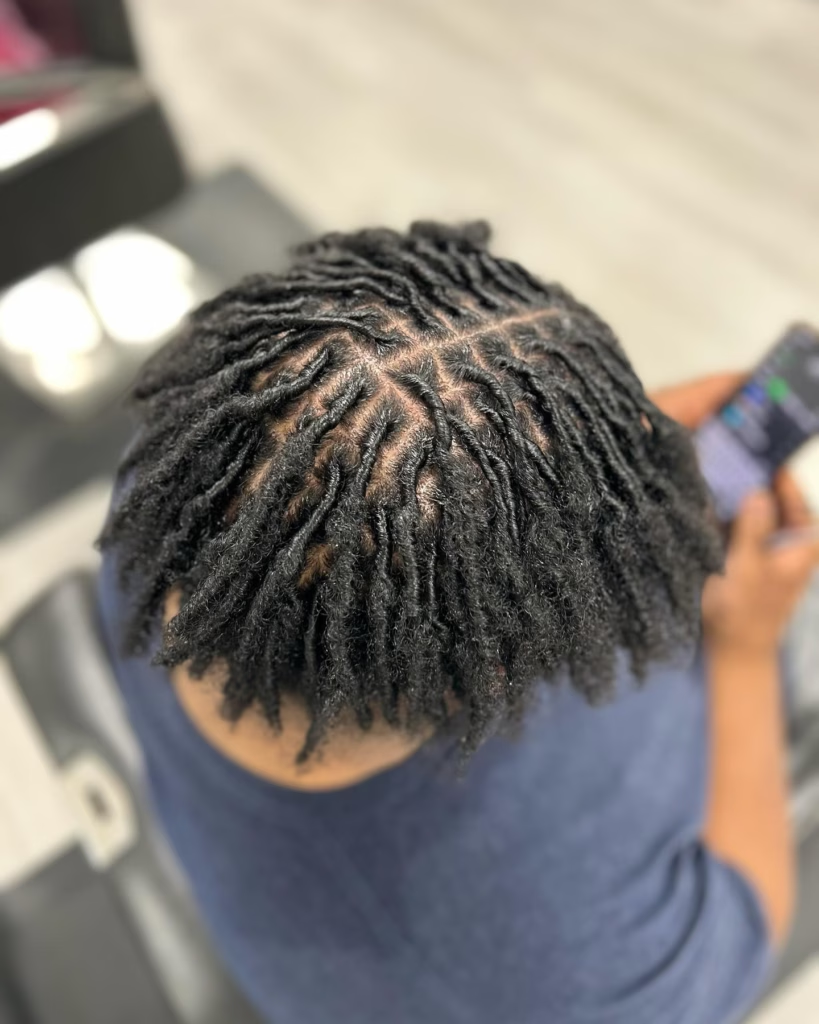
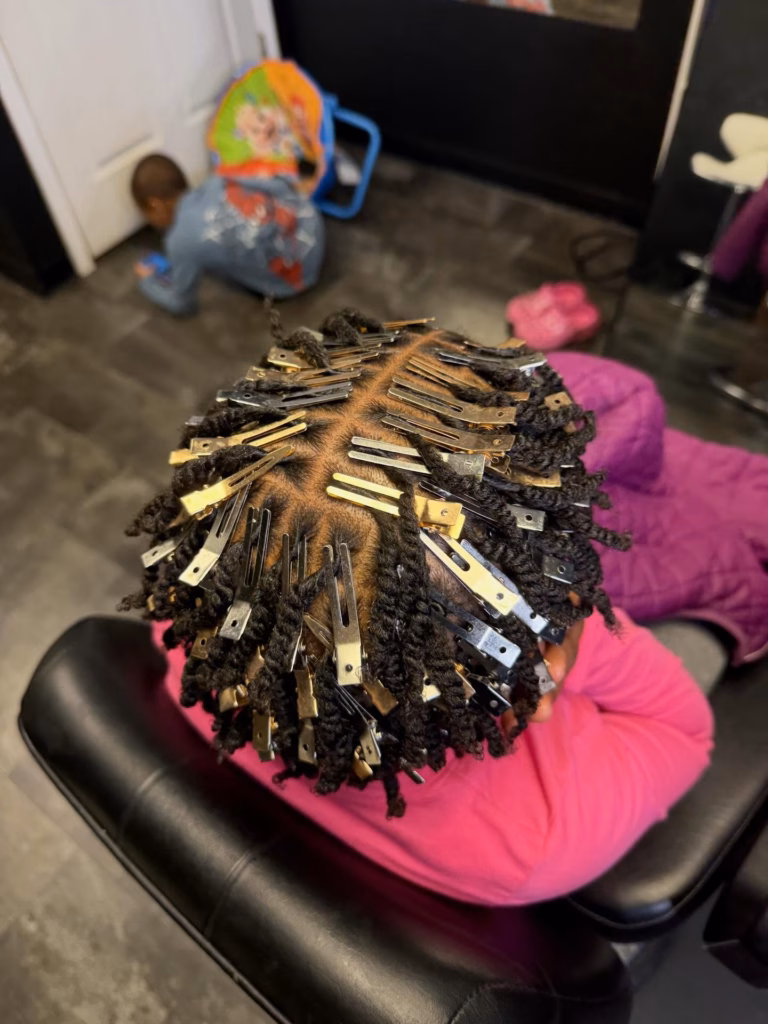
Method 1: Comb Coils
Comb coils are small spirals created with a fine-tooth comb. A loctician or parent uses a rat tail comb, a lightweight gel, and hair clips to form and hold each coil in place. Single-prong clips work best for thinner locs. Double-prong clips are better for thicker ones.
The finished result looks shiny and feels soft right away. That is the good part. The honest part is that comb coils may not survive the first wash. They can unravel when the hair gets wet in the early weeks.
Source @queensantoria
Best for: Children with Type 4B or 4C hair. The tighter the curl pattern, the better comb coils hold.
Not ideal for: Kids who swim regularly or sweat a lot from sports.
Good to know: Many parents start with comb coils and then add interlocking afterward to secure the shape. That two-step approach gives the best of both methods.
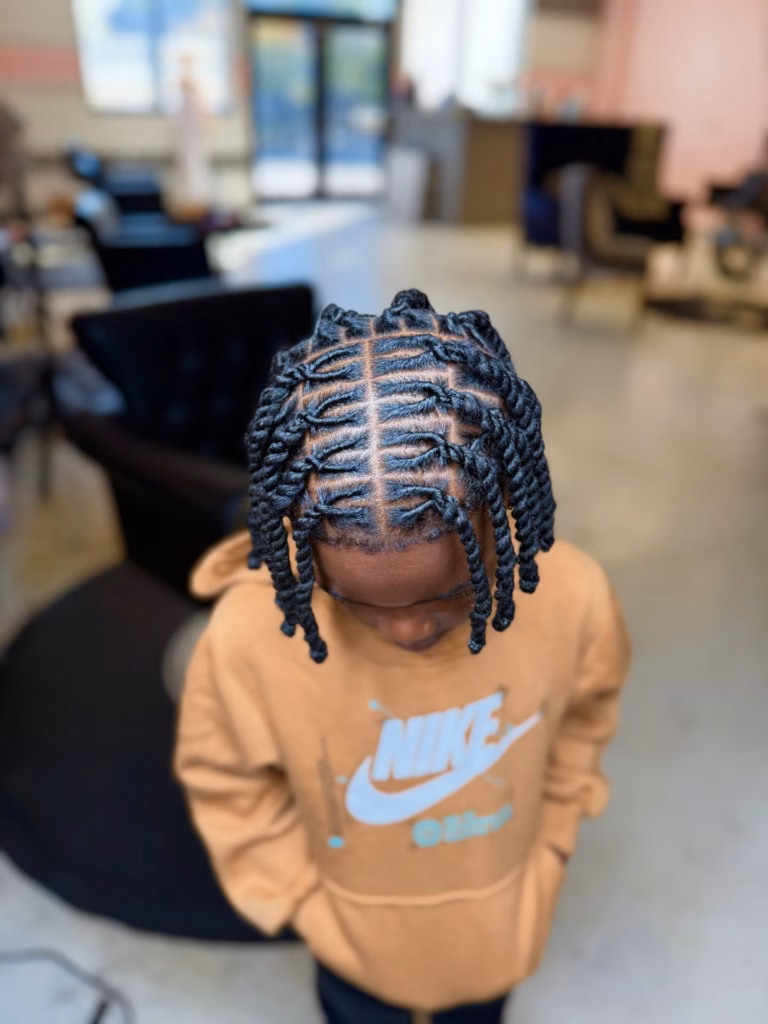
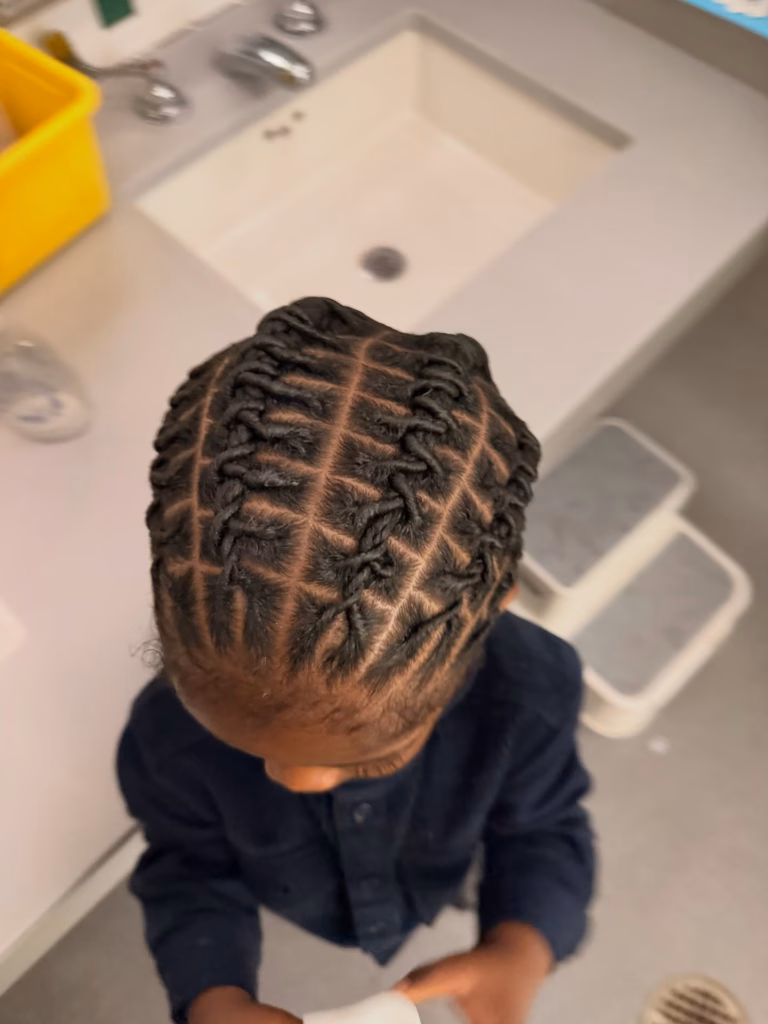
Method 2: Two-Strand Twists
Two sections of hair are twisted around each other from root to tip. Over weeks and months, the twists lock into each other and form locs. This is one of the gentlest starting methods available.
The look is soft and natural in the early stages. Kids who are self-conscious about the transitional phase often find this method easier to live with because the twists look intentional even before they fully lock.
Source @locdbyken_2x
Best for: Children with Type 4A to 4C hair. Also good for kids who prefer a softer, more natural look during the starter phase.
Honest downside: Two-strand twists unravel more easily during rough play. For active kids, simple protective styles like half-up puffs or buns can help hold the twists in place during the first few weeks.
Method 3: Interlocking
Interlocking uses a small needle-like tool to weave each loc in 2, 3, or 4 different directions at the root. This creates a tight anchor that holds the loc in place without relying on heavy twisting at the scalp.
According to Locs Life, interlocking reduces scalp tension compared to palm rolling because it does not pull the hair tightly at the root. That lower tension makes it one of the safer choices for children’s more fragile follicles.
Best for: Active kids. Children who swim, play sports, or spend a lot of time outdoors. Interlocked locs last the longest between retwists, which means fewer sessions and less overall manipulation.
Honest downside: Interlocking takes skill. If you have never done it before, this is not a method to try alone for the first time. See a professional loctician for the first install and learn the technique from them.
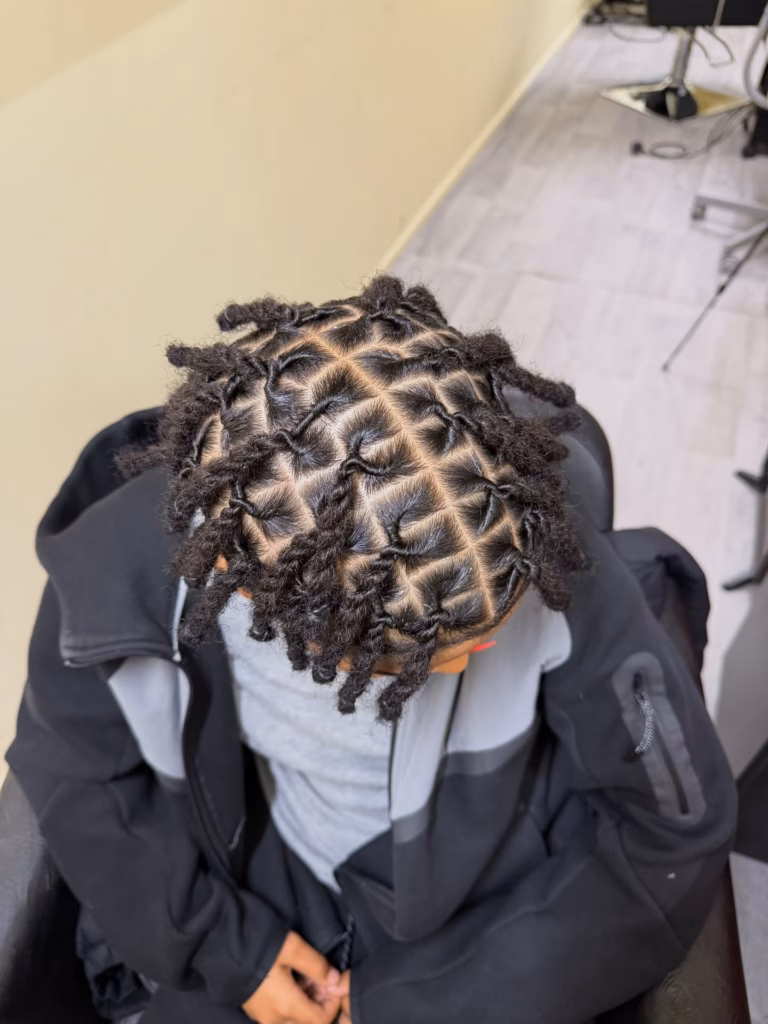
Method 4: Instant Locs Using the Crochet Method
Source @the_locs_studio
Instant locs combine comb coils with back-combing and a crochet needle to create sections that look like finished locs from day one. According to DommiesBlessed, one popular mom used this technique by starting with a comb coil and then using a crochet needle to create fuller, loc-like sections.
The benefit is reassurance. Your child sees something that looks close to the finished style immediately. That can make a huge difference for a child who is nervous about the awkward early phase.
The hair will still go through all the natural locking stages over the following months. Instant locs do not skip any steps. They just give the result a more finished appearance from the start.
Best for: Children who feel self-conscious during the early transitional phase. Also good for parents who want to see the approximate finished size and shape before committing.
Honest downside: The locs can feel slightly stiffer in the first few months compared to naturally formed locs.
Quick Tip: TikTok creator @niathelocgodproducts started a 3-year-old client’s locs using the instant loc method. She later shared that the child was patient throughout, but only because the session was broken into short windows and the child had something he loved to do nearby. Plan around your child’s attention span, not around the ideal session length. No method is worth a miserable child in the chair.
What to Buy Before You Start: The Complete Tools and Products List
Source @sweetcreativestyles
Before your child sits down for the install, have everything ready. Running out to find a rat tail comb halfway through a section is a nightmare you do not need.
Here is exactly what to get.
Tools You Need
- Rat tail comb for clean, precise parting
- Wide-tooth comb for detangling before the install
- Single-prong hair clips for thinner locs
- Double-prong hair clips for thicker locs
- Spray bottle filled with clean water
- Hooded dryer or bonnet dryer for drying after the install
- Interlocking needle (optional, only if you are using that method)
Products You Need
Shampoo: Use a mild, sulfate-free clarifying shampoo. Boss Locs recommends washing every 2 to 3 weeks for most children, but a child who plays sports or sweats heavily will need washing more often. Always rinse thoroughly. Product left on the scalp causes buildup, and buildup causes itching, flaking, and eventually breakage.
Moisture: Keep locs hydrated with natural oils. Black castor oil and coconut oil are two of the most recommended for children’s locs because they nourish both the scalp and the loc without heavy residue. Always mist the hair with water before applying oil. Applying oil to dry hair does not add moisture. It seals in the dryness that is already there.
Installation gel: Choose a lightweight, water-based gel with no wax and no petroleum. This is important. Wax creates buildup inside the loc that is nearly impossible to remove. Two commonly used options in the loc community are Eco Styler Olive Oil Gel in the clear formula and Murray’s Loc Styling Gel. Start with less gel than you think you need. Buildup is a bigger problem than not enough hold.
Nighttime protection: A satin bonnet or a satin pillowcase. Friction from a cotton pillowcase causes frizz, disrupts the locking process, and leads to breakage over time. Natural Hair Kids is clear that for children with locs, nighttime satin protection is not optional.
What to Avoid
Adult hair care products are too strong for children’s scalps. Many contain harsh detergents, artificial fragrances, and chemicals that cause irritation and dryness. Stick to products designed for children or gentle natural alternatives. If you are trying a new product for the first time, do a patch test on your child’s skin before using it all over their head.
Step-by-Step: How to Start Locs on Kids at Home
Source @locxpress.ions2
Once your tools are ready and your child is sitting comfortably, here is exactly what you do.
Step 1: Wash the hair first.
Use your sulfate-free shampoo. Rinse thoroughly until the water runs completely clear. You cannot install locs on hair that has product buildup from previous styles.
The buildup blocks the locking process. Air dry after washing, or use a hooded dryer on a low, warm setting.
Step 2: Detangle gently.
Use your wide-tooth comb on damp hair, not dry hair. Start at the tips and work your way up toward the roots. Never start at the root and drag downward.
Hold the hair at the root with one hand while combing with the other. This prevents painful pulling at the scalp. Section the hair into four or more parts and detangle one section at a time, according to Dr Locs.
Step 3: Create your parting grid.
Decide on your part shape. Box parts are the most common for kids’ locs. Triangle parts and diamond parts are also used.
The size of each parted section determines how thick or thin the finished loc will be. Smaller sections equal thinner, more flexible locs.
Larger sections equal thicker, fuller locs. Use your rat tail comb to part each section cleanly and evenly.
Step 4: Apply your gel.
Lightly mist the section with water from your spray bottle. Apply a small amount of your lightweight gel to the section.
Work from the root downward. Use less than you think you need and add more only if the section is not holding. More product is not better here.
Step 5: Form the loc using your chosen method.
Work from the back of the head toward the front, one section at a time. Secure each completed section with a clip before moving on to the next one.
Working back to front keeps the finished sections protected while you work on the rest.
Step 6: Dry completely before removing clips.
According to DommiesBlessed, drying can take 30 minutes or more. For toddlers and younger children who cannot sit still that long, this is where the bonnet dryer helps.
Use a low, warm setting. Never leave the locs even slightly damp. Wet locs covered with a bonnet or hat trap moisture inside and develop mildew and odor over time.
Step 7: Do a final check.
Once dry, look at each loc from the root. The root should look clean and separate from the neighboring locs. Gently pull apart any sections that have merged together during drying. Do this carefully and slowly.
Step 8: Protect immediately.
Put the satin bonnet on before your child goes to bed that night. Start this routine on day one. Not day three. Not next week. Day one.
Pro Tip: If your child cannot sit for the full session, split it into two sittings. Do the back sections first, then take a 30-minute break and return for the front. Locs held in clips for 30 minutes will not be damaged. A miserable child who refuses to sit down will be.
The first installation is the hardest. Every wash day and retwist after this gets easier.
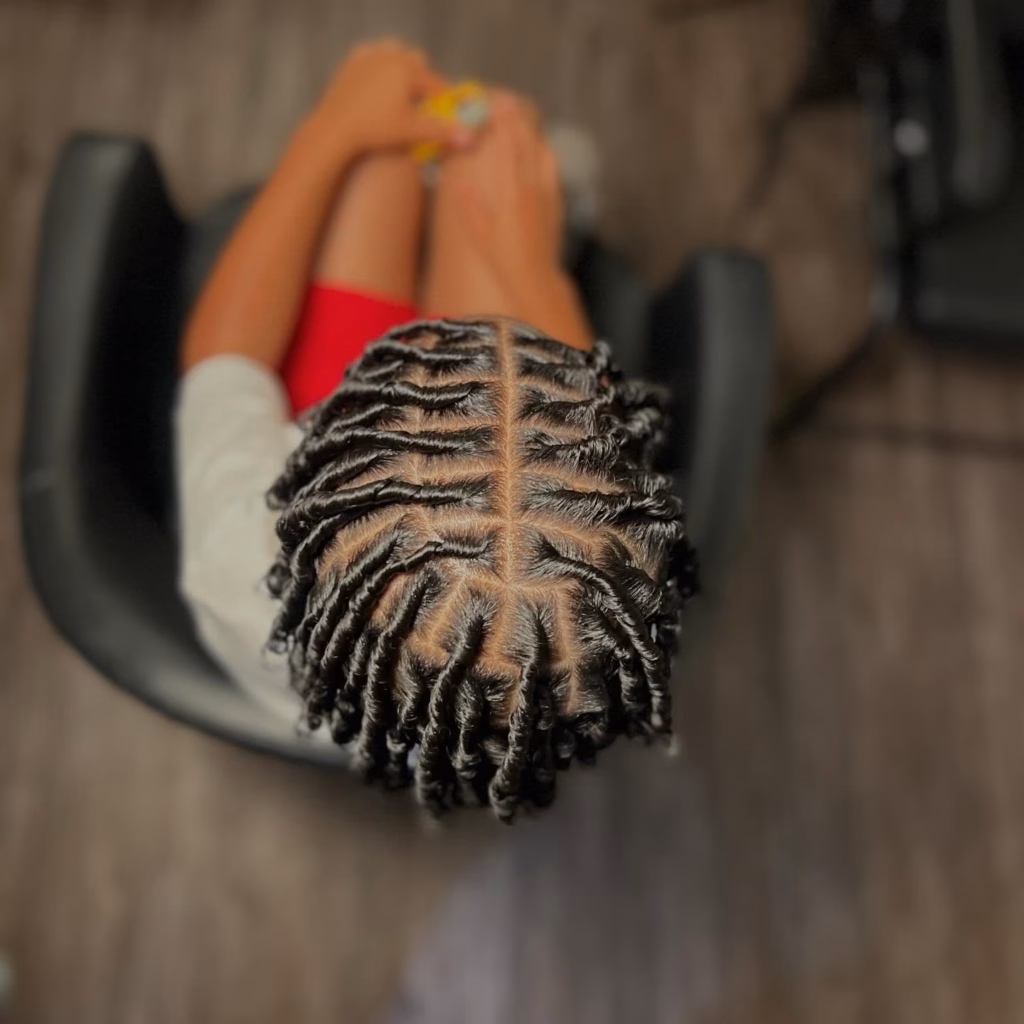
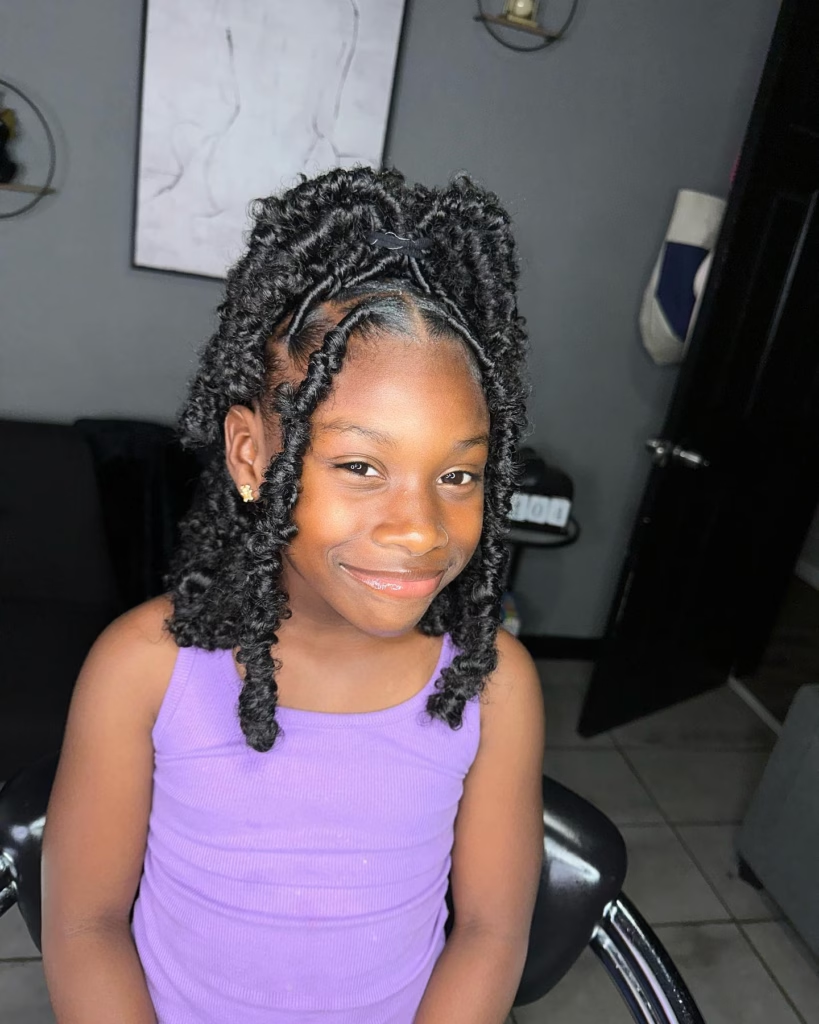
The 3 Stages of Kids Locs: What to Expect Month by Month
Source @tiny_braids_jax
Your child’s locs will not look the same at month one, month six, and month twelve. That is completely expected. Here is what each phase looks like and what to do during each one.
The Baby Stage: Months 0 to 6
Right after the install, the locs look neat and defined. Then week two or three arrives and the frizzing starts. The locs begin to swell during what is called the budding phase. Many parents panic here and think something went wrong.
Nothing went wrong. This is the hair locking itself. The frizz is the process.
The correct response is to keep the scalp clean, keep the locs moisturized, and leave the frizz alone. Do not pick at it. Do not try to smooth it down with heavy product. Just let it do what it is doing.
Styles that work beautifully during this stage include half-up puffs, simple cornrow patterns across the top with the loc ends left out, and headbands. These styles keep the hair looking intentional even when the locs are still forming.
According to Dr Locs, the baby stage lasts anywhere from 1 to 6 months depending on hair type. Type 4C hair, which has the tightest curl pattern, typically moves through this stage the fastest. The tight coil creates more friction between strands, which speeds up the locking process.
The Teenage Stage: Months 6 to 12
By month six, most locs have budded and started to firm up. They become thicker, puffier, and fuller during this phase. Dr Locs describes this accurately: it feels like a growth spurt, similar to what teenagers go through.
This is the stage where locs need the most guidance. Avoid combing through them. Combing delays the locking process. Instead, focus on gentle retwisting to guide each loc from root to tip.
Some shedding is normal. Check the roots every one to two weeks and gently separate any locs that are growing into each other.
The Adult Stage: Month 12 and Beyond
This is when it all comes together. Locs are firm, fully defined, and locked from root to tip. Your child now has full styling freedom. Buns, beads, cornrow tops, braided updos, and more complex styles all become accessible at this point.
Even at this stage, new hair keeps growing from the scalp. That means there will always be some fresh new growth at the root that needs attention. Mature locs still require consistent maintenance.
Every set of beautiful mature locs you have ever admired passed through every one of these phases first. Every single one.
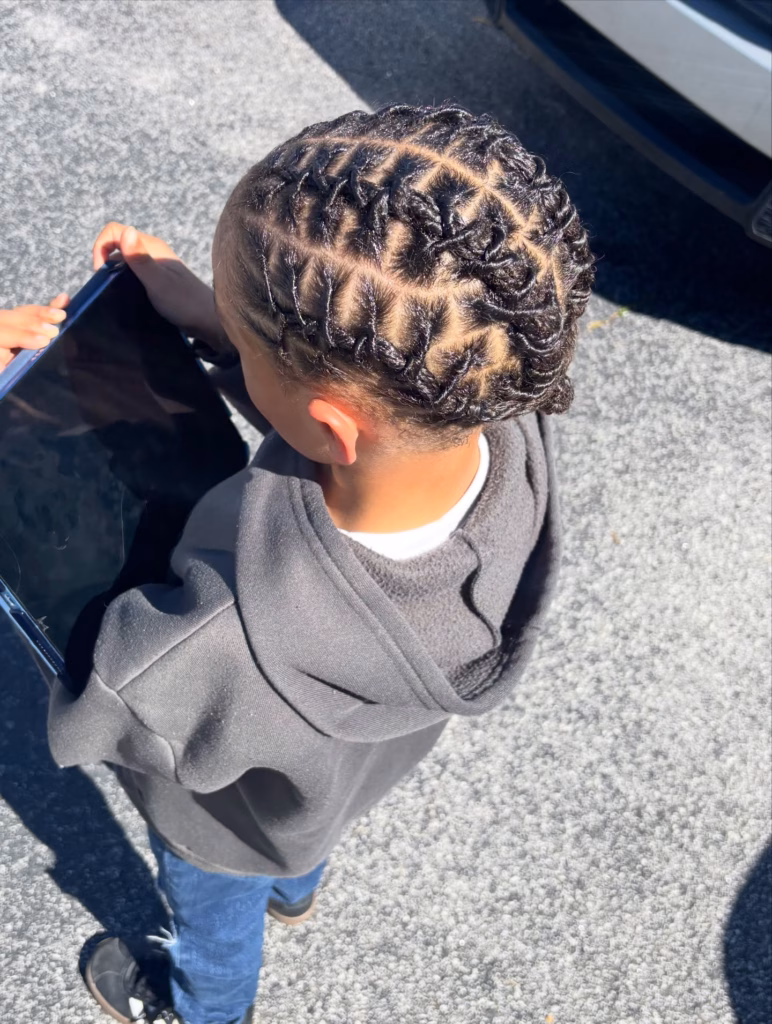
Kids Loc Maintenance: What to Do Every Week
Source @vstyled
Maintenance is where most parents lose confidence. It does not have to be complicated. Here is what the routine actually looks like, broken down by task.
Washing
Wash your child’s locs every 2 to 3 weeks as a baseline. Children who sweat heavily, swim regularly, or play outdoor sports will need more frequent washing, according to Boss Locs. Use a sulfate-free shampoo every time and rinse until the water runs completely clear.
After washing, let the locs dry fully before covering them or putting your child to bed. Locs that stay wet trap moisture inside and develop mildew. That means unpleasant odor and potential scalp problems.
Moisturizing
Mist the scalp and locs lightly with water 2 to 3 times per week. Then apply a small amount of black castor oil or coconut oil to seal the moisture in. Boss Locs makes this point clearly: applying oil to dry hair seals in the dryness, not moisture. Water goes on first, always.
An aloe vera or rice water-based hydration mist works well as a daily refresher between wash days. Apply it along the scalp and down the length of the locs.
Retwisting
Retwist every 4 to 6 weeks depending on how fast your child’s hair grows. Be gentle every time. Too much tension during a retwist causes the same spot at the root to be repeatedly pulled, which weakens the follicle over time.
Natural Hair Kids puts it simply: over-twisting creates breakage and thinning at the root. Styles that keep locs looking neat, like simple buns and puffs, can extend the time between retwists and reduce the total manipulation your child’s scalp experiences.
The Traction Alopecia Warning
This is the most important callout in this entire guide. Read it carefully.
Traction alopecia affects one in three children of African descent who wear tight hairstyles for prolonged periods, according to Tymeless Hair and Wigs. It is hair loss caused by repeated tension on the scalp, and in serious cases, it does not grow back.
Watch for these warning signs after every retwist:
- Redness along the hairline
- Small bumps near the roots
- Thinning at the temples or edges
- Your child saying the retwist hurts or their scalp feels sore
If you see any of these signs, the retwist was too tight. Loosen it immediately. If you catch traction alopecia early, Tymeless Hair and Wigs reports it can often be reversed within six months. If you ignore it and let it continue, the hair loss can become permanent.
Never retwist so tightly that it causes your child pain. That is not how locs are supposed to feel.
Nighttime Protection
Satin bonnet on. Every night.
If your child pulls their bonnet off during the night, switch to a satin-lined beanie that fits more securely, or replace the cotton pillowcase with a satin pillowcase. The friction from cotton fabric over weeks and months causes real, visible damage to the locking process and to the hair itself.
Your Weekly Maintenance Checklist:
- Mist locs with water and apply a light oil 2 to 3 times this week
- Check roots for any locs beginning to grow into each other and separate them gently
- Check the hairline for redness, bumps, or thinning
- Put the satin bonnet or use the satin pillowcase every single night
- Wash at the 2 to 3 week mark, or sooner if the scalp feels itchy or smells
Screenshot this list and put it somewhere you will see it.
Professional Loctician vs. DIY: Which Tasks Belong Where

Source @sweetcreativestyles
Some parts of this process you can handle at home. Some parts you should not do alone.
Here is where the line is.
See a Professional For These
The first installation. If you have never installed locs before, do not practice on your child’s head. A general hair salon is not the right choice either.
Find a loctician who has specific experience working with children. According to Dr Locs, a loctician who works well with children goes slower, has more patience, and understands that working with kids is a completely different experience from working with adults.
Ask the loctician before booking: Have you done locs on children before? What age do you work with? That conversation tells you everything you need to know.
Any retwist where your child complains of pain. Pain means the tension is too high. Stop and see a professional.
Any sign of traction alopecia. Thinning edges, hairline recession, or patchy spots at the roots need a professional eye immediately.
Locs that have merged or matted incorrectly. Do not try to fix this at home. You will make it worse.
You Can Handle These at Home
- Daily and weekly moisturizing
- Wash days, as long as you rinse thoroughly and dry completely
- Applying the satin bonnet each night
- Gently separating locs that are starting to grow together at the root
- Simple styling like half-up buns, puffs, and pony styles
Cost reality: Professional loc installations for children typically run $80 to $200 depending on location, hair length, and density. Monthly retwists generally cost $50 to $120. Add that up before you start. Make sure you can sustain it. Neglected locs cost more to fix than consistent maintenance costs to maintain.
5 Mistakes Parents Make When Starting Locs on Kids

Source @cassihairstyle
Even parents with the best intentions make these mistakes. Knowing them now means you do not have to learn them the hard way later.
Mistake 1: Starting before the child can handle the chair time.
A toddler who cannot sit still for a 90-minute session will be miserable. So will you, and so will the loctician. Age matters, but sitting tolerance matters more. If your child is not there yet, wait a few more months. The hair will still be there.
Mistake 2: Using wax-based products.
Waxes, butters, and thick creams cause buildup inside the loc structure. That buildup leads to odor, discoloration, and weakening of the loc from the inside out. In kids’ locs specifically, wax traps lint and is nearly impossible to remove without cutting.
Stick to lightweight, water-based products. If the product feels heavy and waxy in your hand, do not put it in your child’s hair.
Mistake 3: Retwisting too often or too tightly.
Retwisting more than once a month means you are repeatedly pulling the same hair at the same spot. According to Locs Life, the maximum recommendation is once a month, using a gentle method rather than tight palm rolling.
On a child’s more fragile follicles, repeated tight tension causes real damage faster than it would on an adult. Gentle, consistent, and infrequent is the right approach.
Mistake 4: Skipping the satin bonnet.
Every parent who skips this one comes back saying the same thing: I wish I had started the bonnet habit earlier. The friction from cotton fabric disrupts the locking process and causes breakage.
If your child pulls the bonnet off at night, get a satin-lined beanie or swap the pillowcase. There is always a solution. Skipping protection entirely is not one of them.
Mistake 5: Making the decision for your child without including them.
According to Dr Locs, a child who later decides they no longer want their locs may need to cut their hair off completely to remove them.
That is a significant consequence for a decision they had no say in. If your child is old enough to talk, they are old enough to have a conversation about their hair. Show them pictures. Explain what locs are and what the process involves. Let them be part of the choice.
Avoiding these five mistakes is the difference between a loc experience your child looks back on with pride and one they resent.
The Bottom Line
Starting locs on your child is a real commitment of time, money, and consistency. There is no way around that. But when it is done correctly, with the right method for your child’s hair and the right products for their scalp, it is one of the most beautiful and genuinely manageable protective styles available.
Choose the method that fits your child’s hair texture and personality. Get at least the first installation done by a professional who works with kids. Keep the retwists gentle. Keep the scalp clean. And put the bonnet on every single night.
The parents who do these things consistently raise children who grow up proud of their hair. That is the real point of all of this. Not the Instagram photos. Not the compliments at school pickup. The quiet daily act of caring for your child’s natural hair the right way.
Save this guide. Screenshot the weekly checklist. Book a consultation with a certified loctician before your install date. Go in informed.
Starting locs on kids does not have to be complicated. It just has to be done right.