
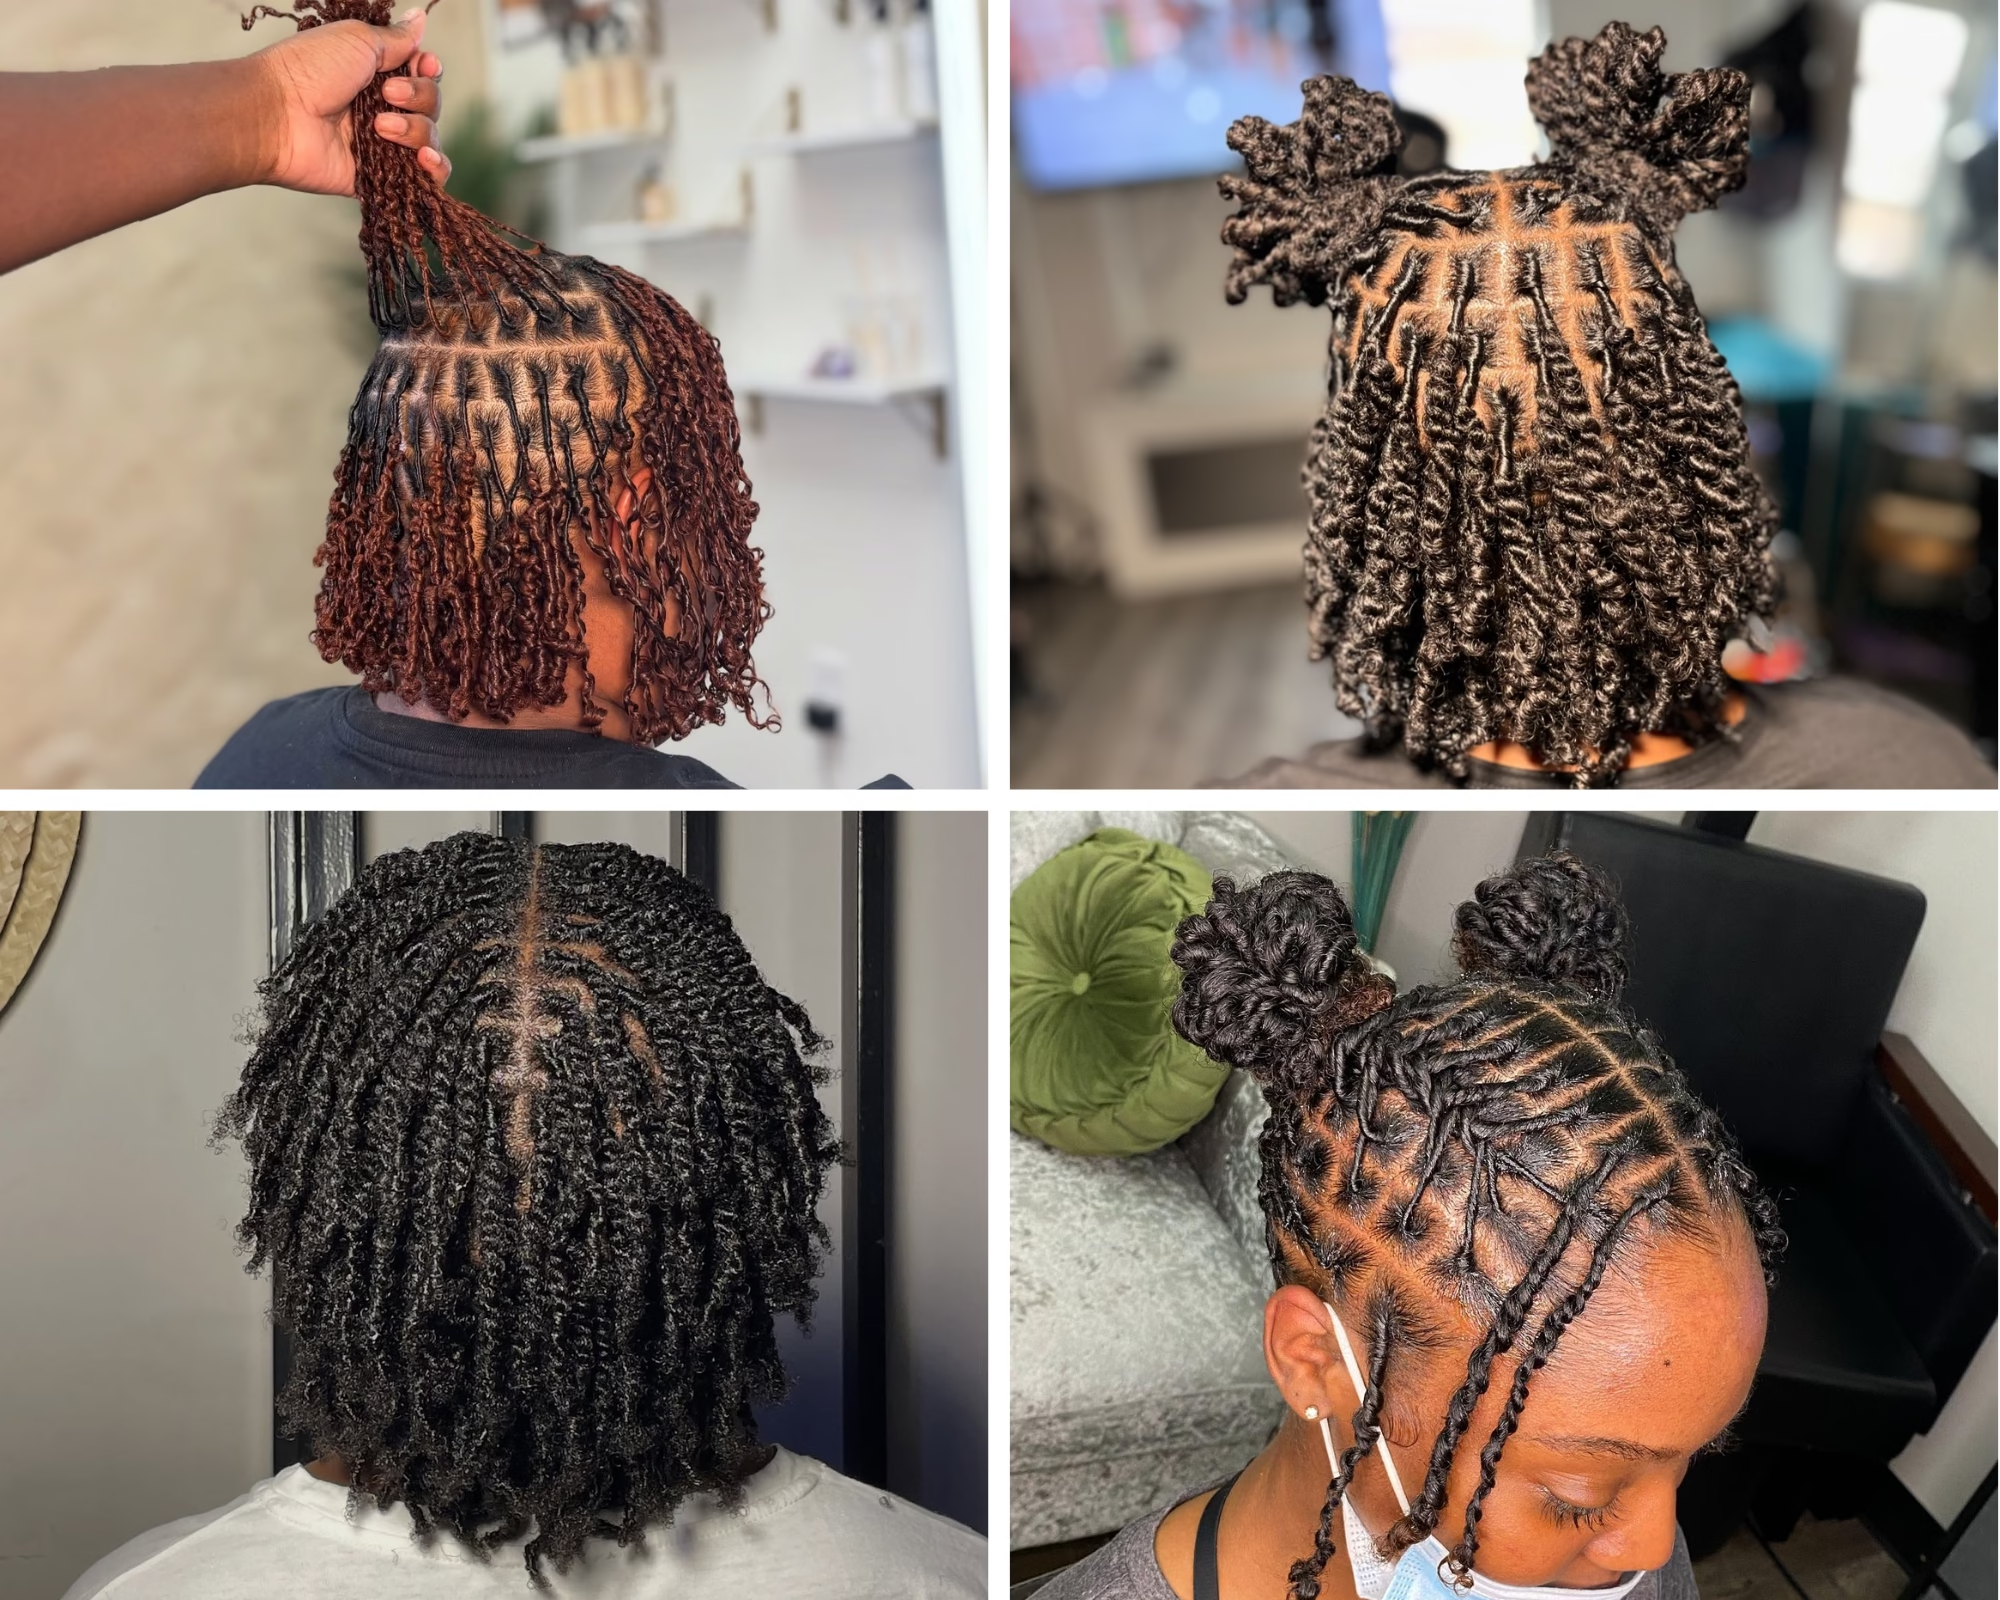
Your hair is washed, parted, and you are staring in the mirror wondering if you are really ready to start locs. Maybe you have saved photos for months, but the first step still feels confusing. Those early questions can make the whole journey feel bigger than it is.
Starting locs is not about having perfect hair or knowing every term. I learned that the beginning is mostly about choosing the right starter method, understanding your hair texture, and being patient while your locs form.
This guide will walk you through how to start locs for beginners step by step, from picking a method to caring for your new locs after the first install.
You will also learn what to avoid, how to keep your scalp healthy, and what to expect during the early stages. Let’s begin with the choices that shape your loc journey from day one.
Decide If You Are Ready for Locs Before You Choose a Starter Method
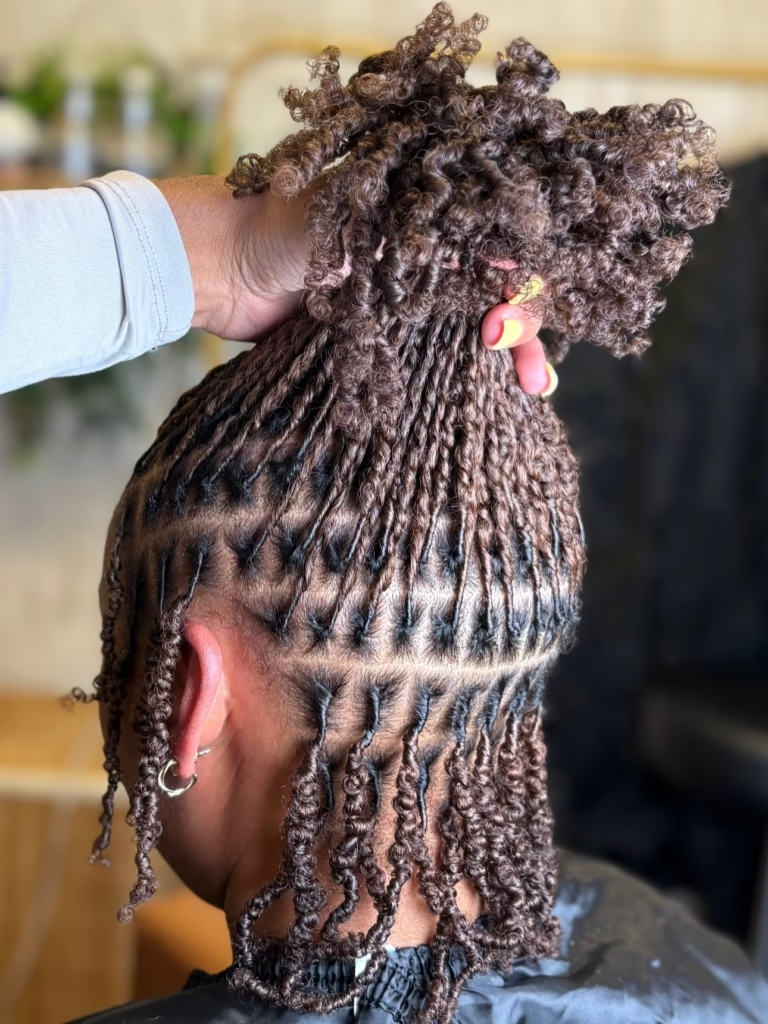
Locs are a lifestyle decision before they are a hairstyle decision. Choosing comb coils, two-strand twists, braids, or instant locs matters, but your reason for starting matters more. Maybe you want less daily styling, or maybe you want hair that feels more like you. Those are valid reasons.
Save this for later Sisterlocks for Black Women Over 40: 20 Looks That Celebrate Every Year
Before you book the appointment, be honest about what you expect your hair to do in the first few months. Ask yourself if you can handle frizz, shrinkage, loose ends, and days when your starter locs do not look like the photos you saved. Your locs will change a lot before they settle.
Patience is part of it. Some days will look messy. Others will surprise you.
A good loc journey needs more than excitement on install day, because your routine, job, workout habits, sleep schedule, and budget will all affect how your locs form.
Work may require neat styles, so think about whether you can manage retwists or simple low-tension styling. Gym life can mean more sweat, so you may need a wash plan that keeps your scalp clean without rough handling.
Scalp care also matters. If your scalp is very itchy, flaky, sore, or inflamed before starting, deal with that first or speak with a professional. Healthy roots give your locs a better start.
Faux locs can be a smart test if you are unsure. They let you wear a loc-like look for a short time without committing to real locs. Temporary styles will not show you the full loc journey, but they can help you learn if you enjoy the look, length, weight, and feeling of locs around your face.
Choose the Right Starter Loc Method for Your Hair Texture and Routine
The Starter Method Blueprint
Don’t follow online photos blind. Match your foundation directly to your unique hair texture, natural density, and weekly activity level.
Comb Coils
Twisted securely from root to tip. Ideal for shorter natural hair, this foundational method thrives when the natural curl pattern is tight enough to stay neatly bound.
Two-Strand Twists
Intertwined pairs that resist immediate sagging. Provides a ready-to-wear look from day one, though softer textures must anticipate temporary swelling and frizz.
Braids & Interlocking
Interwoven locking patterns closer to the scalp. Best suited for high moisture environments, looser textures, and active lifestyles requiring root stability.
Instant Locs & Freeform
Crocheted or allowed to organically group. Yields structural density immediately or offers zero-parting freedom for those with long-term patience.
Your starter method should match the way your hair behaves, not just the style you saw online. A pretty photo may not show the texture, density, upkeep, or patience behind the result.
Comb coils are one of the most common ways to start locs on short natural hair. They are made by twisting small sections into a coil shape, usually with a comb or fingers.
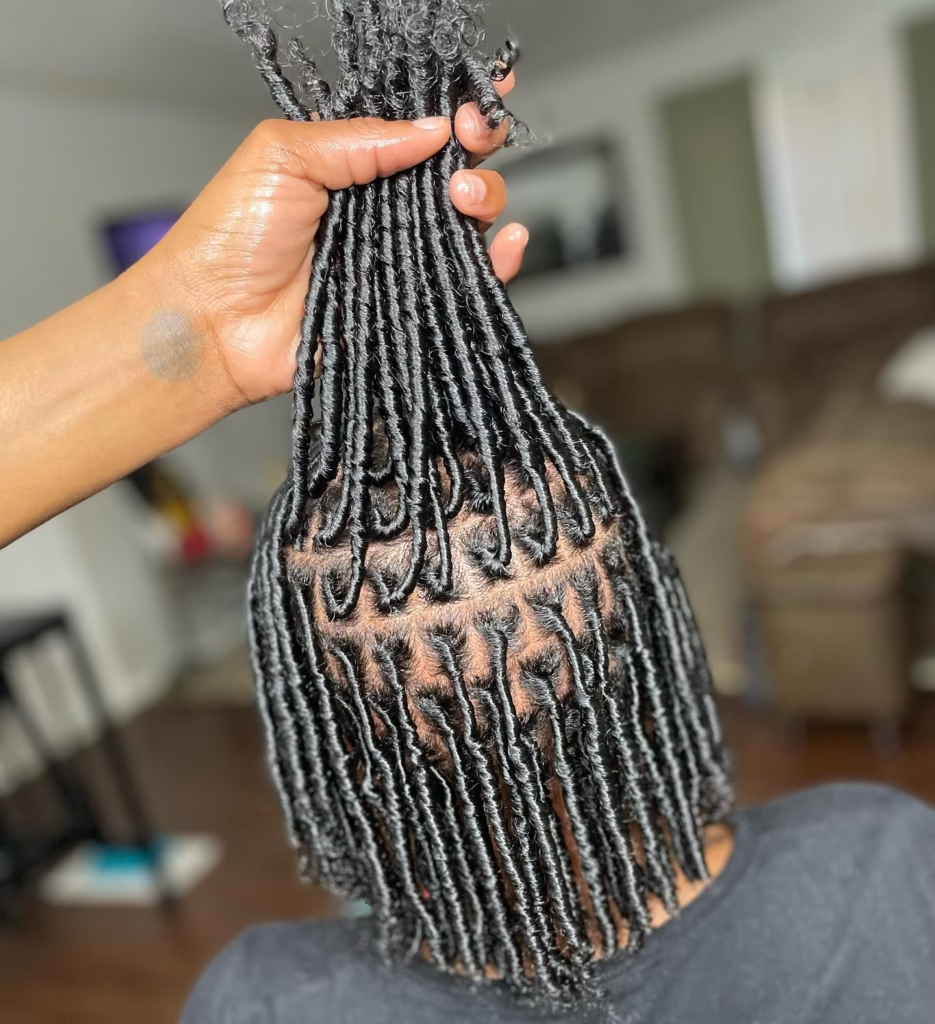
Short hair often holds this method well, especially when the curl pattern is tight enough to stay in place. Tighter textures may coil faster, while softer or looser textures may unravel more in the beginning.
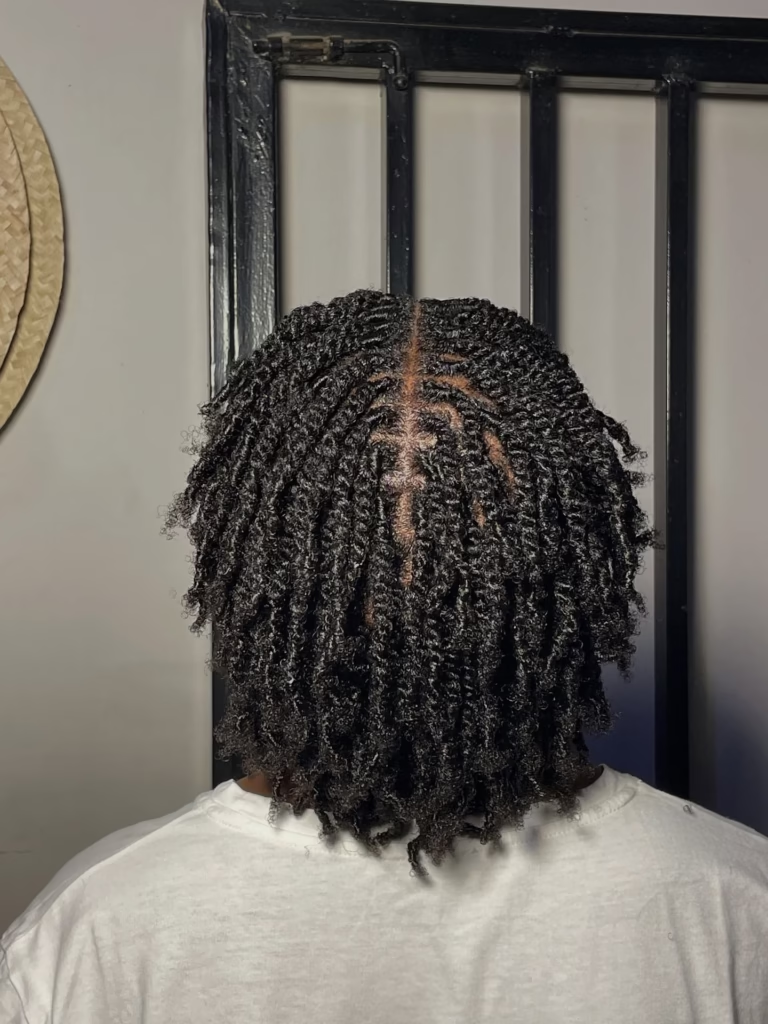
Two-strand twists are another beginner-friendly option. These are made by twisting two small sections of hair around each other.
Bookmark this post 40 Cute Short Starter Loc Styles for Every Stage of Your Loc Journey
Some people like them because they look more like a finished style from day one, so the early stage can feel less awkward. Twists can work on different hair textures, but they may swell, frizz, or loosen before they fully loc.
Braids can be a good choice if your hair unravels easily. This method gives the hair more structure at the start, which can help if you wash often, sweat a lot, or have a looser curl pattern.
Smaller braid starters may take longer to lose the braid pattern, so think about whether you are okay with seeing that shape for a while.
Interlocking starts the loc by pulling the end of the hair through the root in a set pattern. Instead of twisting only the surface, the hair is locked closer to the scalp.
People with softer hair, active routines, or a need for longer-lasting root maintenance may like this option, but it should be done carefully because too much tension can weaken the roots.
Instant locs give you a mature-looking loc shape much faster. That method is often done with a crochet tool to help the hair lock together right away. Still, “instant” does not mean your locs are fully settled forever on day one. The hair still needs care, gentle washing, and time to firm up.
Freeform starts are for you if you want less control and more natural separation. With this path, the hair is allowed to loc with little or no parting, depending on how free you want the look to be. Budget can be lower, but patience matters because the shape may not look neat or even in the early stage.
Maintenance should guide your choice. Active women may need a method that handles sweat and washing better. Fine hair may need parts that are not too tiny, so the locs do not become weak. Thick hair may need a plan for drying time, weight, and future styling.
Photos can inspire you, but your real hair should decide. Ask a loctician what method suits your texture, length, scalp, and routine before anyone starts parting. Good starter locs should fit how you live, not just how you want your hair to look in the first week.
Pick Your Loc Size Before You Let Anyone Part Your Hair
Size changes everything. The part you choose today becomes the base of the loc you wear years from now. A small part usually creates a smaller loc, while a larger part usually creates a thicker loc. That choice affects how full your hair looks, how long it takes to dry, and what styles you can do later.
Check out Wedding Loc Updo Styles for Black Brides That Look Elegant, Secure, and Beautiful
Tiny locs can look soft and flexible, but they often need more time and care because there are more locs to separate, wash, dry, and maintain. Larger locs can feel bold and easier to manage, but they may give you fewer styling options and more weight as they grow.
Medium locs are a common choice because they give you a balance between fullness, styling, and easier upkeep.
Parts decide thickness. Your hair density also matters. Someone with very thick hair may get full-looking locs even with smaller parts, while someone with fine or low-density hair may need larger parts so the locs do not become too thin.
Scalp visibility can surprise beginners. If the parts are too wide for your hair density, your scalp may show more than you expected after the first install or retwist. Clean parts are nice, but they should not leave you feeling exposed or uncomfortable.
Drying time is another thing people forget. Thick locs can take longer to dry after washing, especially as they mature and get heavier. Wet locs that stay damp too long can smell musty, so your size choice should match your wash routine and lifestyle.
Styling depends on size too. Smaller locs can be easier to curl, wrap, pin, and place into detailed updos. Bigger locs can still be beautiful, but some styles may need more pins, more space, or a different shape.
Think long term. Your starter locs may shrink, swell, and change before they settle, so do not judge the final look only by day one. Ask your loctician to show you sample part sizes before starting the whole head.
Bring photos of locs you like, but also ask whether your hair can realistically produce that size and fullness. A good stylist should talk about your texture, density, scalp, and future goals before parting.
Once the grid is set, changing loc size later can mean combining locs, splitting locs, or starting over in some areas.
Choose the size that fits your real hair, not just your saved photos. That one decision can make your loc journey easier from the start.
Understand How Parting Patterns Change the Way Your Locs Will Fall
How Parting Patterns Shape Your Locs
Your scalp grid is not just a neat detail. It affects how your locs fall, how full they look, and how easy they are to style later.
The Grid Controls the Fall
Your parts decide where each loc sits, so parting affects movement, scalp spacing, and how the locs frame your face.
Different Patterns Give Different Energy
Square parts look clean, diamond parts feel softer, crescent parts create flow, and brick-lay parts reduce the stiff grid look.
Density Changes the Best Choice
Thin hair may need a pattern that hides scalp gaps, while thick hair may need enough room for each loc to grow.
Future Styling Starts Here
Ponytails, updos, side parts, and half-up styles all sit better when the parting pattern is planned around your real hair and head shape.
Parting controls how your locs fall. The grid on your scalp decides how your locs move, how full they look, and how easy they are to style later. Many beginners focus only on loc size, but the parting pattern is just as important.
Square parts are the most common because they look clean and are easy to maintain. Diamond parts can make the scalp pattern look softer and can help the locs fall with a little more movement. Crescent parts have a curved shape, so they can create a more natural flow around the head.
You may enjoy reading How to Style Long Locs in 15 Minutes: Quick Looks for Busy Mornings
Brick-lay parts are staggered, meaning each row sits between the row above it instead of lining up in straight columns. That can help reduce the “grid” look when your locs hang down. Organic parts are less exact, and they work well for people who want a more natural or freeform look.
Straight rows can look bold. Staggered parts can look fuller. Curved parts can feel softer.
Beginners often think clean parts always mean better locs, but very sharp parts can make the scalp show more after a fresh retwist. A softer parting pattern may help your hair look fuller, especially if your hair is not very dense. Your density is how much hair grows from your scalp.
Neat parting helps with maintenance because your loctician can see where each loc belongs. Fullness depends on how the locs cover the spaces between parts when they fall. Thin hair may need a pattern that hides scalp gaps better. Thick hair may need a pattern that gives each loc enough room to grow.
Styling changes too. Updos, ponytails, side parts, and half-up styles can look different depending on where the rows sit. A middle part is easier when the grid supports it. Side-swept styles may fall better with parts that allow movement toward one side.
Before your install, ask to see the first few parts in the mirror. Bring photos, but ask how the parting will look on your own head shape and hair density.
Once the pattern is set, changing it later can be hard because the locs begin forming from that base. Later styling becomes easier when the grid is planned with your real hair in mind.
Prepare Your Hair Before Starting Locs the Right Way
Clean hair gives starter locs a better base than hair coated with creams, oils, or old gel. Starting locs on buildup can make the hair harder to part, harder to coil, and more likely to feel itchy later.
Wash your hair before your appointment unless your loctician gives you different instructions. Use a gentle shampoo that cleans your scalp well, then rinse until your hair feels clean and light.
Skip heavy conditioners, thick leave-ins, butter, wax, or greasy styling creams right before starting locs because they can make the hair too slippery.
Heavy products can slow the start. Clean hair grips better. Light hair parts easier.
Detangle your hair before the install, especially if you have thick natural hair or tight coils. Gentle detangling helps the stylist create cleaner sections without pulling through knots for hours. Knots at the roots can also make parting painful, so remove them before the style begins.
Your scalp needs attention too. Scalp health means the skin under your hair is clean, calm, and not sore. Flakes, burning, open spots, or strong itching should be handled before you start locs, because new locs can make it harder to treat scalp problems right away.
Continue reading Locs Styles for Black Women This Fall: 14 Cozy and Chic Looks for the Season
Soreness is not normal prep. Healthy roots matter.
Avoid straightening your hair right before starting locs unless your stylist asks for it. Stretching with heat can change how your texture behaves during the install, and some starter methods work better when the natural curl pattern is present.
Color should also be planned with care. If you want dye, ask whether it is better to color before or after starting, because fresh color can leave hair dry if it is not handled well.
Simple prep makes the day smoother. On install day, arrive with dry or lightly damp hair based on your stylist’s request. Bring photos of the size and shape you want, but also be open to what fits your real hair.
Ask what products will be used before they go into your hair. Dry time, scalp comfort, and clean parting all start with the prep you do before the first twist, coil, braid, or interlock is made.
Start Locs at Home or Go to a Loctician: How to Choose Wisely

DIY can work if your goal is simple, your hands are steady, and you are okay with a less perfect grid. Many beginners start at home to save money, but clean parting is harder than it looks when you reach the back of your head. A mirror helps, but it does not replace a second set of trained eyes.
Saving money feels good. Crooked parts last too. Choose wisely.
Professional help makes sense if you want neat parts, even loc sizing, or a style that will be easy to maintain for years. A loctician can look at your hair density, scalp, texture, and length before choosing the best starter method. That matters because your locs will grow from the base created on day one.
Straight rows are not everything. Even tension matters more. Some DIY starters look neat in front but become uneven around the crown and back. That can lead to locs that are too small in one area and too thick in another.
Texture should guide your choice. If your hair unravels easily, a loctician may suggest two-strand twists, braids, or interlocking instead of comb coils. Softer textures may need more structure at the start, while tighter coils may hold coils or twists more easily.
Fine hair needs careful part sizing. Thick hair needs planning for weight and drying time. Low-density hair may need parts that help the locs look fuller instead of exposing too much scalp.
Scalp issues are another reason to get help. Flaking, soreness, thinning edges, or tender spots should be checked before starting locs. A good stylist should not twist over pain or ignore weak areas.
Style goals matter too. If you want sisterlocks, microlocs, very small locs, or a clean grid, book a trained professional. These styles need skill, patience, and long-term planning.
Budget is real, so do not feel bad if you start at home. At-home starters can work well with careful sectioning, clean hair, light product, and patience. Take photos of each side, use clips to hold sections, and ask someone you trust to check the back before you finish.
Choose a loctician when you care more about long-term structure than saving the first install fee. Start at home when you understand the risks and feel ready to maintain what you create.
Read also 7 Must-Have Hair Tools for Women with Short Locs
Step-by-Step: How Starter Locs Are Installed
The first install should feel secure, not painful. Pain does not mean the locs were done well. Secure starter locs come from clean parts, gentle tension, and a method that fits your hair texture.
- Clean hair is checked first.
Start with hair that has been washed, rinsed well, and left free from heavy creams or wax. Your stylist may touch the scalp, check for flakes or sore areas, and look at your hair density before parting. Dry or lightly damp hair may be used depending on the method. - Hair is divided into main sections.
Sectioning breaks the hair into larger areas before the small loc parts are made. Clips help keep each area separate so the grid does not become messy. Good sectioning also helps the final locs fall more evenly around your head. - Parts are created based on your loc size.
After the main sections are made, the stylist creates smaller parts for each loc. Square, diamond, crescent, brick-lay, or more natural parts may be used. Then each part is checked for size so one area does not end up much thinner or thicker than the rest. - The starter method is done one loc at a time.
Comb coils are made by turning small sections into spiral coils. Twists are made by wrapping two strands around each other. Braids are used when the hair needs more structure at the start.
Interlocking pulls the hair through the root in a pattern to help it hold closer to the scalp. Instant locs use a crochet tool to help the hair lock together faster. Freeform locs may begin with less parting, less control, or simple separation by hand.
- Light product may be used.
Each section may get a small amount of light gel, foam, or water-based product to help shape the hair. Heavy product is not needed for healthy starter locs, and too much can cause buildup before your locs even begin to form. During the install, your hair should still feel like hair, not stiff or coated. - Clips may hold the roots in place.
Good clips keep coils or twists from moving while the rest of the head is being finished. Edges should not feel pulled back tightly just to make the parts look sharp. Firm is fine. Sore is not. - The hair is dried carefully.
Once the starter locs are finished, the hair may be air-dried or dried under a hooded dryer. Drying helps the shape set, especially with comb coils or wet products. Some starter locs can loosen if they stay damp for too long or are touched too much before drying. - Tension is checked before you leave.
Before the appointment ends, move your head around and notice how your scalp feels. Ask for any tight area to be loosened right away. Looking neat should not come with burning, bumps, or a headache. - The final shape is reviewed.
Photograph the front, sides, crown, and back so you can see the full install. Small differences are normal because no head of hair is perfectly even. Uneven parts that look very different in size should be discussed before the locs begin to mature.
Clear starter locs should show your chosen part size, method, and shape without causing pain. Feeling calm when you leave the chair matters because the first install becomes the base for the months ahead.
Pin this post How to Create a Locs Bun That Stays Up All Day Without Falling Out
What Your Starter Locs Should Look and Feel Like After Day One
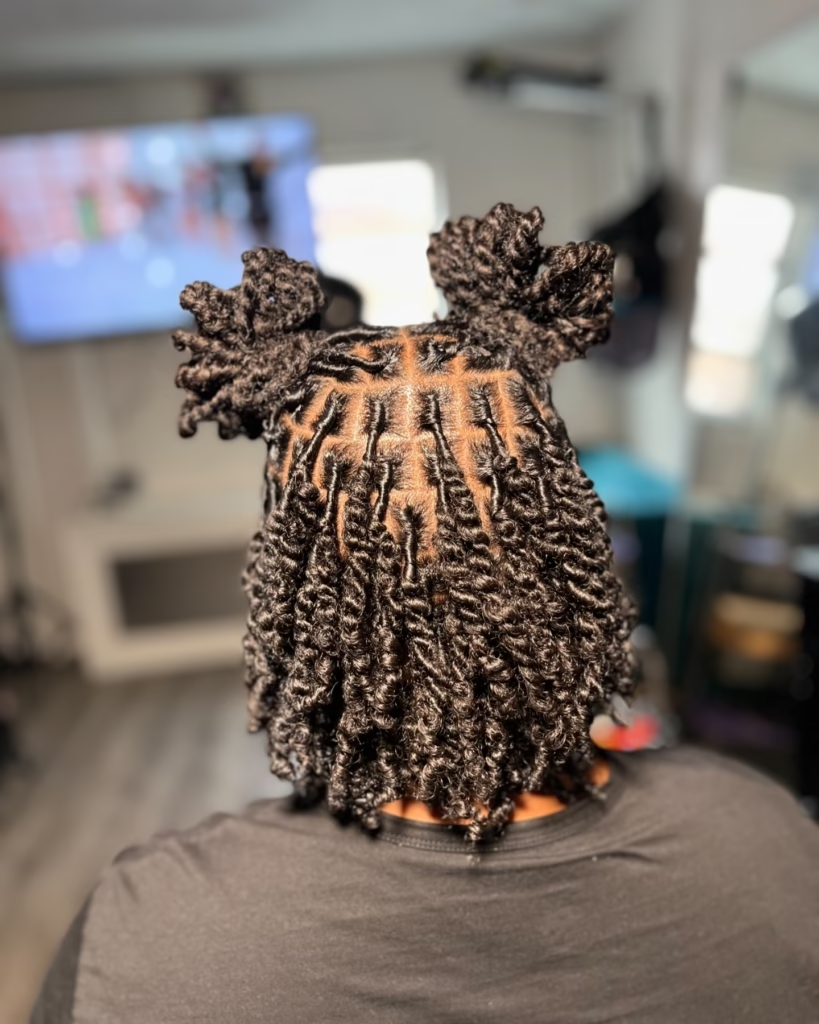
Day-one starter locs may look smaller, shorter, and more spaced out than you expected. Your hair has just been parted, shaped, and set, so the scalp may show more than it will later.
Some beginners panic when they see clear lines between each loc. Others think the install is wrong because the locs do not look full yet.
Shrinkage is normal. Visible parts are normal. Mild tightness can be normal.
Fresh starter locs should feel secure, but they should not hurt. Scalp showing after a clean install does not mean your hair is too thin, especially if your parts are neat and your roots were just shaped. Normal tightness may feel like the hair is newly styled, but it should fade as your scalp relaxes.
Pain is different. Burning is not normal. Headaches are a warning.
Frizz can show up fast, even on day one, because natural hair does not stay perfectly smooth while it is beginning to loc.
Loose ends may also happen, especially with softer textures, looser curl patterns, or starter methods like comb coils and two-strand twists. Ends do not always need to be forced into place right away.
Small changes are part of the start. Clean starter locs should have parts that make sense, locs that look close in size, and roots that do not feel pulled too tightly. Tight starter locs may show raised bumps, sore skin, red areas, or sharp pulling when you move your head.
Healthy starter locs still move a little. They should not feel frozen, glued down, or coated with heavy product. Take a few pictures of the front, sides, crown, and back so you can track how they change over the next few weeks.
Ask your stylist to loosen any area that feels painful before you leave the chair. Photos help, but your scalp comfort matters more than a perfect first-day picture.
Touching them too much can make them loosen faster. Sleep with a satin scarf or bonnet, and let the style settle. Moisture should be light, not heavy, because new locs do not need to be drowned in oil or cream.
Confidence grows when you understand what is normal. Your starter locs are not supposed to look mature on the first day. They are supposed to give your hair a clean, healthy base to begin forming.
The First 30 Days: What to Do After Starting Locs
The First 30 Days After Starting Locs
Your first month is not about perfect hair. It is about protecting the start, keeping your scalp clean, and letting your starter locs settle without constant fixing.
Protect Your Hair at Night
A satin scarf, bonnet, or pillowcase helps reduce frizz and rough parts while your starter locs settle.
Keep Morning Care Simple
Use your fingers to place bent locs back into shape, then leave them alone instead of twisting all day.
Use Light Moisture Only
A small mist of water, rosewater, or water-based spray can refresh dry hair without leaving heavy buildup.
Touch Less, Panic Less
Constant touching can loosen coils and rough up twists, so treat frizz as part of the process, not an emergency.
Make a Sweat and Wash Plan
Exercise, heat, and active work may mean washing sooner, but your first wash should match your starter method.
The first month is more about protecting the start than making your locs look perfect. Your hair is learning how to hold its new shape, so too much styling, touching, oiling, or panic can slow you down. Fresh starter locs need a calm routine, not constant fixing.
Sleep with satin. A satin scarf, bonnet, or pillowcase helps reduce frizz and keeps your parts from getting rough too quickly. Cotton can dry the hair and rub against the locs while you sleep.
See more 15 Mature Locs Styles for Women Over 40 That Exude Confidence
Morning care should be simple. Use your fingers to place your locs back into shape, then leave them alone as much as possible. If a few locs bend or stick out, do not keep twisting them all day.
Light moisture works best. A small mist of water, rosewater, or a water-based spray can help when your hair feels dry. Oils should be used lightly on the scalp only when needed, because too much oil can sit on the hair and attract buildup.
Hands can cause trouble. Constant touching may loosen coils, rough up twists, and make new locs frizz faster. Frizz does not mean your locs are failing. Loose pieces do not always need an emergency retwist.
Panic makes beginners overdo it. Instead of trying to force every hair back into place, watch how your locs settle during the first few weeks. Clean hair and gentle care matter more than a fresh salon look every day.
Sweat needs a plan. Exercise, hot weather, and active work can make your scalp feel itchy or damp. Washing may be needed sooner for some people, but it should be done gently so you do not pull the starter locs apart. Some locticians may suggest using a stocking cap or gentle pressure while washing early starter locs.
Ask your stylist when your first wash and retwist should happen based on your starter method. Photos can help you track changes without touching your hair all the time. Growth will not look neat every week, and that is normal.
Parts may soften. Roots may puff. Ends may loosen.
Products should stay light during this stage. Heavy creams, waxes, and thick gels can create buildup before your locs even have time to mature. Give your scalp room to breathe.
Checking your hair every hour will only make you more nervous. Patience is part of the first 30 days, especially when the style starts looking fuzzy. Let your starter locs settle, protect them at night, keep your scalp clean, and handle them with gentle hands.
Washing Starter Locs Without Ruining Them
Washing starter locs does not ruin them when you do it gently and at the right time. Waiting too long can cause more problems than washing, especially if your scalp is sweaty, itchy, flaky, or starting to smell. Clean starter locs form better than locs covered in oil, sweat, and old product.
Sweat needs to be washed out. Odor is not normal. Buildup can start early.
Ask your loctician when to do your first wash because the timing can depend on your starter method. Comb coils may loosen faster than braids or interlocked starters, so they often need softer handling in the beginning.
Two-strand twists can usually handle gentle washing, but rubbing too hard can still make them frizz or unravel.
A simple wash process works best:
- Cover the locs if needed.
Use a stocking cap, mesh cap, or wig cap if your starter locs are very new or easy to loosen. The cap helps hold the parts in place while water and shampoo reach your scalp. - Dilute the shampoo.
Mix shampoo with water in an applicator bottle so it spreads easily. Thick shampoo can sit between the locs and become hard to rinse out. - Focus on the scalp.
Place the shampoo on your scalp, not all over the ends first. Your scalp is where sweat, flakes, and oil build up the most. - Use gentle pressure.
Scrubbing with your nails can disturb the parts and irritate your scalp. Use the pads of your fingers and press softly between the sections. - Rinse longer than you think.
Gentle rinsing matters because leftover shampoo can dry, itch, or leave flakes. Let the water run through the locs until the hair feels clean and light. - Dry your locs well.
After washing, squeeze gently with a towel instead of rubbing. A microfiber towel or soft T-shirt can help reduce frizz.
Damp locs can become a problem if they stay wet too long. Air drying is fine for some short starter locs, but thicker hair may need more drying time. Sitting under a hooded dryer can help if your locs hold water or your scalp stays damp.
Here’s a guide on Office-Ready Locs Hairstyles for Women: 12 Professional Styles to Try
Products after washing should stay light. Heavy creams, waxes, and thick oils can sit inside new locs and create buildup. A light mist or small amount of oil on the scalp is enough for many beginners.
If a few locs loosen after washing, do not panic. Loose pieces can often be fixed at your next maintenance visit. Some frizz is part of the process.
Watch how your scalp feels after each wash. Fresh, clean, and calm is the goal. Pain, burning, heavy flakes, or strong odor means you may need a different routine or help from a professional.
Products Beginners Should Use and Products That Cause Buildup
The best starter loc products are usually the lightest ones on your shelf. New locs do not need thick creams, heavy oils, or wax to form well. Too much product can sit inside the hair and create buildup before your locs even mature.
Clean beats coated. Less works better. Simple is safer.
Water-based sprays are a good place to start because they add moisture without making the hair feel greasy. Rosewater, aloe mist, or plain water in a spray bottle can refresh your locs when they feel dry. A light mist is enough; your starter locs should not feel soaked every morning.
Scalp oil can help if your scalp feels dry, but it should be used with care. Jojoba oil, grapeseed oil, argan oil, or light coconut oil may work for some people, but even good oils can become too much if you apply them every day. Place oil on the scalp, not all through the locs, unless your hair truly needs it.
Shampoo matters more than shine. Choose a shampoo that cleans your scalp well and rinses out easily. Clarifying shampoo can help remove buildup, but it may feel drying if used too often, so many beginners rotate it with a gentle moisturizing shampoo.
Retwist gels should be light. Some gels help hold parts in place, but thick gel can flake or leave a sticky film. Ask your loctician what they are using before it goes into your hair.
Avoid these common buildup triggers:
- Heavy wax
Wax can be hard to wash out and may stay trapped inside new locs. - Thick hair butter
Shea butter and similar products can feel soft at first, but too much can sit on the hair. - Creamy leave-ins
Many creamy products are made for loose natural hair, not forming locs. - Too much edge control
Strong edge products can flake, harden, and collect around the hairline. - Daily oiling
Oil does not replace water, and too much oil can make the scalp feel dirty faster.
Product choice should match your scalp, hair texture, and starter method. Comb coils may loosen with too much moisture or slippery product, while braids and twists may handle light sprays better. Interlocked or instant locs may feel more secure, but they still need clean products that rinse out.
Read labels when you can. Watch how your hair feels. Change anything that leaves flakes, itching, dullness, or a sticky feel. Your starter loc routine should keep the hair clean, soft, and light enough to begin locking naturally.
Continue reading Pinned-Up Locs Styles: 16 Ways to Pin Your Locs for a Polished Look
Retwisting, Interlocking, or Leaving the Roots Alone: What Beginners Need to Know
Retwist, Interlock, or Let the Roots Breathe?
Healthy starter locs do not need freshly twisted roots every week. Your root method should match your scalp, texture, routine, and comfort level.
Retwisting Gives a Clean Look
Twisting loose roots in one direction can create smooth parts and polished roots, but doing it too often may stress the same hair.
Interlocking Can Hold Longer
Passing the loc through the root can help some active women, frequent washers, and softer textures keep a tighter root base.
Leaving Roots Alone Is a Real Option
Semi-freeform or freeform care can give a fuller look with less salon upkeep, but you must be comfortable with less defined parts.
Timing Beats a Perfect Schedule
Some scalps need more rest, while some textures loosen faster, so your maintenance timing should fit your actual hair.
Pain Means Stop
Bumps, soreness, headaches, or tight edges mean the style is pulling too much. Healthy maintenance should feel secure, not painful.
Roots do not need to look freshly twisted all the time for your locs to be healthy. Many beginners think neat roots mean better progress, but constant root work can weaken the base of the loc. Your new growth needs room to breathe, move, and thicken.
Retwisting is the method most people recognize. The loose root hair is twisted in one direction and usually clipped until it dries. This can give a clean look, but doing it too often may place stress on the same area over and over.
Interlocking works differently. A tool or the end of the loc is passed through the root in a pattern so the new growth is tightened closer to the scalp. This method can last longer for some people, especially if they sweat often, wash more often, or have a softer curl pattern.
Leaving the roots alone is also a real choice. Some people prefer semi-freeform or freeform locs, where the roots are separated gently but not made neat every few weeks. That path gives a fuller, less polished look and usually needs less salon upkeep.
Neat is not always healthier. Loose is not always wrong. Pain means stop.
Beginners often get nervous when their roots puff up. That puffiness is new growth, and it does not mean your locs are failing. Your hair may look less tidy between appointments, but the roots are still part of the locking process.
Choose your root method based on your real routine:
- Retwisting may fit you if you like a neat look.
Clean parts, smooth roots, and a polished finish make retwisting popular for work, events, and people who prefer a groomed style. - Interlocking may fit you if your roots loosen fast.
Active women, frequent washers, and people with softer textures may like that interlocking holds longer than a basic retwist. - Leaving roots alone may fit you if you want fullness.
Less root control can create thicker-looking locs over time, but you must be comfortable with a less defined parting pattern. - Combining methods needs care.
Switching between retwisting and interlocking without guidance can create weak spots or uneven tension, so ask a trained loctician before changing your routine.
Timing matters more than a perfect schedule. Some scalps need more rest between maintenance sessions, while some hair textures loosen faster and need earlier attention. Ask your loctician what makes sense for your starter method, not just what someone online does.
Tight roots can cause bumps, soreness, headaches, or thinning around the edges. Healthy maintenance should feel secure without making your scalp hurt. A clean style that damages your roots is not worth it.
Check out Short Locs Styles for the Holidays: 10 Festive Looks for the Season
Over-retwisting is one of the easiest mistakes to make because fresh locs can feel addictive. Resist the urge to twist loose hairs every time you look in the mirror. Let your roots grow, separate joined locs gently when needed, and give your hair enough time to form a strong base.
Frizz, Budding, Shrinkage, and Unraveling Are Not Always Bad Signs
Early loc changes can look like damage when they are really part of the process. Your hair is not supposed to stay smooth, shiny, and perfectly shaped while it begins to loc. Starter locs go through messy stages because the strands are learning to bind together.
Frizz is normal. Budding is normal. Shrinkage is normal.
Budding happens when a section of hair starts to swell or feel thicker in one spot. That bump can feel odd at first, but it often means the hair is beginning to tangle and form inside the loc. Do not keep squeezing or pulling it apart just because it feels uneven.
Shrinkage can make your starter locs look much shorter than they were on install day. Natural hair shrinks, and starter locs can tighten as they settle. Your hair is not disappearing. The length may show again later as the locs mature and gain weight.
Unraveling can happen with comb coils, two-strand twists, and softer hair textures. A few loose ends do not always mean the whole install failed. If one or two locs come undone, your loctician can usually fix them during maintenance.
Those changes need different responses:
- Leave mild frizz alone.
Extra twisting, brushing, or smoothing can disturb the loc before it has time to form. - Watch budding without picking it.
Raised spots may feel lumpy, but they are often part of the locking stage. - Handle shrinkage with patience.
Shorter-looking hair does not mean your locs are growing backward. - Fix repeated unraveling gently.
If the same loc keeps opening, ask whether a different starter method or smaller adjustment is needed. - Separate joined roots carefully.
Roots can start growing together, especially if your hair is dense, so gentle separation can help keep the locs from marrying.
Pain is different from normal change. Burning, sores, strong itching, pus, bleeding, or tight bumps need attention. A loc journey should not hurt.
Smell also matters. A musty odor may mean your locs are not drying well or product is sitting inside the hair. Wash gently, rinse well, and dry fully so your scalp stays clean.
Some unraveling after washing may be expected in the early stage, but large sections coming apart again and again need help. Take clear photos before your next appointment so your stylist can see what changed.
Ask your loctician if a loc feels very thin at the root, keeps slipping out, or looks much smaller than the rest. Small issues are easier to correct early. Let normal frizz and budding happen, but get help when comfort, scalp health, or the structure of the loc feels off.
See also Locs Updos for Beginners: The Easiest Styles to Start With
How to Style Starter Locs Without Pulling on New Roots
The safest starter loc styles are often the plainest ones. Early locs need time to form, so the goal is to look neat without pulling your roots too much. New roots are still settling, and tight styling can cause soreness, bumps, or weak spots.
Simple can still be cute.
A side part is one of the easiest styles for starter locs because it gives shape without needing pins, bands, or heavy tension. Side parts work well for comb coils, two-strand twists, and short starter locs that are not ready for ponytails.
- Wear a clean side part.
Use your fingers or the parts already made by your loctician, then let the locs fall naturally. This gives your hair direction without forcing it into a tight style. - Try a soft headband.
Headbands can make fuzzy starter locs look more styled, especially when your retwist is not fresh. Choose fabric bands that do not grip, snag, or press too hard on your edges. - Add loose clips near the front.
Small clips can hold a few locs away from your face without pulling the whole section backward. Metal clips or heavy pins may tug, so lighter options are safer for new locs. - Use gentle curls only when your locs can handle them.
Soft curls can make starter locs look fuller, but tight rods or heavy rolling can disturb new coils and twists. Ask your loctician if your hair is ready before trying curls at home. - Choose loose two-strand twists.
Two-strand twist styling can help starter locs look neat, but the twist should not feel tight at the scalp. Fresh locs need hold, not strain. - Leave very short locs alone when needed.
Sometimes the best style is clean parts, light moisture, and patience. Not every stage needs clips, buns, curls, or accessories.
Tension should be your warning sign. Pulling at the hairline, pain at the crown, or a headache after styling means the look is too tight. Your starter locs should move a little, even when they are styled.
Try styling only the front if the rest of your locs are too short. Frame your face, protect your roots, and let the back grow without constant handling. Starter locs do not need pressure to look beautiful.
How to Style Starter Locs Without Pulling on New Roots
Safe styling starts with the roots, not the finished look. Your starter locs may look strong, but the base is still new and needs time to settle. Tight styles can make the hairline sore, loosen the pattern, or create weak spots before the locs have started forming well.
Less pulling is better. Soft shape works. Comfort comes first.
A side part is one of the easiest ways to make starter locs look styled without adding stress. Use the parts your loctician already created, then guide the locs to one side with your fingers. Avoid forcing a part that fights against the way your hair naturally falls.
- Try a side part or middle part.
Parts give starter locs shape without bands, pins, or tight pulling. This works well when your locs are too short for buns or ponytails. - Use soft headbands.
Fabric headbands can help control frizz around the front while keeping the rest of your locs loose. Choose one that does not squeeze your edges or slide roughly across your scalp. - Add light clips near the face.
Small clips can hold a few locs back without dragging the whole front section. Heavy clips may pull, so use simple ones that feel secure but not tight. - Wear loose two-strand twists.
Two-strand twists can make starter locs look neat for a few days, but they should not be twisted tightly at the root. Ask your stylist to keep the base soft if your scalp is tender. - Try gentle curls only when ready.
Soft curls can make starter locs look fuller, but rods, rollers, or pipe cleaners should not pull on fresh roots. If your coils or twists unravel easily, wait until your locs are more settled. - Style only the front.
Sometimes the back of your hair needs rest while the front needs shape. Pinning or parting the front can make the whole head look intentional without disturbing every loc.
Pain is your warning. A style that causes bumps, burning, or a headache is too tight. Remove it or loosen it before your scalp gets irritated.
Starter locs do not need daily styling to look good. Let them breathe, protect them at night, and choose styles that keep your roots calm while your locs begin to form.
Read now Loc Styles for the Budding Stage: 12 Looks That Celebrate Your Loc Journey
The Beginner Loc Mistakes That Can Affect Your Whole Journey
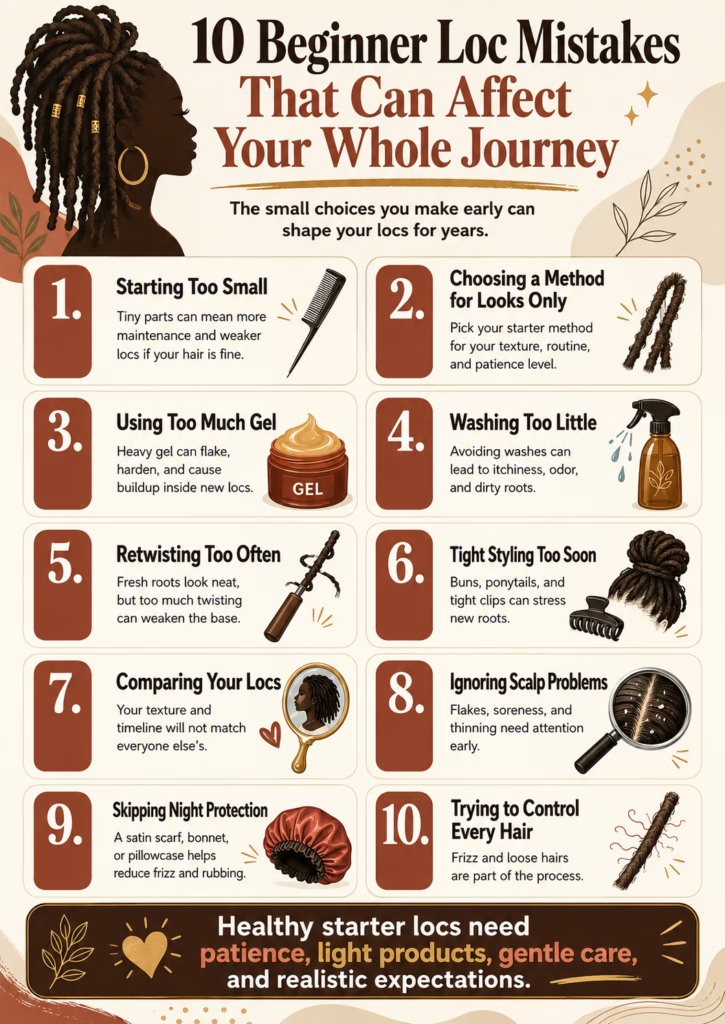
Small choices in the beginning can follow your locs for years. A cute install photo can hide weak parts, heavy product, or roots that are being pulled too often. Your first goal is not perfect starter locs. Your first goal is a healthy base.
- Starting too small without planning
Tiny locs can look beautiful, but they may need more time, more separating, and more careful maintenance. Fine hair can become weak if the parts are too small for the amount of hair in each section. Ask how your chosen size will look after swelling, shrinking, and maturing. - Choosing a method only because it looks cute online
Photos do not show how often the person washes, sweats, retwists, or visits a loctician. Comb coils may look neat on one person and unravel fast on another. Pick your method based on texture, routine, scalp, budget, and patience. - Using too much gel
Heavy gel can make starter locs look smooth at first, but it may flake, harden, or build up inside the hair. Light hold is enough for many starter locs. Clean hair will always age better than coated hair. - Washing too little
Some beginners avoid washing because they fear unraveling. Dirty roots can itch, smell, and collect product. Gentle washing is better than letting sweat and buildup sit on your scalp for weeks. - Retwisting too often
Fresh roots feel nice, but constant retwisting can stress the same hair again and again. Your roots need time to thicken and settle. A little puffiness does not mean your locs are failing. - Pulling starter locs into tight styles
Buns, ponytails, and heavy clips can be too much for new roots. Pain is not a sign of neat work. If a style gives you bumps, burning, or a headache, loosen it. - Comparing your locs to someone else’s journey
Different hair textures loc in different ways, and even two people with similar hair can have very different results. Your locs may frizz more, shrink more, or bud slower than the photos you saved. That does not mean anything is wrong. - Ignoring your scalp
Healthy locs need a healthy scalp. Flakes, soreness, strong itching, or thinning edges should not be covered with styles and products. Get help early if your scalp keeps feeling irritated. - Skipping night protection
Sleeping without a satin scarf, bonnet, or pillowcase can make starter locs rough faster. Cotton can dry the hair and rub against the new shape. Night care saves morning stress. - Trying to control every loose hair
Loose hairs are part of the process. Frizz is part of the process. Constant twisting, palm rolling, and smoothing can disturb locs before they settle.
Better habits start early. Take photos each month, ask questions at appointments, and change what is causing pain, buildup, or stress. Your locs do not need to be perfect to be progressing.
What Most Loc Articles Skip: Your First Loc Plan Should Match Your Real Life
Your best starter loc method is the one you can maintain on your busiest week, not the one that looks best on a fresh install photo.
A style that needs salon care every few weeks may not fit if your schedule, budget, or location makes appointments hard. Real life should shape your loc plan before the first part is made.
Work matters. Gym life matters. Money matters.
Start by writing down what your week really looks like. If you work in an office, school, church, hospital, or customer-facing job, you may want a starter method that can look neat with simple parts, headbands, or low-tension styling.
If your job requires hats, helmets, scarves, or uniforms, ask how that headwear may rub your roots or flatten fresh starter locs.
Exercise changes the plan too. Sweating often means your scalp may need washing sooner than someone who is less active. Comb coils can loosen more easily with frequent sweat and washing, while braids, twists, interlocking, or instant locs may hold better for some active routines.
Budget should be honest. A low-cost install can become expensive if the method needs more frequent maintenance than you can afford. Ask the price of the first install, retwists, washes, repairs, and style takedowns before you commit.
Salon access matters more than people admit. If your loctician is far away, fully booked, or hard to reach, choose a starter method that will not panic you between appointments. You need to know what you can safely handle at home and what should wait for a professional.
Travel can affect new locs. Long flights, swimming, heat, dust, hotel water, and busy trips can make starter loc care harder. If you have a trip coming soon, ask whether it is better to start after traveling or choose a method that handles movement and washing better.
Maintenance style is personal. Some women love fresh parts and neat roots. Others feel better with a fuller, softer, less polished look. Neither is wrong, but choosing against your own comfort will make the journey stressful.
Build your first loc plan like this:
- Choose your starter method based on your routine.
Pick what fits your washing, sweating, work, and styling habits. - Set a real maintenance budget.
Include retwists, products, trims if needed, and emergency fixes. - Plan your first wash before you need it.
Ask when to wash, how to wash, and what to do if some locs loosen. - Decide how neat you need to look.
Work, events, and personal comfort should guide your root maintenance. - Prepare for the awkward weeks.
Have headbands, satin scarves, light clips, and simple styles ready.
Peace comes from planning. Locs are easier to enjoy when they fit your actual life. Let your starter choice support your routine instead of forcing your routine to chase your hair.
When to Book a Loc Check-In and What to Ask Your Loctician
Book your first check-in before you feel lost. Waiting until your starter locs look messy can make small problems feel bigger than they are. Early check-ins help you find out whether your parts, roots, scalp, and starter method are settling well.
Start with timing. Ask your loctician when they want to see you again based on your hair texture, starter method, and lifestyle. Comb coils, two-strand twists, braids, instant locs, and interlocked starts do not always need the same schedule.
Ask real questions. Do not sit quietly. A good check-in should give you clear next steps, not just a fresh retwist.
Take photos before the appointment so you can show changes that happened after washing, sweating, sleeping, or styling. Use the front, sides, crown, and back because the back of the head often tells the truth beginners cannot see in the mirror.
Questions to ask your loctician include:
- Are my parts holding well?
This helps you know if your starter size and parting pattern still make sense. - Do any locs look too thin at the root?
Thin roots should be checked early before they become weak spots. - When should I wash again?
Your scalp needs a plan, especially if you sweat, work out, or use products. - Should I retwist now or wait?
Fresh roots may look nice, but over-retwisting can stress your scalp. - What should I do if a loc unravels?
You need to know what to fix at home and what to leave for the salon. - Is my scalp healthy?
Flakes, soreness, redness, or strong itching should not be ignored. - How should I moisturize between visits?
Light sprays and careful scalp care are usually better than heavy product. - Which styles are safe for my stage?
Starter locs may not be ready for tight buns, ponytails, or heavy clips.
Pain should always be discussed. Raised bumps, burning, headaches, or pulling around the edges mean something needs to change.
Clear answers build confidence. Leave the appointment knowing when to wash, when to return, what products to use, and which habits to stop before they affect your locs.
Your Simple Starter Loc Action Plan for the Next 90 Days
Your next 90 days should be planned before your first loc is even installed. A simple plan helps you avoid panic, heavy products, random retwists, and the habit of copying every loc routine you see online. Starter locs need steady care more than constant changes.
- Choose your starter method carefully.
Begin with comb coils, two-strand twists, braids, interlocking, instant locs, or a freeform start based on your hair texture, budget, and daily routine. If you sweat often, wash often, or have softer hair, ask whether your chosen method will hold well. - Decide your loc size early.
Small locs, medium locs, and larger locs all come with different styling and maintenance needs. Ask to see sample part sizes before the full install begins. - Prepare your hair before install day.
Wash your hair well, detangle gently, and avoid heavy butter, wax, or thick creams before your appointment. Clean hair matters. - Book the install with care.
Bring photos of the loc size, parting pattern, and finished look you like if you are going to a loctician. Starting at home means you should section slowly, use mirrors, and ask someone to check the back before you finish. - Protect the first week.
Sleep with satin. A satin scarf, bonnet, or pillowcase helps reduce frizz and rubbing while your starter locs settle. Touching slows progress. - Plan your first wash.
Use your loctician’s advice to know when to wash, because comb coils, twists, braids, and interlocked starts may need different handling. Focus on the scalp and wash gently. - Track changes with photos.
Take pictures after install, after your first wash, after your first retwist, and at the end of each month. Photos help you see progress when your mirror makes you doubt everything. - Schedule maintenance wisely.
Puffy roots do not always mean you need a retwist. Retwisting too soon or too often can stress your scalp and weaken the base of your locs. - Use light products only.
A simple spray, gentle shampoo, and small amount of oil when needed are often enough. Heavy products can create buildup early. - Watch your scalp.
Itching, flakes, pain, or strong odor should not be ignored. Adjust your routine if your scalp feels irritated or your locs feel coated.
Patience will carry you through the first 90 days. During this stage, your locs may frizz, shrink, loosen, or bud in uneven ways. By following a clear plan, you give your starter locs room to form without forcing every stage.