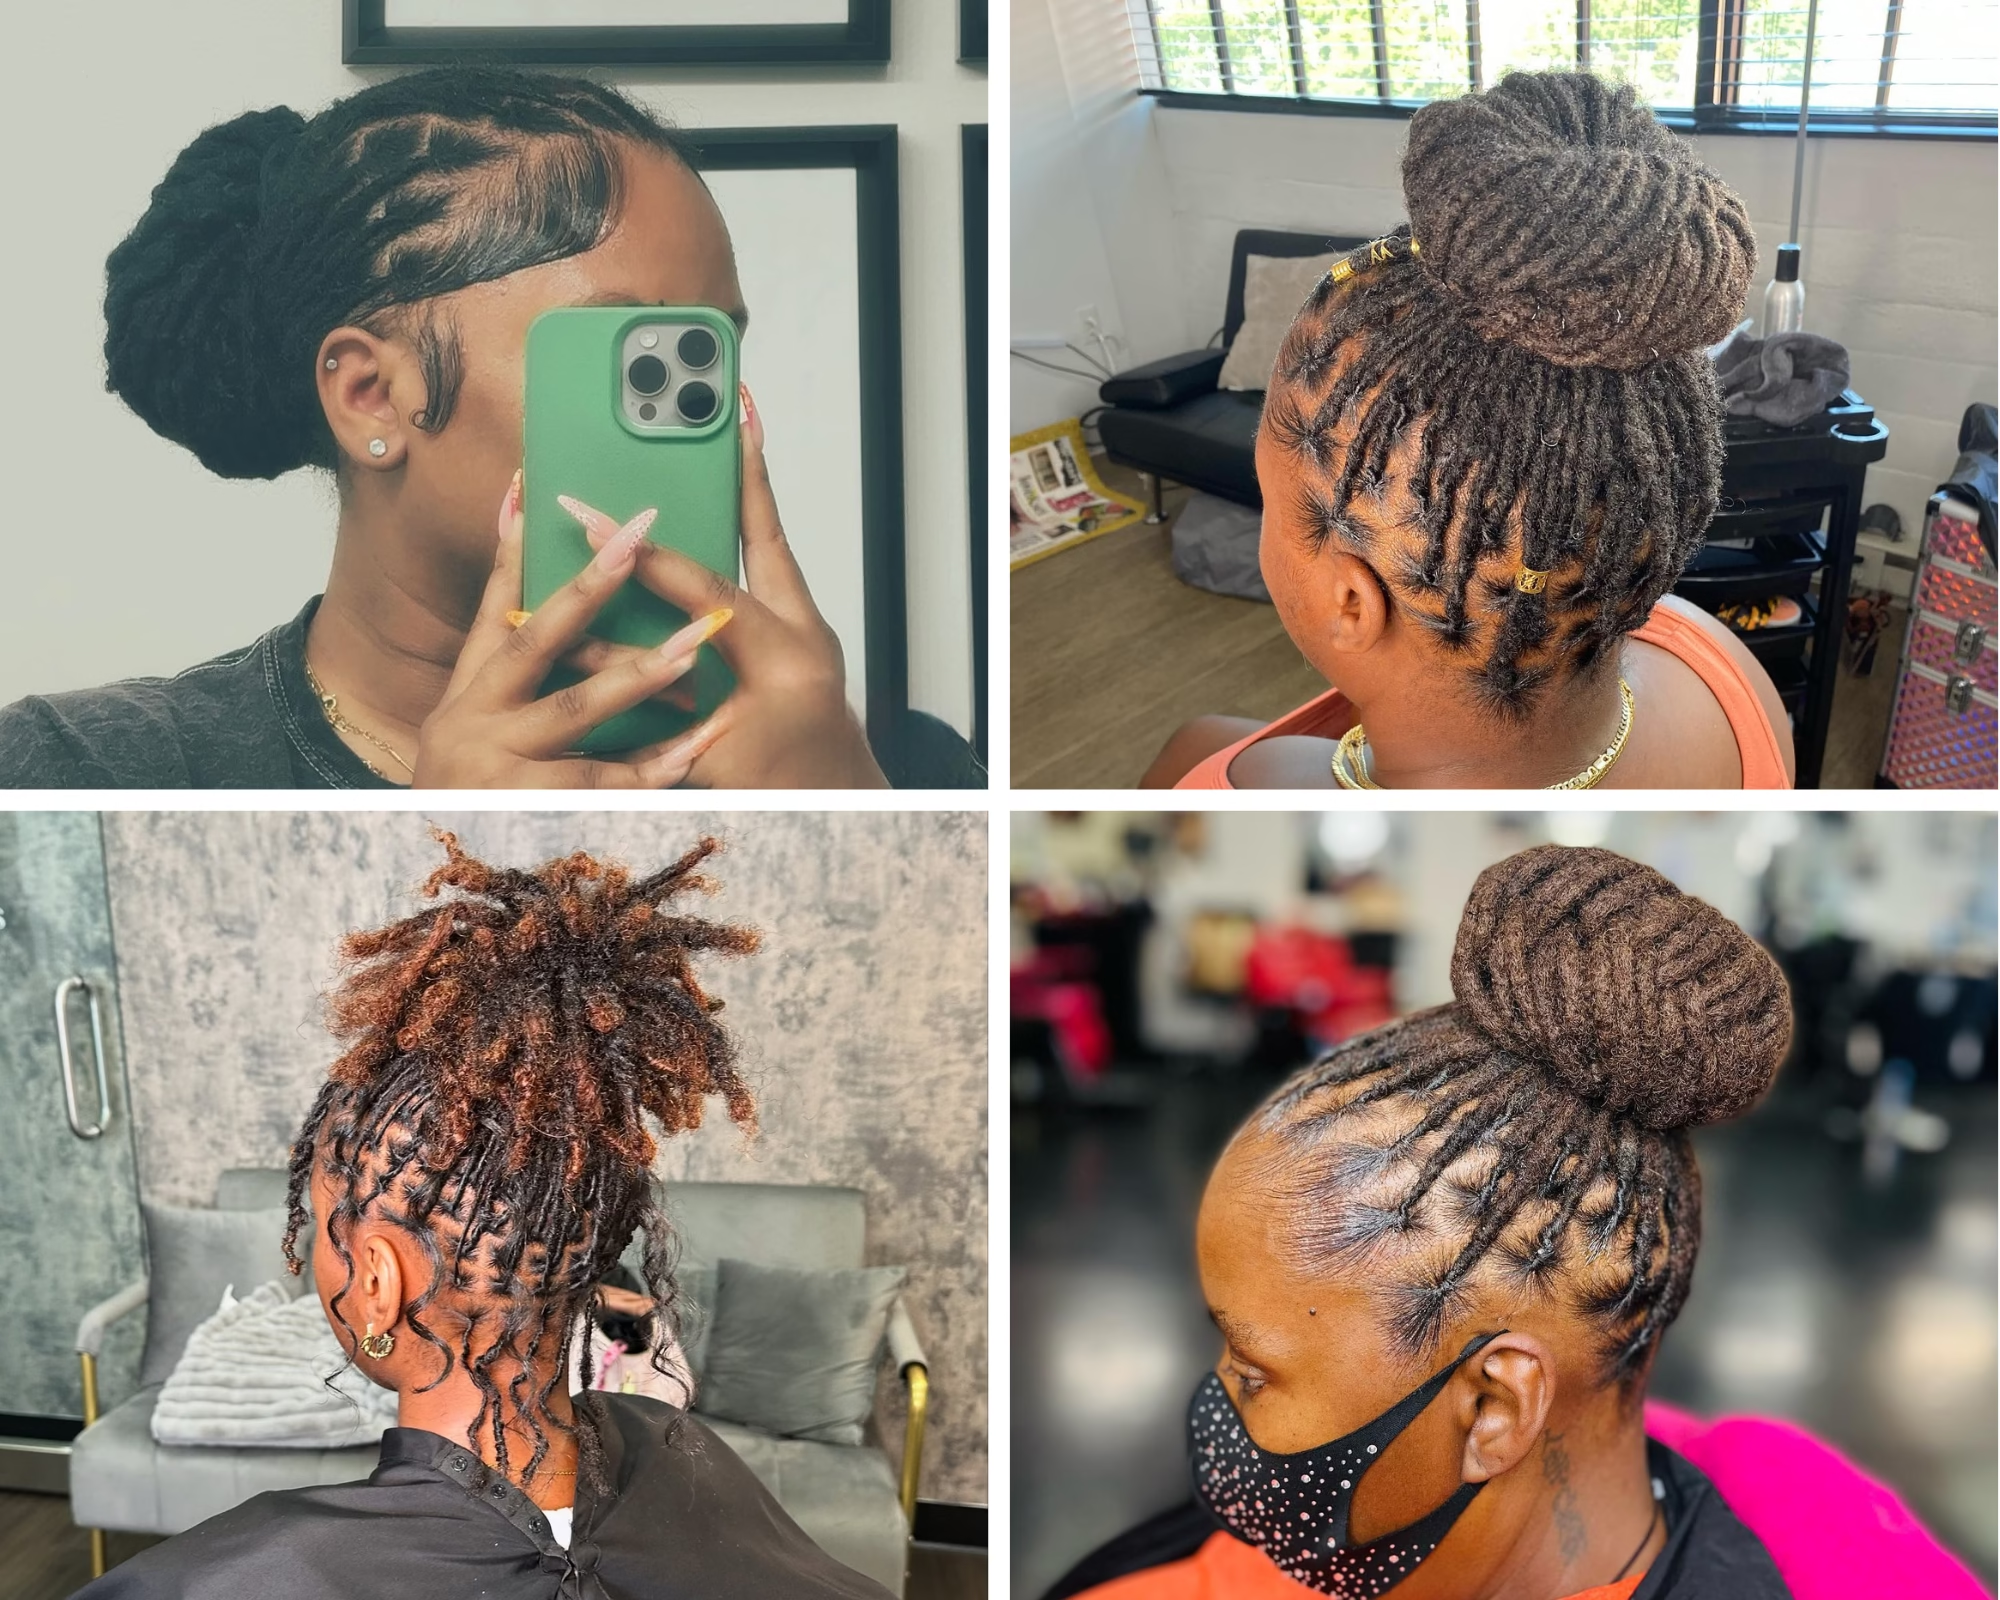
A good loc updo should feel secure without making your scalp sore, your edges tight, or your head heavy after one hour. Tightness is not security.
You only need the right placement, soft hold, and a few strong anchor points to make a beginner-friendly style stay in place.
Most home updos fail because the locs are pulled into one heavy spot instead of being spread, tucked, and pinned with the weight balanced. Pain is a warning.
Before you start, think about your loc length, thickness, and how tender your roots feel that day.Start with comfort.
Simple styles usually look better when they are neat, loose enough to move, and easy to take down without frizz or breakage.
Once you learn the basic steps, you can build prettier updos without depending on a stylist every time.
See more Locs Updos for Beginners: The Easiest Styles to Start With
Know What Kind of Updo Your Locs Can Handle Before You Start
Choose the updo your locs can support today, not the one that only looks good in a picture.
Copying a photo without checking your own length, thickness, and scalp comfort is one of the fastest ways to end up with a style that hurts or falls apart.
Short locs need pinning, not force

Short locs usually cannot wrap into a full bun yet, and that is normal.
Pins help more than pulling.
Trying to force short locs upward can make the style stiff, uneven, and tight around the edges.
Use small tucked sections, soft side rolls, mini flat twists, or pinned front pieces instead.
Medium locs can hold simple buns and rolls
Medium locs give you more room to shape the hair without needing too many pins.
Simple low buns, loose rolls, and half-up styles work well because the locs have enough length to tuck and hold.
Because the hair is not too heavy yet, you can build a clean shape without putting too much stress on one spot.
Save for later Sisterlocks for Black Women Over 40: 20 Looks That Celebrate Every Year
Long locs need weight control
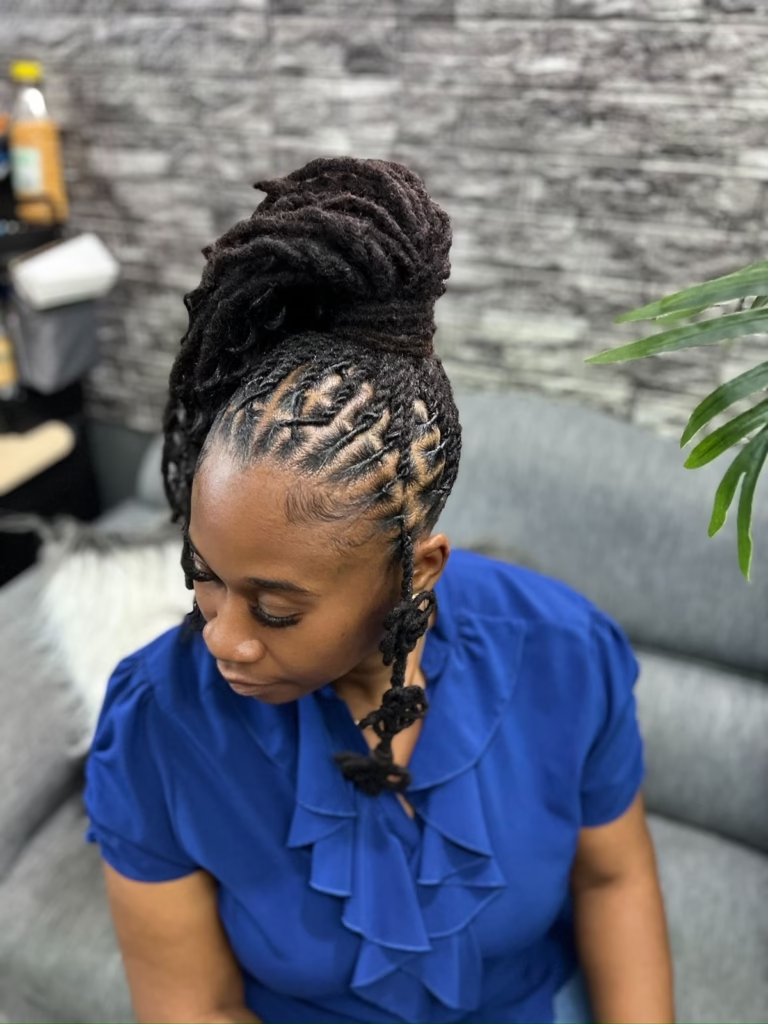
Long locs can make beautiful updos, but the weight must be spread out.
Place the bun where your scalp can carry it comfortably, not where it looks most dramatic.
High is not always better.
A low bun, side tuck, or loose crown wrap may feel better than lifting all your locs to the top of your head.
Starter locs need gentle styles that do not disturb the roots
Starter locs are still forming, so they need soft handling.
Gentle is the goal.
Fresh parts, loose ends, and new roots can get rough faster when you pull the hair too tightly or keep moving the style around.
Choose light half-up looks, loose pins, or simple tucks that do not twist the roots too much.
Mature locs can handle more structure, but still need comfort
Mature locs are stronger than starter locs, so they can hold bigger buns, rolls, and pinned shapes.
Still, stronger does not mean pain-proof.
Comfort should guide every choice, especially if your locs are thick, long, or recently retwisted.
Before you begin, touch your scalp, lift your locs gently, and notice where the weight feels easy.
A good home updo should feel balanced before it looks finished.
Bookmark for later 6 Mistakes Parents Make When Starting Their Child’s Locs (And How to Avoid Them)
What Beginners Usually Get Wrong About Loc Updos
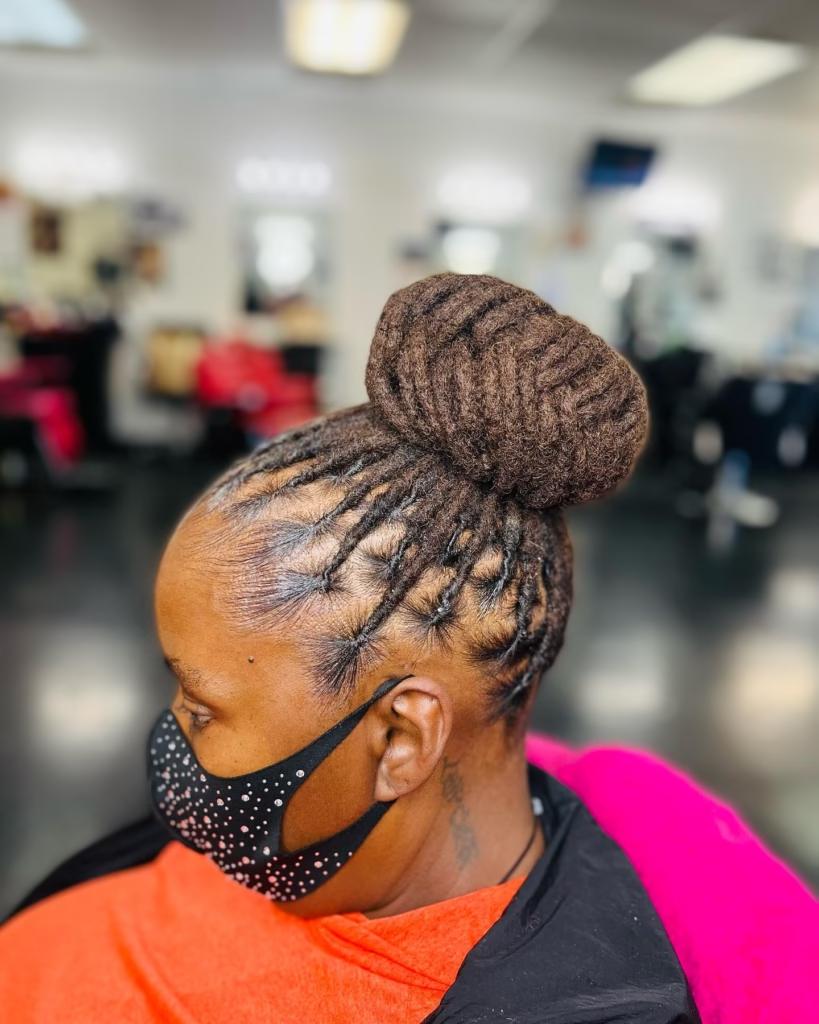
Secure should feel steady, not painful.
Many beginners pull harder because they think tight hair will last longer, but locs hold better when the weight is placed well and the pins are set in the right spots.
1. Tight does not mean better hold
Pain is not proof of a good style.
A tight updo can stress your edges, temples, nape, and crown before you even leave the house.
Instead, gather your locs with enough firmness to shape them, then loosen any spot that feels sharp, sore, or stretched.
2. More pins do not always mean more security
Extra pins can make the style feel stiff and heavy.
Better pinning means placing pins where the locs need support, especially at the base of the bun or roll.
Cross two pins in opposite directions when one area feels loose, because crossed pins grip better than pins stacked in the same direction.
3. Heavy products can make locs slip or collect buildup
Thick gel, wax, and creamy products may make the front look smooth for a short time, but they can also leave residue inside your locs.
Light mist works better when your locs feel dry.
Use a small amount of oil only where the scalp needs it, because too much product can make the hair slippery and harder to pin.
4. A perfect front does not matter if the back feels painful
Smooth edges can look nice, but comfort matters more than a sharp hairline.
Your updo should not pull at the back of your head just so the front looks flat.
Check the nape and crown with your fingers before you finish, because those areas often carry the most pressure in a home updo.
5. Some updos fail because the locs are placed in the wrong direction
Locs have weight and movement.
Forcing them against their natural fall can make the style loosen, lean, or collapse faster.
Guide the hair in the direction it already wants to go, then tuck and pin from there instead of fighting the shape.
Continue reading 45 Half Up Half Down Locs Styles for Black Women That Give You the Best of Both Worlds
Choose the Best Beginner-Friendly Loc Updo for Your Hair Today
Pick the style that matches your hair today, not the one you saved three months ago.
Your locs may be shorter, thicker, fresher, drier, or more tender than the person in the photo, and that difference changes what will hold safely at home.
1. Low loc bun for simple everyday wear
A low bun is one of the easiest places to start.
Nape-level styles feel lighter because the hair does not have to be lifted high and held against gravity.
Gather your locs near the back of your neck, wrap them softly, and pin the base so the bun feels steady without pulling your edges backward.
2. High loc bun for longer locs with enough length
High buns can look beautiful, but they work best when your locs are long enough to wrap without force.
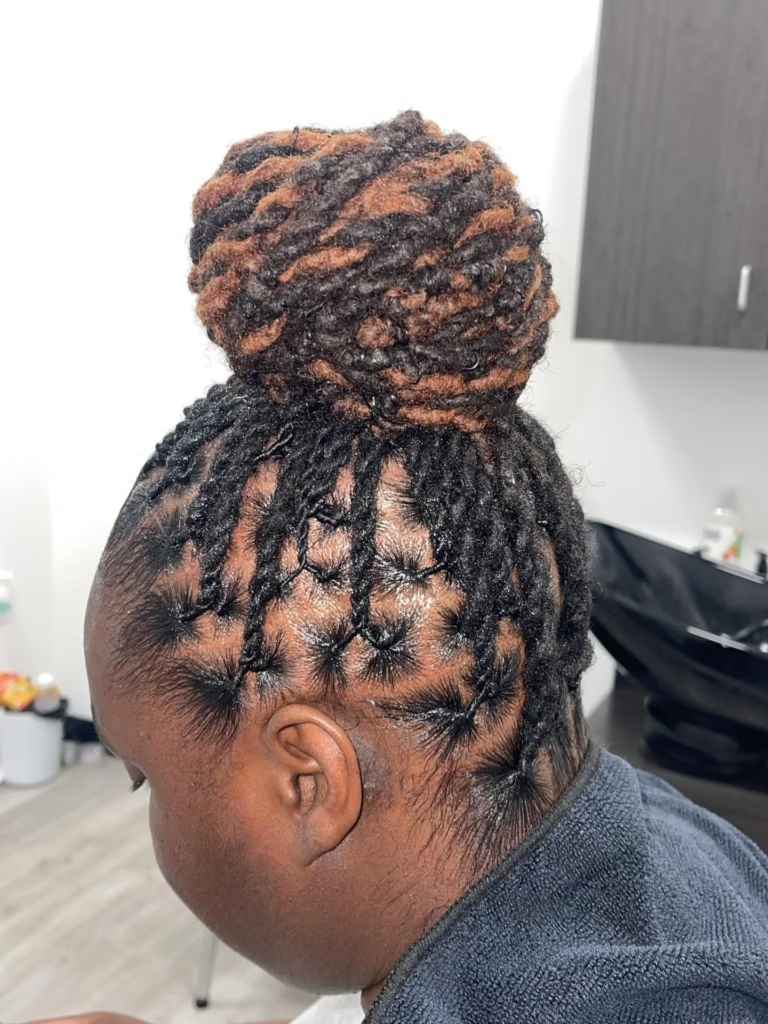
Shorter locs may stick out or pull too hard when you try to lift them high.
Place the bun slightly behind the crown instead of directly on top if your scalp feels tender, because that position spreads the weight better.
3. Side-swept loc tuck for soft shape
A side tuck gives your updo a softer look without needing a perfect bun.
Sweep your locs toward one side, tuck the ends under, and pin the folded section close to the base.
This works well when you want shape around your face but do not want a tight style.
4. Rolled loc updo for medium to long locs
Rolled styles are good when your locs have enough length to fold inward.
Start from one side, roll the locs toward the back, and secure the roll with large pins.
Because the hair is spread across the head, this style can feel lighter than one heavy bun in the middle.
5. Half-up loc bun for beginners who want less tension
A half-up bun lets you style the top while leaving some locs down.
This is helpful if a full updo feels too heavy or your roots are tender after a retwist.

Pull only the top section into a loose bun, then let the back locs hang freely so your scalp does not carry all the weight at once.
Check out Long Locs Styles for Fall and Winter: 12 Cozy, Protective Looks for Cold Weather
6. Flat twist or barrel twist front with a back bun
Flat twists and barrel twists both guide locs close to the scalp before the bun starts.
A flat twist uses two sections twisted along the head, while a barrel twist rolls several locs together in a raised row.
Choose this look when you want the front to stay neat, but keep the twists loose enough that your hairline does not feel tight
Tools You Need for a Loc Updo at Home Without Damaging Your Hair
The tools you use should reduce pulling, not help you force your locs into place.
Wrong clips, tight bands, and weak pins can make a simple updo feel painful before you even finish styling.
Good tools make the shape easier to build because they hold the locs without squeezing the roots.
1. Soft scrunchies instead of thin elastic bands
Soft scrunchies are better for gathering locs because they spread pressure over more hair.
Thin elastic bands can dig into the locs, catch loose hairs, and make the base feel too tight.
Choose fabric-covered scrunchies that stretch enough to hold the hair without snapping back hard against your scalp.
2. Large hair pins and bobby pins for anchor points
Large hair pins are helpful because locs are thicker and heavier than loose strands of hair.
Bobby pins can work for smaller sections, but they may not hold a full bun by themselves.
Pins matter.
Cross two pins in different directions when one area feels loose, because that gives the style more grip without adding too much pressure.
Here’s a guide on 7 Must-Have Hair Tools for Women with Short Locs
3. Edge brush only if your hairline can handle it
An edge brush is optional, not required.
Brushing the hairline too often can irritate tender edges, especially if your locs were recently retwisted.
Skip the brush if your temples feel sore, and smooth the front with your fingers instead.
4. Light mist bottle for softening stiff locs
A mist bottle helps soften locs that feel dry, stiff, or hard to move.
Spray lightly from a distance so the hair becomes easier to shape without turning wet.
Soaking your locs before an updo can make them heavier, and damp locs may take longer to dry inside a bun.
5. Small mirror for checking the back
A small mirror helps you see what your hands cannot feel clearly.
Checking the back matters because many home updos look neat in front but uneven at the nape.
Turn slowly and look at the sides, crown, and back before adding more pins.
6. Satin scarf for setting the front without hard gel
A satin scarf can smooth the front without coating your locs in heavy product.
Tie it gently for a few minutes after styling so the front settles into place.
Remove it before the style becomes too flat or tight.
Prep Your Locs So the Updo Holds Without Pulling

Prep decides whether your updo feels easy or turns into a fight with your hair.
Rushing straight into styling can make dry locs stiff, tangled at the roots, and harder to tuck without pulling.
Better prep gives you cleaner parts, softer movement, and a style that holds with less force.
1. Start with dry or slightly misted locs, not soaking wet hair
Dry locs are easier to pin because they are lighter.
Slightly misted locs can move better if they feel stiff or rough.
Water-soaked locs may stretch, feel heavy, and stay damp inside the bun longer than you expect.
See also Best Silk Bonnets for Women with Locs: Protect Your Hair While You Sleep
2. Separate locs gently at the roots before styling
Separate the roots with your fingers before you start gathering the hair.
Pulled-together roots can make the updo feel tight even when the bun itself is loose.
Use your fingertips to free any locs that are joined at the base, and stop if the area feels sore.
3. Check for lint, buildup, or stiff product spots
Lint is easier to remove before the hair is tucked.
Buildup can make locs feel sticky, dull, or hard to shape.
Rub stiff product spots gently between your fingers, then decide if the style needs a light mist or if the hair should be washed before styling.
4. Add light oil only where the scalp feels dry
Oil should support comfort, not soak the whole style.
Place a few drops on dry areas of your scalp and massage lightly with your fingertips.
Too much oil can make your hands slippery, weaken your grip, and cause pins to slide out while you are building the updo.
5. Stretch heavy locs with your hands before lifting them
Long or thick locs need a gentle stretch before you raise them into a bun.
Hold sections in your hands and guide the hair in the direction you want it to go.
This helps the locs settle into the shape without dragging your edges or pulling hard at the crown.
Notice how your scalp feels before you pin anything.
Read now Bob Locs for Women in Their 30s: Polished Styles That Feel Grown, Soft, and Intentional
Step-by-Step: How to Do a Simple Low Loc Updo at Home
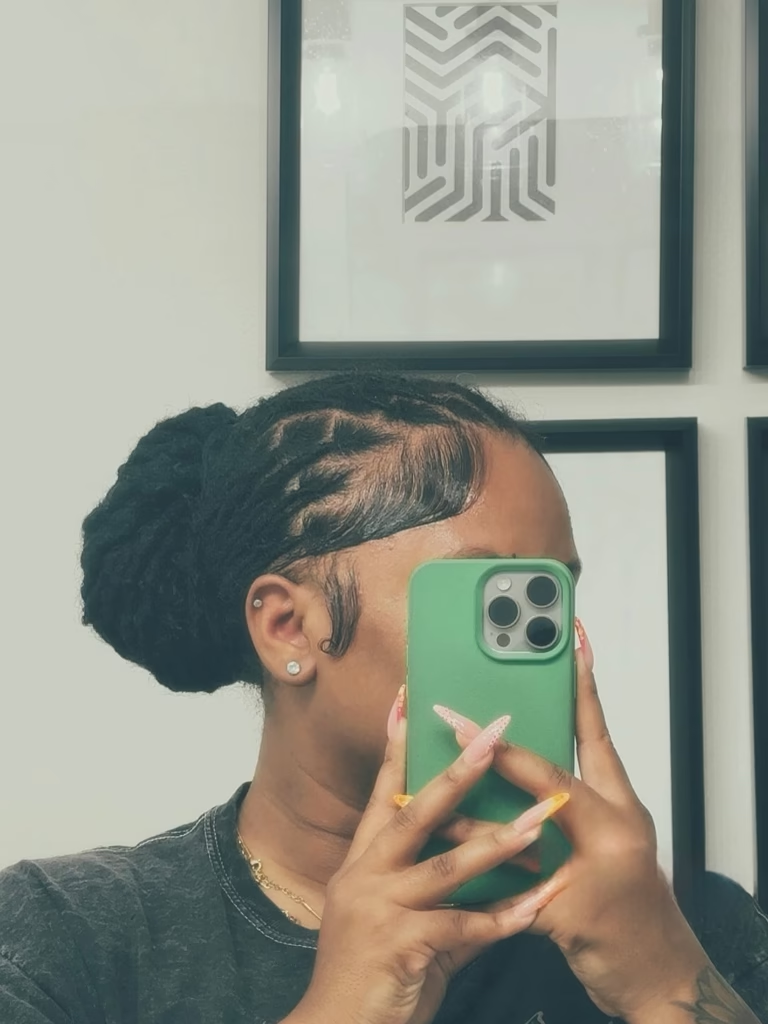
Comfort should guide each move before you think about how neat the style looks.
A low updo is one of the safest places to start because the hair sits near the nape instead of pulling from the top of your head. This position helps reduce weight on your crown and edges, especially if your locs are long, thick, or recently retwisted.
Start slow.
Step 1: Decide where you want the bun to sit
Stand in front of a mirror and choose the exact spot before you gather your hair.
Lower placement usually feels easier for beginners because the locs do not have to fight gravity. A bun at the nape works well for everyday wear, while a bun slightly above the nape can look a little more dressed up.
Touch the spot first.
Step 2: Separate the front section if you want face-framing pieces
Part out a few front locs before the back is gathered.
Leaving the front loose gives you more control over your edges, and it also helps the updo look softer around your face. You can keep two side locs down, sweep the front to one side, or pin the front back later.
Avoid pulling tiny edge hairs.
Step 3: Gather the back locs loosely at the nape
Use both hands to bring the back locs toward the spot you chose.
Hold the hair like you are making a low ponytail, but do not tighten it yet. If the roots feel pulled before you even wrap the bun, loosen your hands and let the locs fall more naturally.
Soft hold works better.
Step 4: Wrap the locs into a soft bun or tuck shape
Turn the gathered locs in one direction and guide them into a round bun.
Shorter locs may not wrap all the way, so tuck the ends under and pin them instead of forcing a full circle. Longer locs can be wrapped once or twice, but keep the shape loose enough that the scalp does not feel stretched.
Fold gently, not tightly.
Step 5: Pin from different directions to anchor the weight
Place your first pin at the base of the bun, close to the scalp but not digging into it.
Add another pin from the opposite direction so the two pins cross inside the style. Crossed pins grip better because they hold the locs from more than one angle, which helps the bun stay firm without needing a tight band.
Use large pins for thick locs.
Check out Short Locs Styles for the Holidays: 10 Festive Looks for the Season
Step 6: Place the front locs without pulling the edges
Bring the front section into the style after the bun feels steady.
Sweep the front locs back, to the side, or around the bun, then pin them lightly where they rest best. If your hairline feels tight, leave the front looser or let a few locs frame your face.
Pretty should not hurt.
Step 7: Check the back with a mirror
Hold a small mirror behind your head and look into the main mirror.
The back may feel neat but still have loose ends, uneven folds, or visible pins. Fix only what needs fixing, because too much adjusting can make the style tighter and rougher than it needs to be.
Look at the nape too.
Step 8: Shake your head gently to test the hold
Move your head from side to side slowly.
A safe updo should feel steady, not frozen. If the bun shifts too much, add one or two pins at the base instead of pulling the whole style tighter.
Test before you leave.
Step 9: Loosen any spot that feels tight
Press your fingers around your temples, nape, crown, and behind your ears.
Soreness in one small area means the weight is sitting wrong or one section is pulled too hard. Remove the nearest pin, relax that section, and place the pin again at a softer angle.
Pain is a warning.
Step 10: Set the front with a satin scarf if needed
Tie a satin scarf around the front for a few minutes if you want a smoother finish.
Satin helps lay the front down without needing thick gel, and that matters because heavy product can leave buildup on locs over time. Keep the scarf gentle and flat, then remove it before the style feels pressed or tight.
Finish by checking comfort one more time.
How to Pin a Loc Updo So It Stays Without Feeling Heavy
Good pinning holds the weight of your locs without making the whole style feel locked to your scalp.
Locs are heavier than loose hair, so weak pin placement can make an updo sag even when the bun looks neat at first.
Weight needs support.
Small changes in where you place each pin can decide whether the updo feels balanced or starts pulling after one hour.
1. Cross pins instead of stacking them in one spot
Crossing two pins gives better grip than pushing several pins into the same place.
Stacked pins can slide together because they are all holding the hair from one direction.
Slide one pin from the left and another from the right so they meet inside the bun.
Stop when the area feels steady.
Read more Loc Styles for the Budding Stage: 12 Looks That Celebrate Your Loc Journey
2. Pin into the base of the bun, not only the outer locs
Surface pins may hold the look, but they do not always hold the weight.
Anchor the pin through the outer locs and into the base near your scalp, without scratching or pressing into the skin.
Push gently.
Think of the base as the support point, because that is where the bun needs the most help staying in place.
3. Spread weight across the crown, sides, and nape
One heavy bun in one tight spot can make your scalp sore.
Spread the locs before you pin so the weight does not hang from one small area.
Place a few pins around the bun instead of loading one side with all the support.
Check the crown, sides, and nape with your fingers before you call the style finished.
4. Use larger pins for thick mature locs
Thick mature locs need pins that can hold more hair at once.
Tiny bobby pins may bend, slip, or disappear inside the style without giving real support.
Choose large hair pins or strong bobby pins when your locs feel heavy in your hands.
Open the pin slightly if needed, but do not force it so wide that it loses grip.
5. Stop adding pins when the style feels firm, not stiff
Firm means the updo stays when you move your head.
Stiff means your scalp feels trapped, tight, or pressed.
Remove one pin if the style starts to feel hard instead of secure.
Give the bun a gentle shake test, then adjust only the loose areas that actually need help.
You may enjoy reading Bob Locs for Women in Their 30s: Polished Styles That Feel Grown, Soft, and Intentional
How to Protect Your Edges While Doing a Loc Updo
Edge protection starts before the bun is made, not after your hairline already feels tight.
Beginners often pull the front too hard because they want a smooth finish, but that can stress the small hairs around the temples and forehead.
Gentle still looks neat.
Nothing about an updo should leave your edges sore, raised, or painful to touch.
1. Leave the first row of locs slightly relaxed
Leaving the front row a little loose helps protect your hairline from constant pulling.
That small space gives your edges room to move when you smile, talk, or turn your head.
Pulling every front loc straight back may look clean, but it can create pressure around the temples.
Let the style sit softly there.
2. Avoid pulling baby hairs into the main bun
Baby hairs are shorter and more delicate than the rest of your hair.
Forcing them into a bun can cause breakage, especially if you use gel, brushing, and tight bands together.
Smooth them lightly if you want, or leave them alone if your hairline feels tender.
Less is safer.
3. Use soft hold instead of hard edge control every time
Hard edge control can make the front look polished, but using it often may leave buildup and make the hairline stiff.
A light mist, your fingers, and a satin scarf can smooth the front without coating the roots.
Save strong hold for times when you truly need a sharper look.
Daily styling should feel easy on your scalp.
4. Watch for soreness at the temples
Soreness around the temples is a warning sign.
Your updo may be too tight, too high, or pinned in a way that drags the front backward.
Press gently around both sides of your head after styling.
Fix the painful area right away instead of waiting for it to “settle.”
5. Move your bun position from week to week
Repeating the same bun placement can stress the same roots again and again.
Changing from a low bun to a side tuck or half-up bun gives your edges and crown a break.
Rotate the style when you wear updos often.
Comfort should decide where the bun sits, not only how the style looks in the mirror.
How to Balance Weight in an Updo
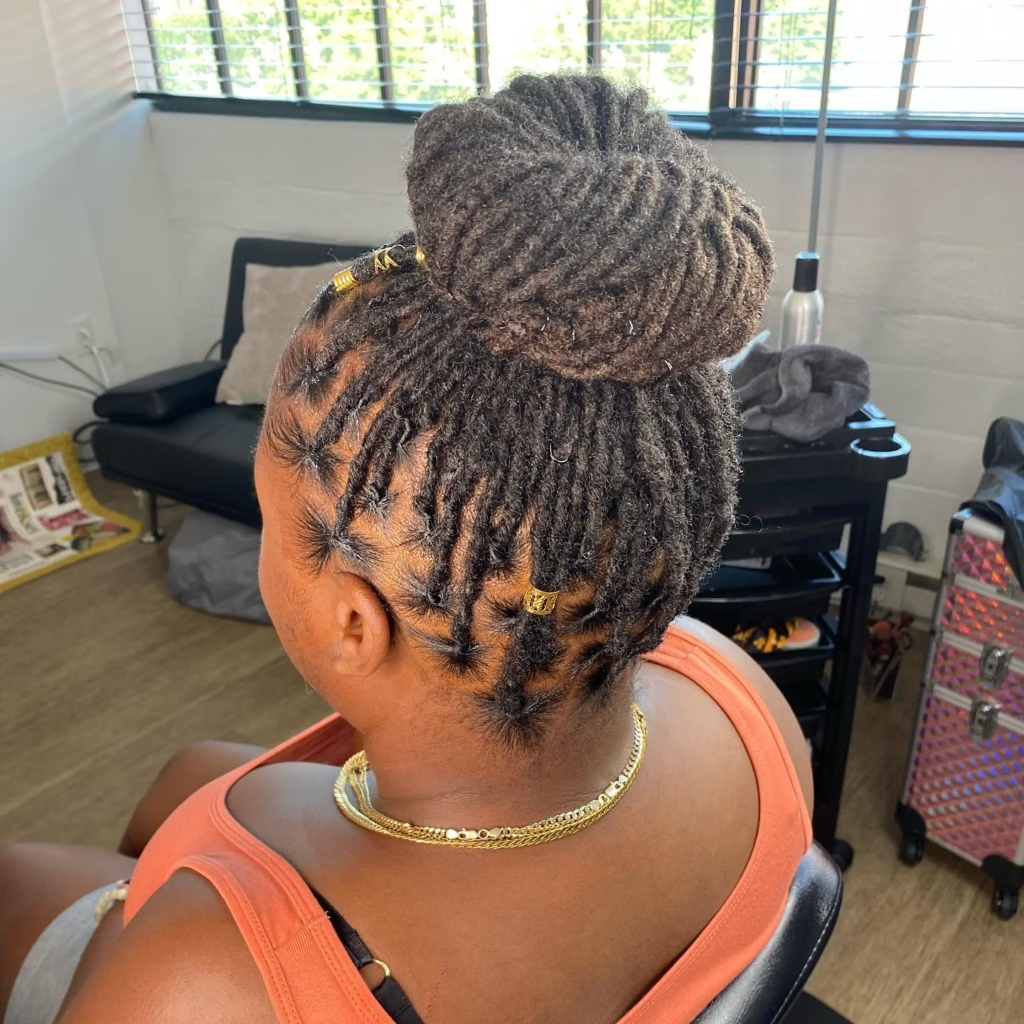
Weight decides whether your updo feels comfortable or starts pulling after a short time.
Many home updos do not fail because the bun is ugly or the pins are weak.
Balance is the real issue.
One heavy section hanging from your crown, edges, or nape can make the whole style feel wrong, even when it looks neat in the mirror.
Read on 18 Cute Locs Styles for Women Who Love Effortless Everyday Looks
1. Heavy locs should not sit in one tight point
Heavy locs need space across your head.
Instead of pulling everything into one small knot, spread the hair before you start wrapping.
Guide some locs from the sides, some from the back, and some from the crown so the bun is supported by more than one area.
2. High buns need more support than low buns
High buns look pretty, but they ask more from your scalp.
Place the bun slightly behind the crown if the top of your head feels tender.
Add pins around the base, not just at the front, because a high bun can lean forward or backward when the weight is not anchored well.
3. Side updos need extra anchoring on the opposite side
Side styles can feel soft and beautiful, but the weight sits more on one side of your head.
Support the opposite side with a hidden pin or a tucked section.
Pinning only the side where the bun sits can make the style pull, tilt, or loosen as you move.
4. Thick locs may need two hidden sections before forming one bun
Thick locs can feel too bulky when you gather everything at once.
Divide the hair into two loose sections first, then bring both sections together into the final shape.
After that, tuck the ends into one bun or roll so the finished updo looks full without feeling like one heavy ball.
5. Pain at the crown usually means the weight is not balanced
Crown pain often shows up when too much hair is lifted upward and held in one spot.
Move the bun lower, loosen the center, or split the weight into smaller sections before pinning again.
Loosen the style right away if the pain feels sharp, because soreness is your scalp telling you the placement is wrong.
6. A comfortable updo should feel spread out, not hanging
Comfortable does not mean loose enough to fall apart.
Your updo should feel firm across different parts of your head, not like one heavy piece is hanging from your roots.
When the weight is balanced, you can turn your head, talk, smile, and move without feeling a pull in one exact spot.
Hold the finished style with both hands for a few seconds before adding the last pins, and notice where the weight wants to drop.
See also High Bun Locs Hairstyles: 14 Show-Stopping High Bun Styles for Loc Wearers
Beginner Loc Updo Variations You Can Try After the Basic Bun
Once the low bun feels easy, you can change the shape without learning a whole new skill.
Small changes make a big difference.
Each style below still uses the same beginner rules: gentle gathering, balanced weight, soft pinning, and no pulling at the edges.
1. Low rolled loc bun
A low rolled bun is a soft step up from the basic low bun.
Start by gathering your locs near the nape, then roll the hair inward instead of wrapping it into a round bun.
Secure the roll with large pins along the base so the weight sits close to your head.
This works well for medium to long locs because the hair can fold into a smooth shape without being lifted too high.
2. High loose loc bun
High buns look bold, but they need enough length to wrap without force.
Place the bun slightly behind the crown so the weight does not pull straight from your edges.
Keep the bun loose, then pin around the base instead of tightening the whole style with a small band.
Longer locs usually handle this better because they can wrap around themselves without sticking out everywhere.
3. Side-tucked loc updo
A side tuck gives your updo a softer, more relaxed look.
Sweep your locs toward one side, fold the ends under, and pin the tucked section close to your scalp.
Use one or two hidden pins on the opposite side so the style does not lean too much.
This is a good choice when you want shape around your face without making the style feel formal.
4. Half-up half-down loc updo

Half-up styles are helpful when a full updo feels too heavy.
Take only the top section of your locs and form a small bun, roll, or tuck.
Leave the back down so your scalp carries less weight at one time.
Beginners often like this version because it gives lift at the front while still letting the longer locs move freely.
5. Crown wrap with the ends tucked
A crown wrap works best when your locs are long enough to move around the head.
Guide the locs from one side across the top or back, then tuck the ends underneath the wrapped section.
Pin lightly as you go, not only at the end, because long locs need support along the path.
This style can feel elegant without needing a tight bun.
6. Front barrel twists with a back bun
Barrel twists are raised twists made by wrapping locs around each other close to the scalp.
Use them in the front only if you can twist without pulling your hairline.
After the front is shaped, gather the back into a low bun or soft tuck.
Choose this style when you want the front to look neater but still need the back to feel simple.
7. Messy soft loc updo for casual days
Messy does not mean careless.
Gather your locs loosely, tuck the ends in different directions, and pin only the sections that need support.
Let a few locs fall around the face or sides if they are not pulling.
This relaxed version works well on days when your roots are puffy, your retwist is older, or you want a style that feels easy instead of perfect.
Pin this post 25 Cute Short Locs Hairstyles That Prove Short Is Always Stunning
How to Make a Loc Updo Look Neat Without Overusing Gel
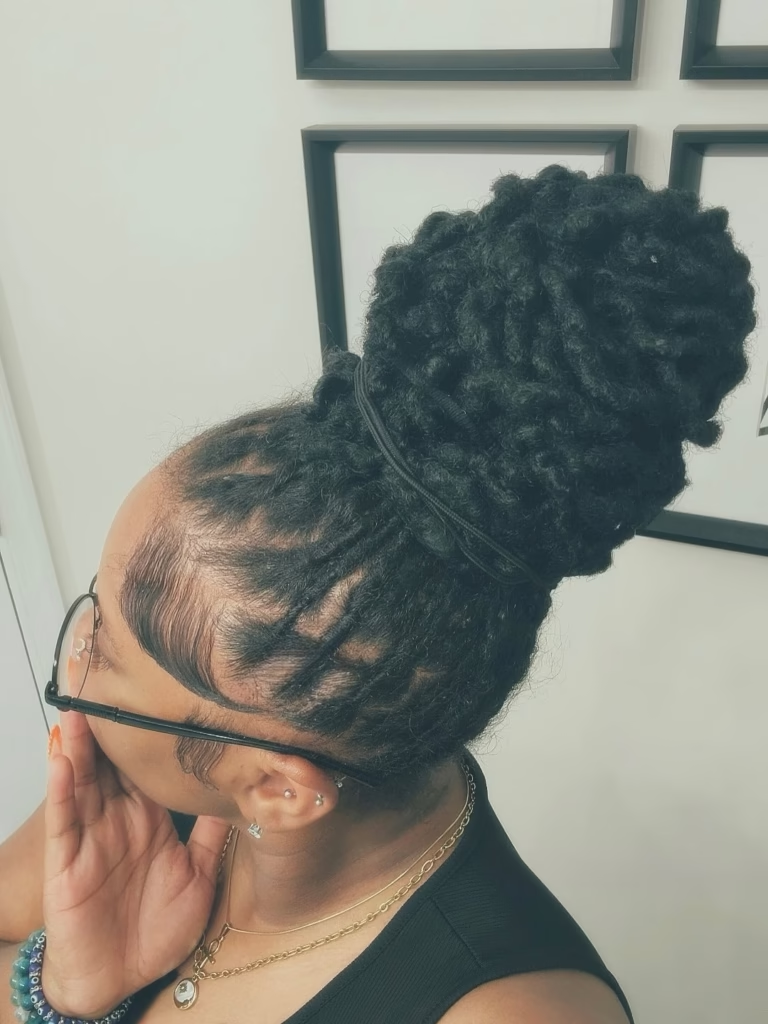
Neat locs do not need to be pasted down to look good.
Too much gel can leave buildup, make your roots stiff, and cause your locs to collect lint faster than usual.
Clean placement often looks better than hard hold.
1. Use water or light mist to soften flyaways first
Dry locs are harder to shape, so start with a light mist before reaching for product.
Spray from a distance and use your fingers to guide the front into place.
Avoid soaking the hair because damp locs inside a bun can feel heavy and may take a long time to dry.
2. Tie the front with a scarf instead of adding more product
A satin scarf can smooth the front gently after you finish pinning.
Tie it flat around the hairline for a few minutes while you get dressed or do your makeup.
Remove the scarf before it presses the style too hard.
This helps the front settle without needing thick gel every time you wear an updo.
3. Smooth with fingers before using a brush
Fingers are softer on your roots than a brush.
Use your hands to place loose locs, tuck stray ends, and smooth the front before deciding if a brush is needed.
Brush only the surface if your hairline can handle it, because rough brushing can irritate tender edges.
4. Let some frizz stay if the style is comfortable
Frizz is part of locs, especially between retwists.
Trying to control every loose hair can lead to too much product, too much brushing, and too much tension.
Leave soft frizz alone when the updo feels balanced and your scalp is calm.
A comfortable style with light frizz is better than a sharp style that hurts.
5. Use light edge control only around the hairline, not through the locs
Edge control should stay near the edges, not spread through the whole head.
Apply a small amount only where you want a cleaner finish, then smooth it with your finger or a soft brush.
Heavy product inside the locs can dry down, attract lint, and make future washing harder.
Save stronger hold for special days when you truly want a sleeker look.
See more How to Create a Locs Bun That Stays Up All Day Without Falling Out
How to Add Accessories Without Making the Updo Too Heavy
Accessories should decorate the updo, not become the reason it starts pulling.

Many beginners add cuffs, clips, pins, flowers, and chains all at once because the style feels too plain, but locs already carry weight before anything extra is added.
1. Use cuffs on a few visible locs only
Loc cuffs work best when they highlight the shape instead of covering the whole style.
Choose two to five visible locs near the front, side, or bun area.
Too many cuffs can make the style feel crowded, and they may snag when you take the updo down.
2. Place pins near the base, not the weakest ends
Decorative pins should sit where the style is strongest.
Push them near the base of the bun or roll, not through the loose ends that are already tucked.
That placement helps the accessory stay steady because the base has more support than the outer pieces.
3. Choose lightweight flowers, pearls, or clips
Light accessories are safer for beginner updos because they add beauty without dragging the locs down.
Small flowers, pearl pins, and soft clips can dress up the style without putting extra strain on your roots.
Heavy pieces may look pretty in photos, but they can shift, pull, or loosen the bun as you move.
4. Avoid heavy chains if your roots feel tender
Chains can add a bold look, but they are not always kind to tender roots.
Skip them if your scalp feels sore from a fresh retwist, tight bun, or long day of styling.
Use a soft ribbon, light cuff, or small clip instead when you want detail without pressure.
5. Match accessories to the updo size
Small updos need small accents.
Large buns can handle bigger pieces if they are still lightweight and placed well.
Balance matters because an oversized clip on a small bun can pull the style to one side, while tiny pins may disappear inside thick mature locs.
Test the accessory by turning your head gently before you leave the mirror.
See also Bridal Loc Hairstyles for Black Women: 20 Stunning Ideas for Your Wedding Day
How Long You Should Wear a Loc Updo at Home
Your scalp will usually tell you when an updo has stayed in too long.
Some styles can last all day, but that does not mean they should stay in for days without checking comfort, tension, and root pressure.
1. Wear tight-looking updos for short periods only
Sleek updos may look clean, but they often need more pulling, pinning, or smoothing.
Save tighter-looking styles for events, photos, church, workdays, or short outings.
Remove or loosen the style when the day is over so your roots can relax.
2. Take down the style if your scalp feels sore
Soreness is not something to ignore.
A style that hurts at the temples, crown, nape, or behind the ears should be loosened right away.
Waiting for pain to “settle” can make the area more tender and harder to style the next day.
3. Do not sleep in a heavy high bun
High buns can pull while you sleep because your head presses against the pillow from different angles.
Take down a heavy high bun before bed, especially if your locs are long or thick.
A soft bonnet or satin pillowcase will protect your hair better than sleeping with weight hanging from one spot.
4. Use a loose low style if you need overnight protection
Loose low styles are safer for sleep because they sit closer to the neck and do not pull upward.
Choose a soft low tuck, loose braid, or gentle low bun if you need your locs contained overnight.
Make sure the style still has space to move inside your bonnet.
5. Give your roots a break between updos
Repeated updos can stress the same areas if you always place the bun in one spot.
Change the position during the week, or wear your locs down for a day when your scalp feels tired.
Rest helps your hairline, crown, and nape recover before the next style.
How to Take Down a Loc Updo Without Creating Frizz or Breakage
Take your time when removing the style, because rough takedown can cause more frizz than the updo itself.
Beginners often rush this part after a long day, but pins, cuffs, and tucked ends can catch on locs if you pull them out too fast.
Gentle removal protects the shape.
1. Remove pins slowly and count them as you go
Start with the pins you can see first.
Count each one as you remove it so none stay hidden inside the bun.
Leftover pins can snag your locs later, especially when you sleep, wash, or run your fingers through your hair.
2. Unwrap the bun in the same direction you created it
Follow the direction of the wrap instead of pulling the bun apart from the middle.
That small step helps your locs come loose without twisting against themselves.
If the bun was wrapped clockwise, loosen it clockwise until the tucked ends release.
3. Separate locs with your fingers, not a comb
Use your fingers to loosen any locs that feel joined together.
A comb can pull loose hairs, scrape the roots, or create frizz around the base.
Move slowly.
Start at the ends, then work closer to the roots only if the locs feel stuck.
4. Mist dry sections lightly after takedown
Dry locs may feel stiff after being tucked for hours.
Spray a light mist over the dry areas, then press the moisture in with your hands.
Avoid soaking the hair, because damp locs can feel heavy and may take longer to dry when they are gathered again.
5. Check the scalp for tender spots
Press your fingers around the temples, crown, nape, and behind the ears.
Tender spots show where the updo may have pulled too much.
Give that area a break before your next style, and choose a lower or looser updo if the same place feels sore again.
Your scalp should feel calm after the style comes down.
Why Your Loc Updo Looks Messy, Falls Down, or Hurts
Most updo problems come from placement, weight, or prep, not from your hair being “too difficult.”
A messy bun can usually be fixed with better sectioning, softer smoothing, or stronger anchor points.
Pain needs faster action.
1. The bun falls because the base is too loose
Check the base before blaming the pins.
A bun with no firm center will slide no matter how many pins you add.
Gather the locs again, hold the base with one hand, then pin through the bun and into the base instead of only pinning the outer pieces.
2. The style hurts because the weight is too high or too tight
Pain often means the bun is pulling from one small area.
Move the bun lower if your crown feels sore.
Loosen the front if your temples feel stretched, and remove any pin that feels like it is digging into your scalp.
3. The front looks rough because the roots were not separated first
Rough roots can make the front look crowded, puffy, or uneven.
Separate the front locs gently with your fingers before styling.
This helps each loc sit in its own place, so you do not need to use too much gel or brush the hairline too hard.
4. The back looks uneven because you did not check with a second mirror
A front mirror does not show the whole style.
Use a small hand mirror to check the back, sides, and nape before you leave the house.
Uneven pieces are easier to fix before the bun is fully pinned, so check early instead of waiting until the style feels locked in.
5. The pins keep showing because they are placed on the surface
Visible pins usually sit too close to the outside of the style.
Push each pin under a loc, then angle it toward the base so the hair covers most of the metal.
Choose pins close to your hair color when possible, especially if your locs are dark and the pins are shiny.
Continue reading Sisterlocks for Black Women Over 40: 20 Looks That Celebrate Every Year
6. The updo looks bulky because the locs were not spread before wrapping
Bulky styles happen when all the locs are packed into one hard ball.
Spread the locs with your hands before you wrap them into the bun.
Thick locs may need two loose sections first, then both sections can be tucked into one softer shape.
A little space inside the style helps it look full without looking heavy.
A Simple 10-Minute Loc Updo Routine for Busy Mornings
The 10-Minute Updo Blueprint
Speed comes from a simple layout, not from pulling harder. Elevate your busy mornings with a structured flow that protects your roots and secures your style.
Mins 1–2: Mist & Separate
Lightly mist dry zones from a distance. Gently separate roots with your fingers so your hairline sits cleaner and stops joined roots from pulling.
Mins 3–6: Gather, Wrap & Tuck
Bring the back upward loosely. Roll the locs into a soft bun shape, tucking shorter lengths under instead of forcing a rigid circle.
Mins 7–8: Anchor & Test Hold
Cross two bobby pins at the base for a secure anchor. Move your head side-to-side to ensure the updo grips safely without a tight band.
Mins 9–10: Scarf Set & Go
Tie a satin scarf around the hairline while you pack your bag. Remove it for a smooth, comfortable finish that holds all day.
Ten minutes is enough when you stop trying to make the updo perfect.
Speed comes from having a simple order, not from pulling harder or adding more product.
Rushing without a plan usually makes the front too tight, the back uneven, and the bun harder to pin.
Use this routine when you need your locs up fast but still want the style to feel neat and comfortable.
1. Minute 1–2: Mist and separate the front
Start with a light mist only where your locs feel dry or stiff.
Mist from a distance so the hair softens without becoming wet.
Separate the front locs with your fingers before you gather anything.
This helps the hairline sit cleaner and stops joined roots from pulling when the bun is formed.
2. Minute 3–4: Gather the back loosely
Bring the back locs toward the nape or slightly above it.
Hold the hair like a low ponytail, but do not squeeze it tight.
Loose is better.
3. Minute 5–6: Wrap and tuck the bun
Turn the locs in one direction and form a soft bun.
Wrap only as far as the hair moves easily.
Shorter locs can be tucked under and pinned instead of forced into a full round shape.
4. Minute 7–8: Pin the base and test the hold
Place your first pin at the base of the bun.
Cross a second pin from the other direction so the style grips without needing a tight band.
After pinning, move your head gently from side to side and add support only where the bun shifts.
5. Minute 9: Set the front with a scarf
Tie a satin scarf around the front if you want a smoother finish.
Let it sit while you dress, pack your bag, or finish your makeup.
Soft beats stiff.
6. Minute 10: Remove scarf, adjust, and go
Remove the scarf and check the front, sides, and back.
Look for loose ends, visible pins, or any spot that feels tight.
Fix only what needs fixing, then leave the style alone.
Your First At-Home Loc Updo Plan for the Next 30 Days
Practice one small change each week instead of trying five new styles at once.
Confidence grows faster when you repeat the same base style and learn how your own locs behave.
Repeating a simple updo also teaches you where your hair holds well, where it pulls, and which parts need softer handling.
One month is enough time to build a routine that feels less stressful.
1. Week 1: Practice the low bun without accessories
Choose a low bun and wear it plain.
Focus on comfort, pin placement, and weight balance.
Leave out accessories this week so you can feel what the style is doing without extra clips, cuffs, or pins confusing the problem.
2. Week 2: Try one front styling detail
Add one small change at the front.
Try a side sweep, two loose face-framing locs, or a soft front tuck.
Front details make the style look more finished without changing the whole updo.
3. Week 3: Add a side tuck or rolled finish
Move from a basic bun into a gentle roll or side tuck.
Guide the locs in the direction they already fall instead of forcing them across your head.
Pin along the roll as you go so the style feels supported, not heavy.
4. Week 4: Try a dressier version with light accessories
Use one or two light accessories when the basic shape feels easy.
Place small cuffs, pearl pins, or clips near the strongest part of the style.
Skip heavy chains or large clips if your scalp feels tender.
5. Track what holds, what hurts, and what needs less tension
Write down what works after each style.
Notice where the bun stays firm and where it starts to sag.
Pain tells you what to change.
Your best updo plan is the one that helps you style faster without repeating the same tension every week.