
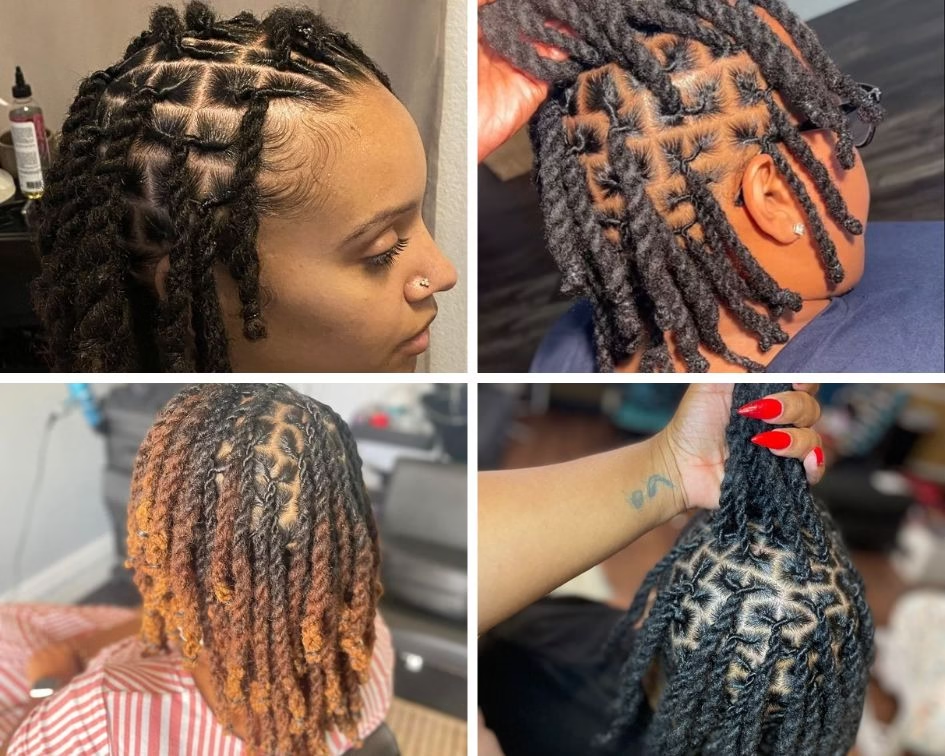
A full head of two strand twists can take four to eight hours, depending on length and size. And that time is well spent, because the twists you make today become the locs you wear for years.
Two strand twists are one of the most popular ways to start locs, and they suit beginners. Plus, you can do them at home with a few tools, a little patience, and a good plan.
Before you pick up a comb, read everything you need to know before you start locs first. That guide covers the big picture, and this post covers the hands on steps for your twist day.
So let us walk through the whole process, from your first part to your first wash. Snap a photo at every step, because those pictures will show your progress and help you later.
How to Start Two-Strand Twist Locs: A Beginner’s Tutorial with Photos
What Two Strand Twist Locs Are and Why People Love Them
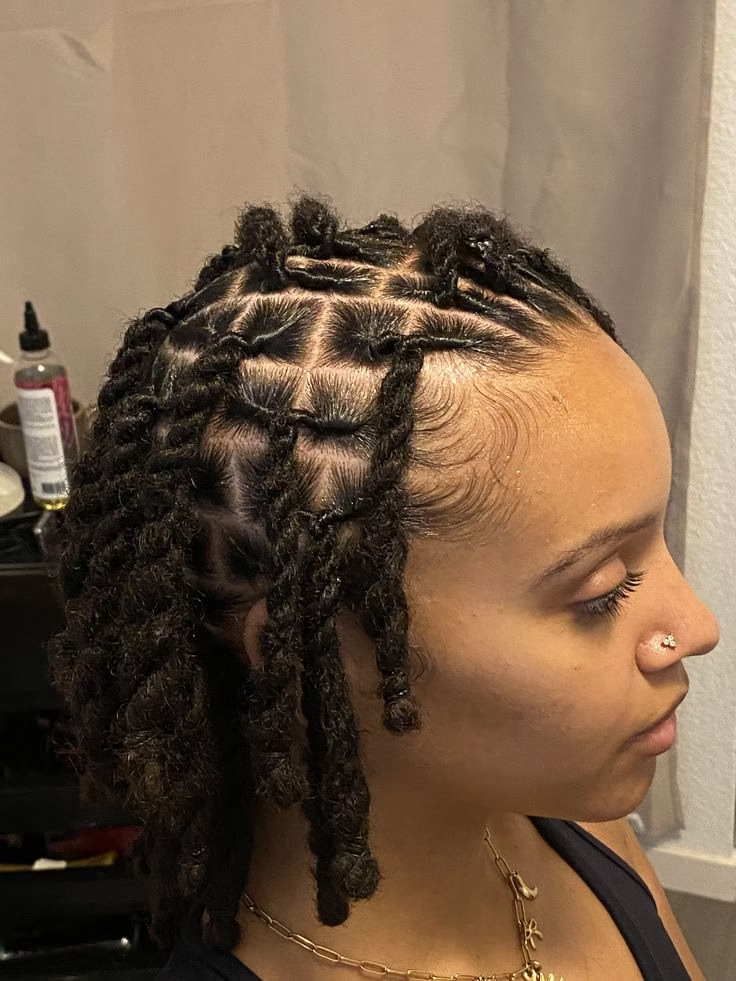
Two strand twist locs start with simple twists made from two smaller strands of your own hair. You split each section into two, twist both strands the same way, and then wrap them together.
And over time, the twists knot, tighten, and turn into mature locs that hold their shape. So people love this method because it looks neat from day one and feels soft and natural.
It also costs less than many salon methods, since you can do most of the work yourself. Two strand twists also work for all ages, and the 15 mature locs styles for women over 40 prove it.
Still, this method has a few weak points, and you should know them before you begin. Twists can unravel in the first weeks, especially if you wash too early or sleep without a bonnet.
They also need careful handling, because the loose pattern holds less tightly than other starter methods. But with a good plan, those problems are easy to avoid and easy to fix.
So this guide gives you the exact steps, the right tools, and the habits that protect your twists. Plus, once you learn the basic move, you can repeat it on every single section.
Let us first check that your hair is ready for this method, so you start strong.
Check That Your Hair Is Ready
How long does your hair need to be before you can start two strand twist locs? Most people do best with at least three to four inches of hair, since shorter hair slips out.
If your hair is shorter, you can still start, but comb coils or interlocking may hold better. Short locs look wonderful too, and the 22 short locs styles for women in their 30s show how.
And texture matters as well, because tight coily hair grips itself and holds twists very well. But softer or looser textures may need smaller parts, tighter twists, or extra bands to stay put.
Next, your scalp should also be healthy, with no open sores, deep flakes, or painful spots. So if you have any scalp trouble, see a doctor or a skilled professional before you start.
Also, your hair should be strong, so trim any very damaged ends before the big day. Locs hold on to the hair you have, so healthy hair gives you healthy locs.
Be honest about your time and patience, because this method needs a calm and steady mindset. If you feel unsure, book a short consultation, and let a loctician look at your hair.
Then you will know exactly what your hair can do, and you can plan with confidence.
Pick Your Parting Size and Pattern
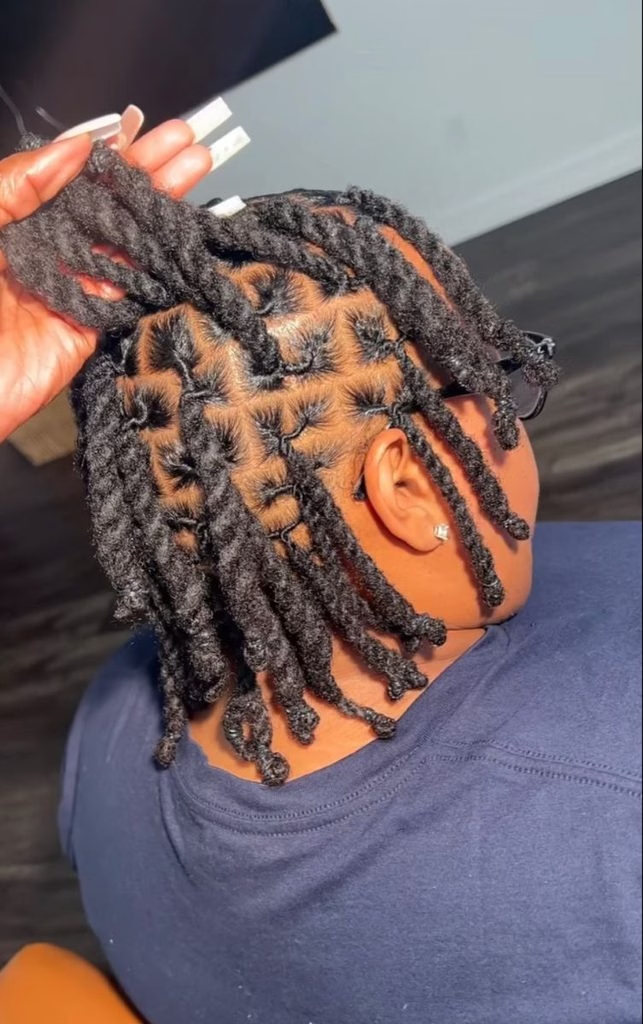
Picture a mirror in front of you and a comb in your hand, ready for the first part. And that first part sets the size of your future locs, so it is worth a little thought.
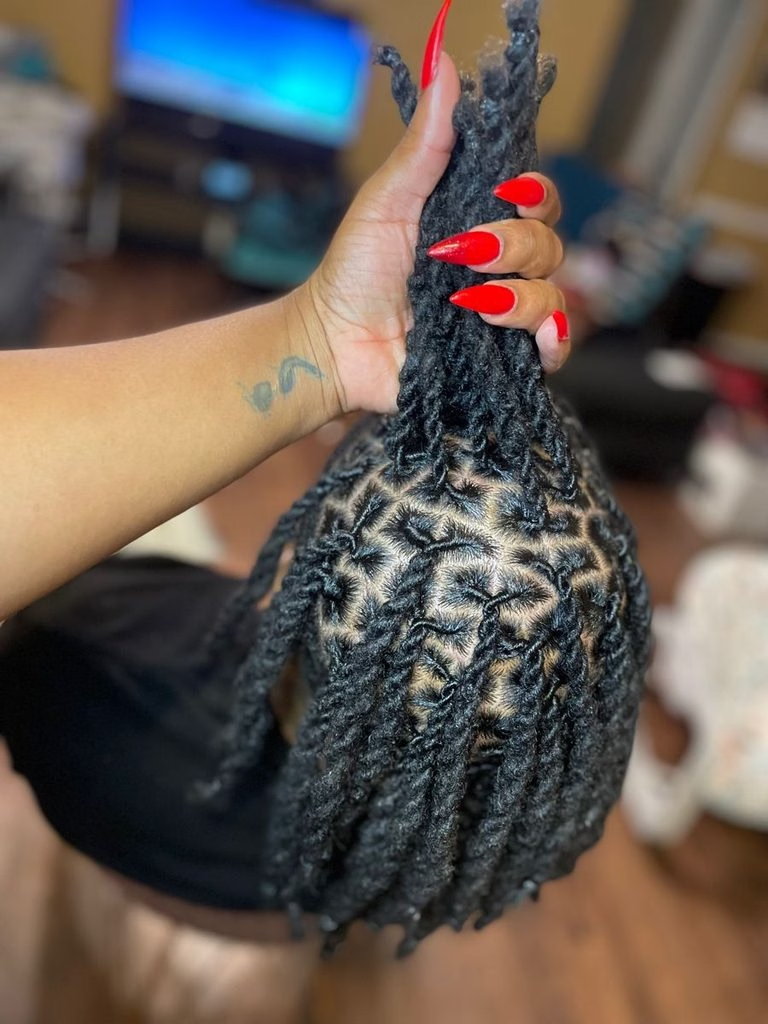
Small parts, about the width of a pencil, give you many thin locs that look detailed. Medium parts, about the width of a finger, give you fewer, thicker locs that feel sturdy.
Also, smaller locs offer more styling choices, but they take longer to start and need more upkeep. But larger locs are faster to start, easier to maintain, and often stronger in the early months.
Your hair length also plays a role, as the locs updo styles by hair length guide explains. Next, pick a pattern, such as a brick lay, a diamond, or a simple grid.
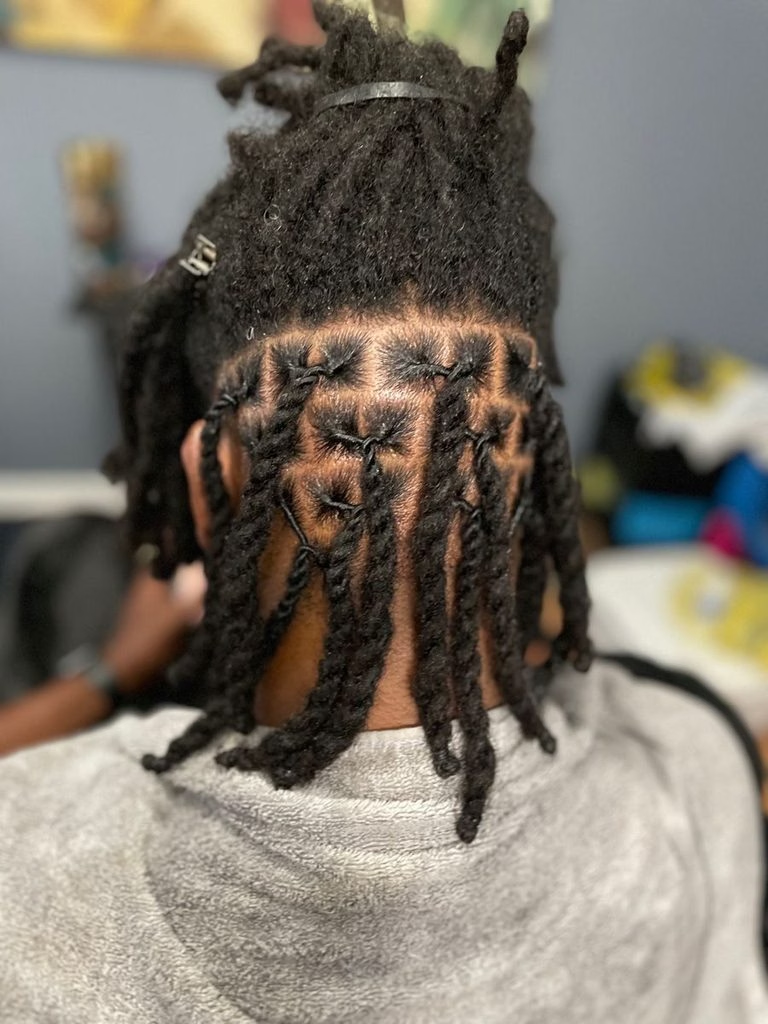
Still, brick lay parts help locs hang evenly, while grid parts look very clean and sharp. Whichever pattern you choose, stay with it, since parts cannot be changed later without starting over.
Use a rattail comb to draw clean lines, and clip each finished section out of the way. Take a photo of your parts before you twist, so you can fix mistakes later.
Clean parts are the base of beautiful locs, so take your time on this step.
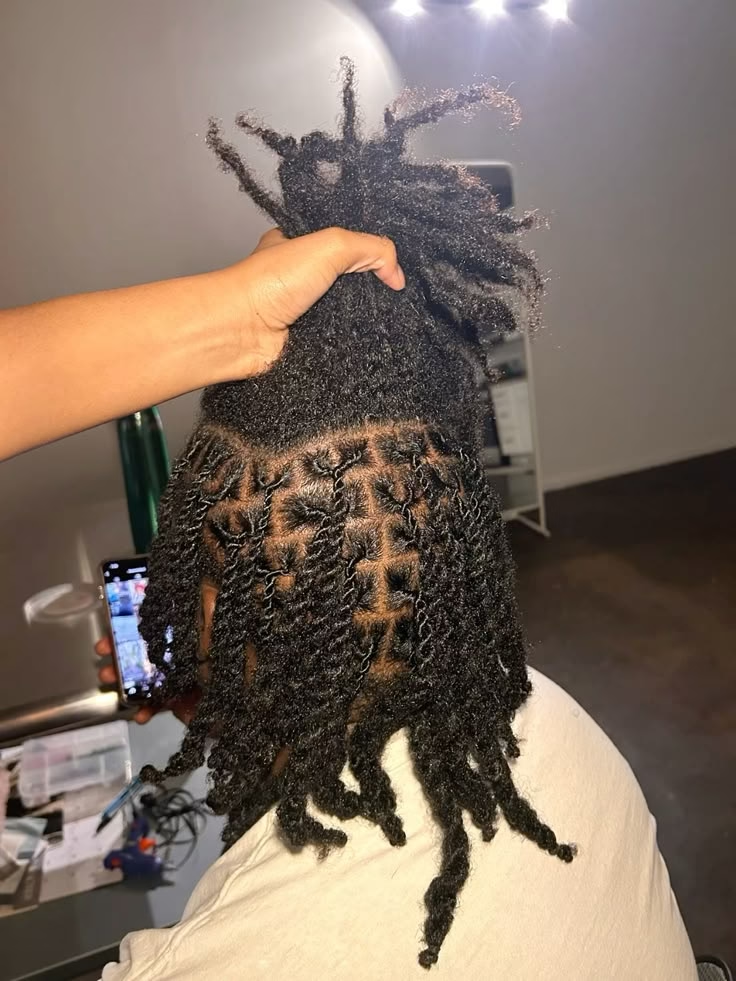
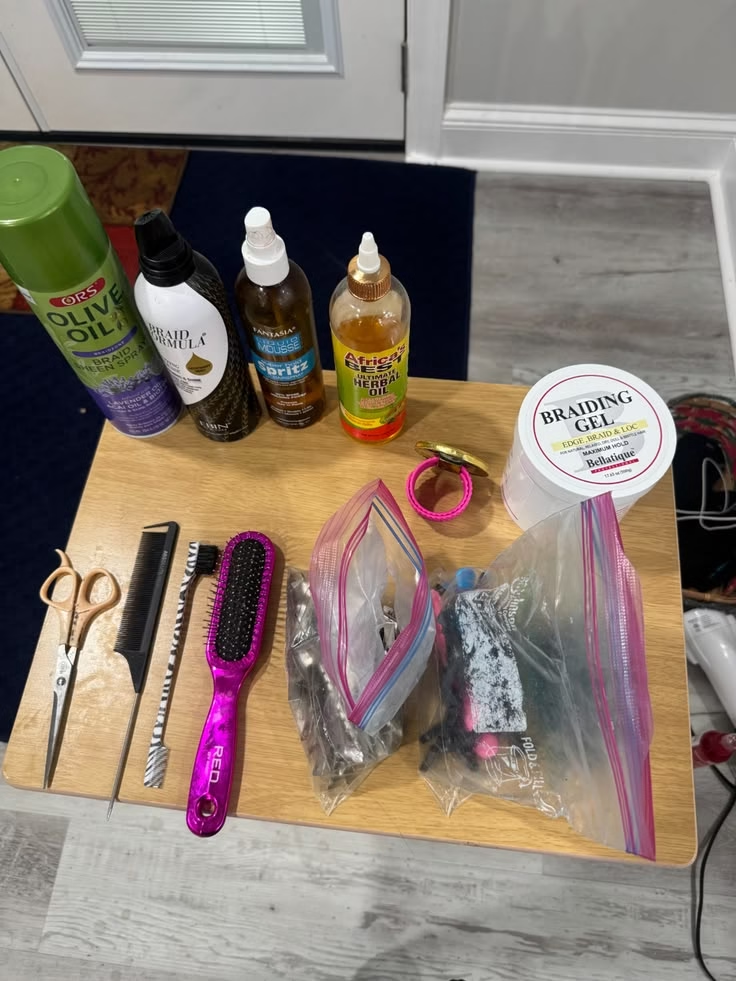
Gather Your Tools and Products
You need fewer than ten simple items to start, and most are cheap and easy to find. First, get a rattail comb for parting and a wide tooth comb for detangling your hair.
Next, buy plenty of clips, because you will need them to hold each finished section. Then choose a light gel, a loc butter, or a twisting cream that holds without making hair stiff.
Avoid wax and heavy pomades, because they trap lint and make your locs look dull. Plus, a spray bottle filled with water and aloe keeps your hair damp and easy to twist.
Small, snag free rubber bands are helpful for the ends, since they stop twists from unraveling. Also, grab a satin bonnet, a hand mirror, a towel, and a comfortable chair with good light.
And good light matters, because it helps you see your parts and keep the twists even. Set up a small tray with your tools nearby, so you never have to stop and search.
Also, charge your phone, and queue up a few shows or songs to keep you company. Plus, keep water and a snack close, because this is a long and tiring task.
Plan Your Twist Day Well
My client Renee from Columbus tried to twist her whole head in one rushed afternoon. By hour five, her arms were sore, her patience was gone, and her twists looked uneven.
We fixed them together the next week, and she learned to split the work into sessions. So plan your twist day well, or better yet, plan two or three shorter sessions.
Also, a helper makes the job faster, since a friend can hold the mirror and clip the sections. Busy schedules are normal, and the 20 easy loc styles for busy moms help with the weeks after.
Then pick a day when you have no rush, no big plans, and no stress on your phone. Eat a good meal first, wear comfortable clothes, and take a short break every hour.
Stretch your neck and shoulders during breaks, since long sessions can leave you stiff and sore. Also, keep your twisting hand gentle, because tight grips can hurt your scalp and your fingers.
Then work in the same order each time, such as from the back to the front. That steady order keeps your parts neat, and it shows you how much is left to do.
And a calm plan makes the whole day feel lighter, so your twists will look better too.
Prepare Your Hair Before You Start
Good prep makes your twists tighter, cleaner, and much easier to make from root to tip. Start with a clarifying wash to remove buildup, oils, and old product from your hair.
Also, clean hair grips better, and it forms strong locs from the very first day on. Skip heavy conditioner this time, because slippery hair makes new twists unravel much faster than usual.
Next, detangle gently with your fingers and a wide tooth comb, working from the ends up. Be patient here, because hidden knots can pull on your twists and cause breakage later.
Then dry your hair completely, and stretch it with braids or low heat if you can. Plus, stretched hair is easier to part and twist, and it makes your locs look longer.
Also, use a heat protectant if you blow dry, and keep the dryer on a low setting. Still, many people skip heat entirely, and they simply stretch their hair with loose braids overnight.
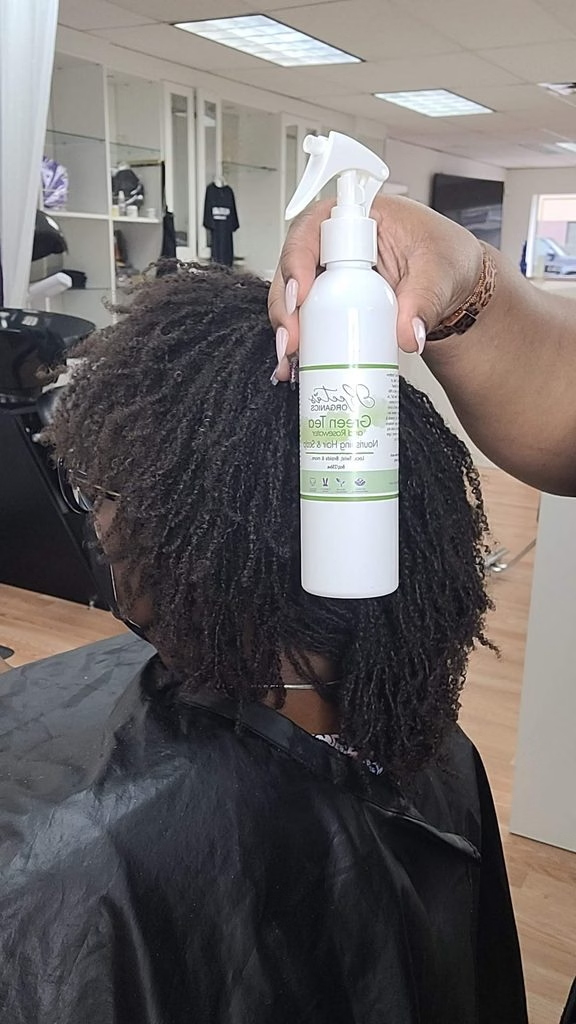
Finally, mist your hair lightly, so each section stays damp but never soaking wet at all. Take a quick photo of your clean, stretched hair, so you have a very clear before picture.
Section Your Hair and Make the Twists
Are you ready to make your very first twist, one small section at a time? Start at the back of your head, and make a clean part with your rattail comb.
Clip away the rest of your hair, so only one small working section hangs free. Apply a small amount of gel or butter to the section, and smooth it from root to end.
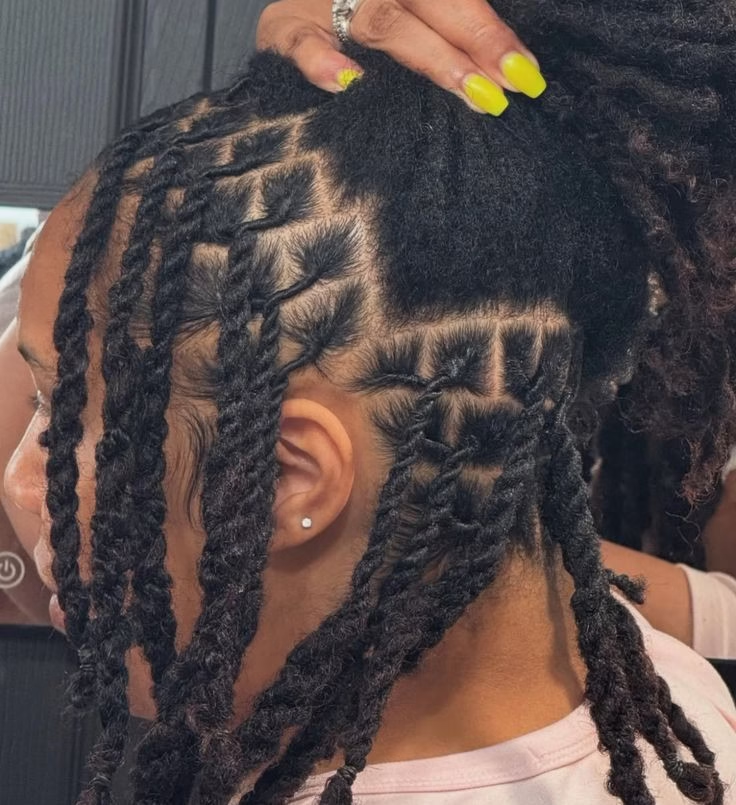
Now split the section into two equal strands at the root, and hold one in each hand. Twist each strand in the same direction, say to the right, keeping the tension firm and even.
Then wrap the two twisted strands around each other in the opposite direction, to the left. The opposite direction locks the twist in place, so it will not simply unwind on its own.
Keep twisting down the whole length, and hold the root with your fingers so it stays tight. Keep the twist firm, but never so tight that it pulls or hurts your scalp.
When you reach the end, secure it with a small band, or fold and tuck it neatly. Then clip the finished twist out of the way, and move on to the next part.
Repeat this simple process on every section, and check that the size stays about the same. Also, take a photo every few rows, because it helps you spot any uneven parts early.
Do not worry if your first few twists look rough, since your hands improve with every row.
Finish the Ends and Set Your Twists
The ends are where most twists fail, so they deserve a little bit of extra care. A small snag free band keeps the twist from unraveling while the hair begins to lock.
Place the band about a half inch from the end, and keep it loose enough to be safe. Remove the bands after a few weeks, because leaving them on too long can cause breakage.
Some people also palm roll each twist, which means rolling it gently between both palms. Palm rolling helps the twist tighten evenly, and it gives the loc a smooth, round shape.
Do not roll too hard, since that can twist the hair too tightly at the root. After you finish the whole head, tie on a satin scarf, and let your twists rest.
Your next choice is how to keep them neat, and the retwisted locs and freeform locs guide helps. Retwisting keeps the roots neat and uniform, while freeform locs grow in a looser, natural way.
Both paths are beautiful, but your choice changes how often you will visit a loctician. Decide early, so you can plan your time, your budget, and your care routine well.
Once your twists are set, step back, take a photo, and enjoy your hard work.
Then give your twists a few quiet days, because they need time to settle and hold their shape.
Your First Week and Your First Wash
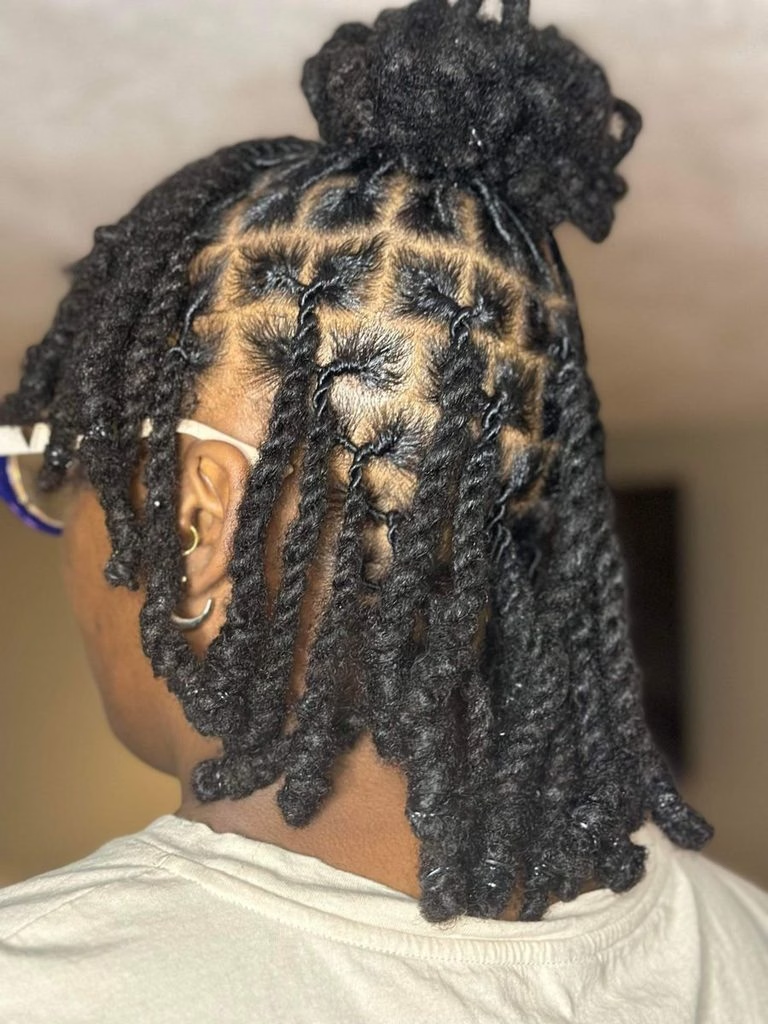
Picture the first morning after your twists, when you wake up and see them in the mirror. They may look slightly puffy or loose already, and that is normal for this method.
Protect them by wearing a satin bonnet every night and by avoiding lots of touching. My friend Candice from Raleigh washed her new twists on day three, and many unraveled.
She had to start over on about a third of her head, and she never forgot that lesson. So ask your loctician when to wash, but many people wait one to two weeks.
When wash day comes, put on a stocking cap or a mesh band to hold the twists in. Use a gentle, residue free shampoo, and squeeze the suds through the twists without any scrubbing.
Rinse until the water runs clear, and then squeeze out extra water with a soft towel. Let your twists dry fully, because damp hair that stays wet for days can smell sour.
Weather matters too, and the 12 long locs styles for fall and winter share ideas for cooler months. In cold weather, dry your twists carefully, since damp hair outside can leave you chilled.
In hot weather, sweat can loosen new twists, so keep your scalp cool and dry.

Styling Your New Starter Twists
New twists are small and soft, but you can still style them in simple and pretty ways. Soft headbands, silk scarves, and light accessories can add polish, and the locs accessories guide shows more.
Keep the pieces light, because new twists cannot hold heavy beads or thick metal cuffs. A simple side part and a few pinned twists create a neat and gentle look.
As your twists grow, try a half up style, like the 45 half up half down locs styles. Half up styles are light, since only a few twists are lifted off your neck.
Avoid tight ponytails and tall buns in the first months, because the roots are still tender. Tension at the roots can cause thinning, and thin spots are slow to grow back.
Also, switch your parts and styles often, so no spot on your head carries the strain. At night, a loose pineapple under your bonnet keeps your twists safe, tidy, and stretched.
Style your twists for fun, but keep every look gentle, light, and comfortable to wear. Then take photos of your favorite looks, so you can track how your twists change.
Soon you will have a whole collection of styles that fit your mood and your week.
Starting Before a Wedding or a Big Event
Many people decide to start locs because a big event is coming, such as a wedding. That can work, but give yourself plenty of time, because new twists need a few months to settle.
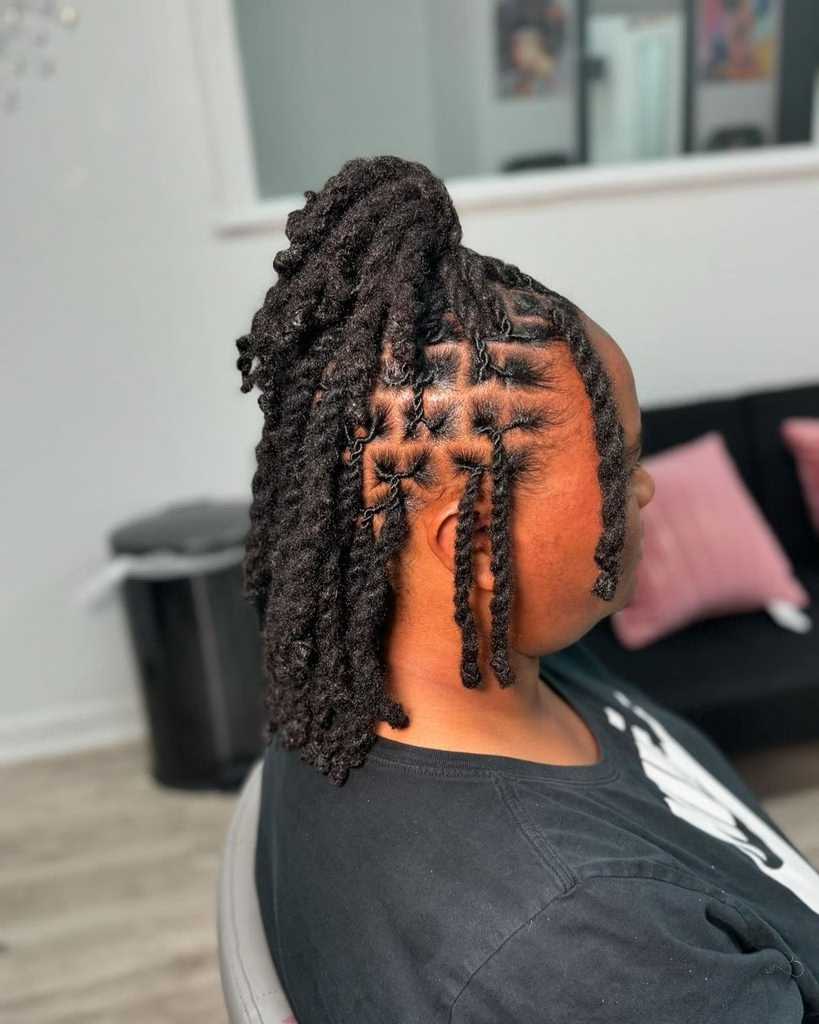
Ideally, start at least three to six months before the event, so the roots look neat. The wedding loc updo styles for black brides show how polished young locs can look.
Brides and guests can both enjoy a neat pinned style, even when their twists are new. Keep the style gentle, and avoid heavy pins that pull hard on your tender roots.
For more ideas, browse the 25+ bridal locs updo ideas before you book your date. A trial run a month before the event shows you what works with your twists.
Avoid starting your twists the week of the event, because the hair will still look loose. Also, avoid any big haircut or color change in the weeks right before an important date.
Plan your retwist about one week before the event, so the roots look fresh and neat. Then relax and enjoy the day, because your twists are doing exactly what they should.
When to Add Color or Make Big Changes
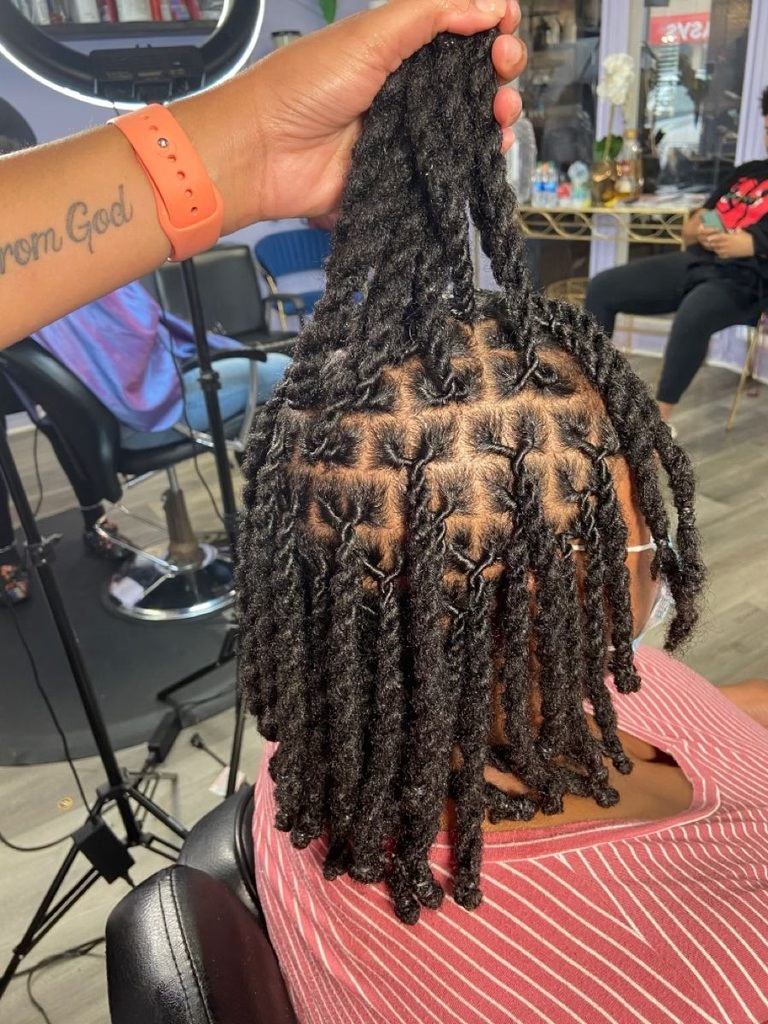
Color is exciting, but new twists are usually not ready for it right away, so wait. Ideas like 39 colored locs ideas for black girls look gorgeous, but timing matters a lot.
Bleach and strong dye can dry out young locs and cause them to snap or thin. Most professionals suggest waiting until your locs are well formed, often after the first year.
If you cannot wait, ask about gentle options like loc wraps, thread, or temporary color. These options add color without harsh chemicals, and you can remove them whenever you like.
Always do a strand test first, so you know exactly how your hair will react. Other big changes, like cutting your locs or switching methods, also need some careful thought.
Talk to your loctician first, since a small change today can save you trouble later. Also, remember that your twists will change a great deal in the first year anyway.
So enjoy the natural look for a while, and save your color plans for later. Patience now gives you stronger locs, and stronger locs hold color and style far better.
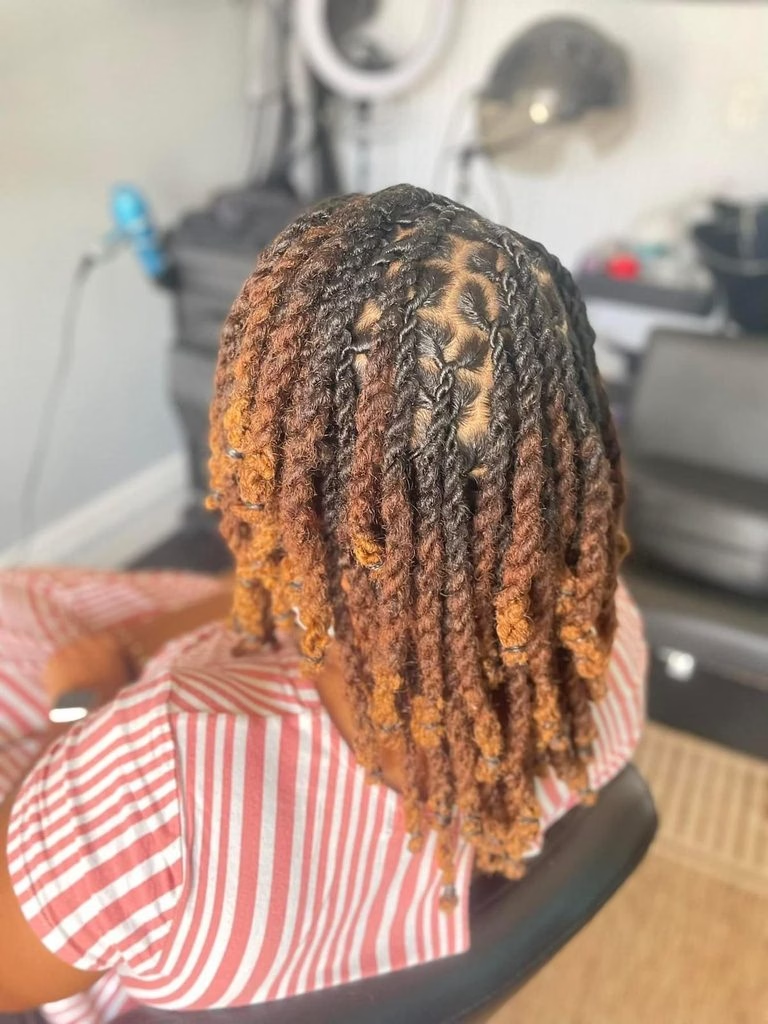
Starting Twists on a Child’s Hair
Parents often ask if two strand twists are a good way to start locs on a child. They can be, as long as the hair is long enough and the style stays gentle.
Children have tender scalps, so use larger parts and a very light touch every time. Never twist tightly, and stop right away if your child tells you that anything hurts.
Long sessions are hard for young kids, so split the work over several calm days. Offer snacks, a favorite show, and plenty of breaks to keep everyone calm and happy.
After the install, the guide on how to maintain kids locs at home gives a simple weekly routine. Kids move, play, and sleep restlessly, so their twists may unravel faster than an adult’s.
A soft satin bonnet or a satin pillowcase protects their new twists during the night. Also, keep their play gentle for the first weeks, and avoid rough games that tug.
Explain each step in simple words, so your child feels safe and proud of the process. When children feel included, they often take better care of their hair as they grow.
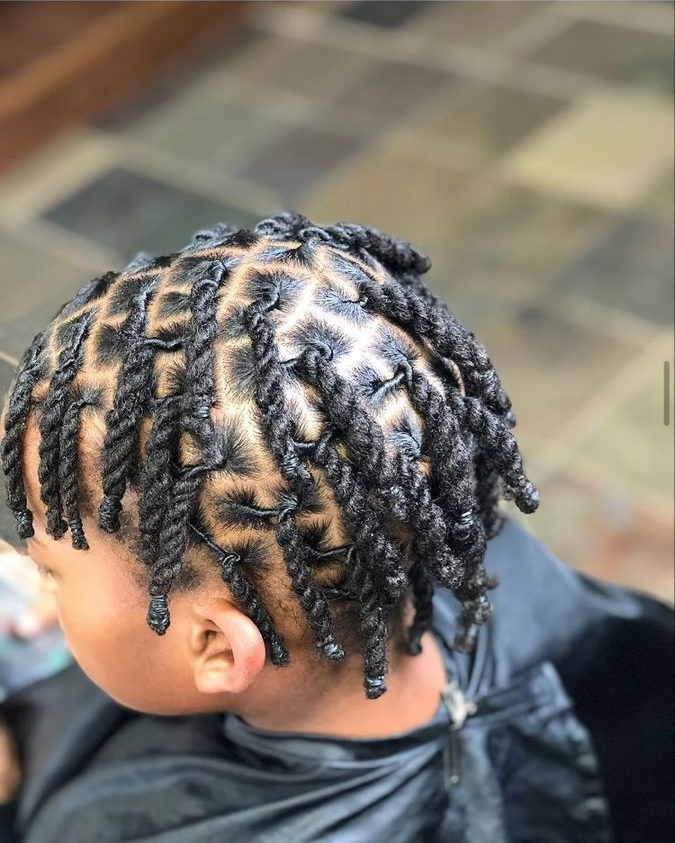
Common Mistakes and Easy Fixes
Almost every beginner makes a few mistakes along the way, and that is perfectly fine. My neighbor Vanessa from Chicago made her parts far too big on the left side.
She saw the difference in her photos, and she fixed the size on the right side. That is why photos help so much, since your eyes miss what the camera shows.
A common mistake is twisting too tightly, which can cause pain, bumps, and hair loss. The fix is simple, so loosen your grip and make each twist firm but gentle.
Another mistake is using too much product, which leaves buildup and makes twists slide apart. Use a tiny amount, and add more only if the hair feels dry or fluffy.
Washing too early is another trap, and it can undo many hours of careful work. Wait for the time that your loctician suggests, and protect your twists with a cap.
Skipping the bonnet at night is also a mistake, because friction makes twists frizz and loosen. If a twist does unravel, simply redo it with a little gel and fresh patience.
Still, do not panic over small flaws, because they blend in as the twists lock and grow.
Mistakes are part of learning, and every expert once made the very same ones too.
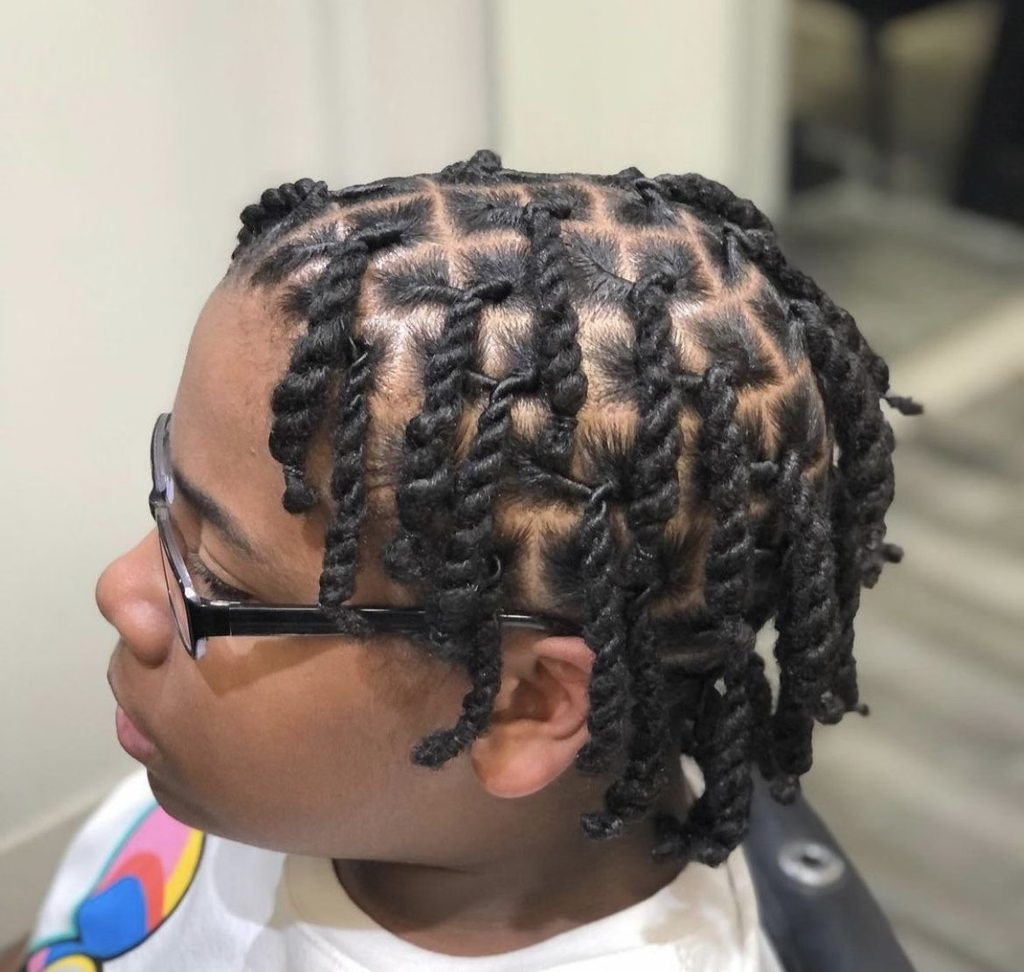
What Comes Next as Your Twists Mature
Over the next months, your twists will swell, bud, and slowly knot into real locs. Your retwist schedule matters now, and most people visit a loctician every four to eight weeks.
Keep your wash routine steady, with a full wash about every two to three weeks. Moisturize lightly, protect your hair at night, and avoid heavy waxes, creams, or thick butters.
When your locs grow longer, you can try bold shapes like the 12 locs crown braid updos. Crown styles look regal, and they show off both your length and your hard work.
Take a photo every month, and compare it with your first picture from twist day. You will see the twists thicken, shrink, and slowly turn into strong and unique locs.
Some days will feel awkward, but those days are a normal part of every loc story. So keep your care simple, and trust the process even on days when it feels slow.
Full maturity often takes a year or two, and the wait is truly worth it. Your future locs will carry every step of this day, from the first part to the last twist.
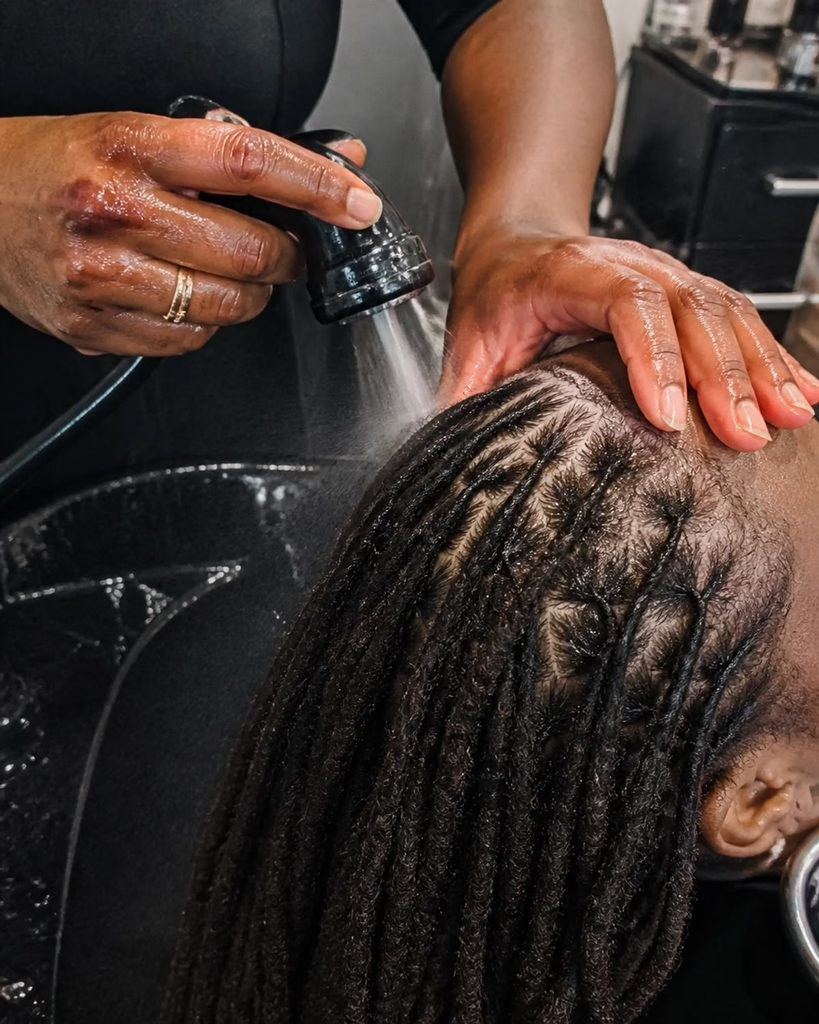
Final Thoughts on Starting Two Strand Twist Locs
Starting two strand twist locs takes time, patience, and care, but the steps are simple. Check your hair, pick your parts, gather your tools, and plan your day with kindness.
Then twist each section with firm, gentle hands, and protect your new twists carefully afterward. Remember to wait before your first wash, wear a bonnet, and keep your styles light.
Also, take photos along the way, because they show how far you have really come. Mistakes will happen, but each one teaches you something that makes your next twist better.
So be kind to yourself, and enjoy the quiet hours that you spend on your hair. Your locs will grow, change, and surprise you in the best possible ways over time.
You started something beautiful today, and the best part is that it keeps on growing. Welcome to your loc journey, and enjoy every single twist and turn along the way.